Today and yesterday I began getting the fluorescent light setup going so I can start seeds inside.
The previous blog post was about starting the Copra Onions and I spoke a little bit about the fluorescent lights and the setup.
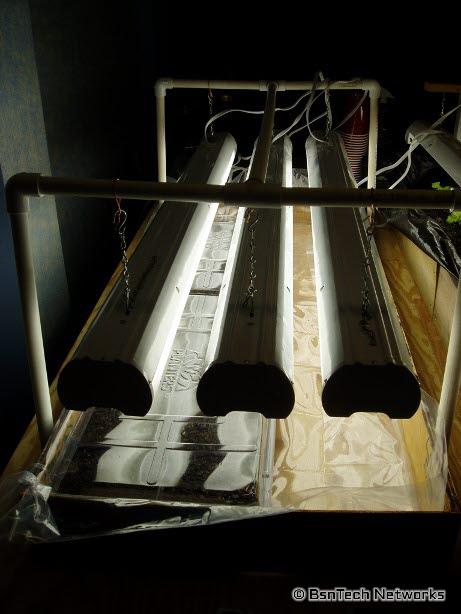
Below are some pictures of the setup I have. The stand t hat holds the lights up is made of 1/2" PVC pipe. There are four 90-degree elbows and two T connectors used. The rack to hold the lights probably would cost a person less than $3 to make for the pipe and the couplers needed.
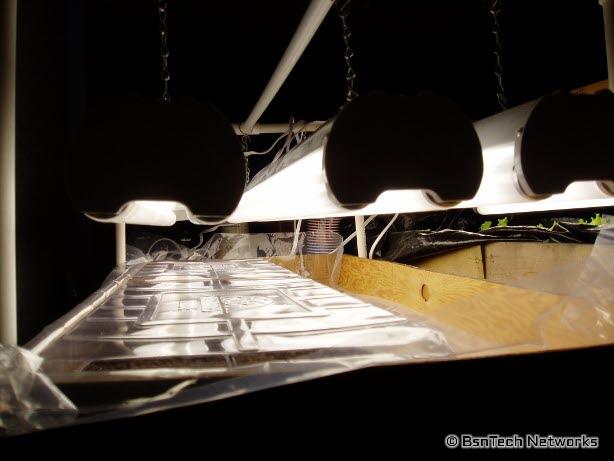
I have three four-foot fluorescent light fixtures in the box – with each bulb about 2.5 inches apart form one another. I'm not sure yet whether this is overkill and I could get sufficient coverage with just four light bulbs instead of six (meaning only two fixtures are needed instead of three), but I want to ensure that these plants get a good head-start before putting them out.
The bulbs I am using are a combination of Cool White and Premium Cool White. What is the difference? Well, the Premium Cool White are about twice as expensive as the Cool White (which are standard utility bulb-grade). However, the Premium Cool White have 3300 lumens and 20,000 CRI. The standard Cool White bulbs have 3000 lumens and also a 20,000 CRI. The thing that is important is the lumens – which is the intensity of the light. Of course, the color temperature is also important (basically the amount of light at each color in the spectrum), but the lumens will give your plants additional light. So, the Premium Cool White bulbs will pack an additional 10% punch per bulb with the same amount of wattage used.
The Premium Cool White bulbs are used in the center fixture and then one bulb on each of the other two fixtures near the outside of the box. The standard Cool White bulbs are on the outer two fixturs but closer to the middle fixture. Why did I use two of the older kind? Well, because I'm cheap – and I didn't want to buy more Premium Cool White bulbs. Two of these bulbs are currently being used for the growing lettuce inside (which is going too slow to be worthwhile) – so I can just swap them into place when I'm done there.
The fixtures are hung from the PVC support system by using a small chain – which allows me to move the lights up or down as needed. The lights should always be within 2 inches of the seedlings for the best results.
On the bottom is the box that I made using some old plywood and thin paneling. I have a clear piece of plastic across the bottom and along the sides that will serve as a moisture barrier in case any water flows out of the seed containers (which it will easily by over-watering or spraying too much). This will keep the box nice and dry and will keep water from spilling out into the table this all sits on (which is a pool table with plywood over the top).
I just placed the Copra Onion seed containers in the box – but none have sprouted yet. So, I will not be turning these lights on until I see at least one sprout – no sense in wasting electric.