Well it is time to make our next batch of Welch’s Grape Juice Wine! Well, it really isn’t Welch’s – it is the generic brand at the local store that sells for $2.29 for a two-quart bottle.
We should have actual grapes next year to make our own wine from the grapes, but this is the second year of using the grape juice. Over the course of the year, we have been able to tell that the first batch we made has mellowed out and is very good wine! When we bottled it in the gallon jugs back in May, it seemed very bitter and had a pretty big kick as an aftertaste. Now that we are into our fourth gallon and six months later, there isn’t very much bitterness to the wine and not much of a kick. However, the alcohol content is still quite high and will get you feeling good from just a glass of wine!
Here I will explain our sequence of events for making wine and will add on our progress as it continues.
November 15
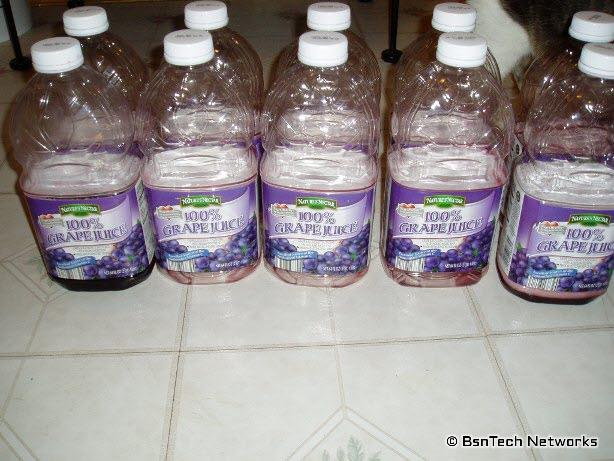
Today we purchased the grape juice. To fill a five gallon carboy, you only need about 9 to 9.5 bottles of 2-quart grape juice. You do have to add a few items to the mix – especially sugar if you want to increase the achievable alcohol content.
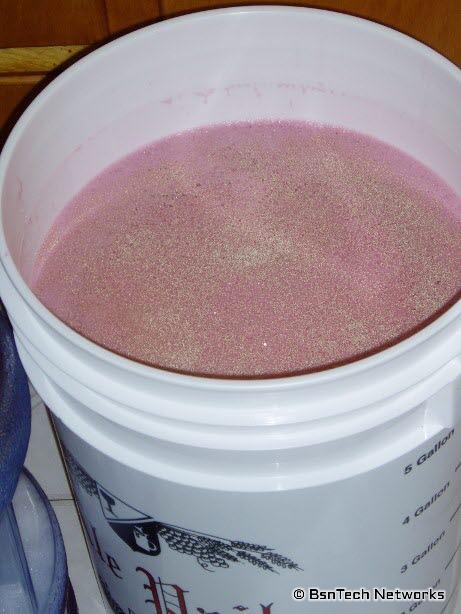
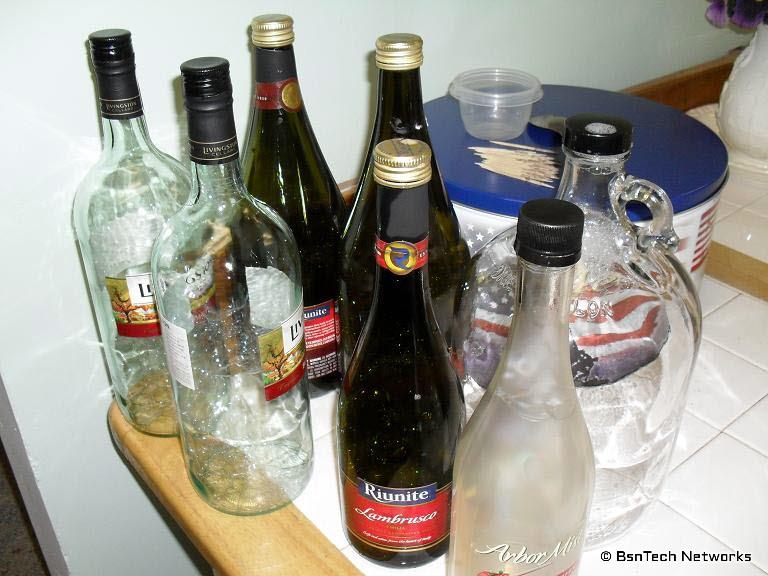
Here are our emptied bottles of grape juice:
Here is the equpiment that we use. I will list what they are:
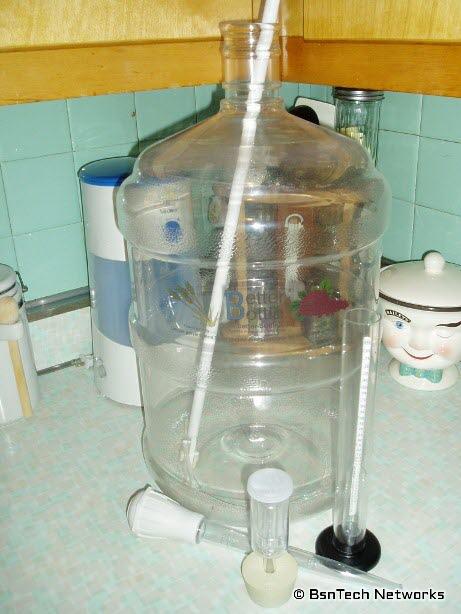
- 5 Gallon Plastic Carboy – The “Better Bottle”
- Mixing Rod (white pole in the carboy – can attach to an electric/cordless drill to make mixing faster)
- Turkey Baster (piece lying down on the countertop – used to suck up wine out of the carboy to check Specific Gravity
- Airplug and Airlock (front piece that will be added to the top of the carboy to keep the oxygen out).
- Plastic “test tube” and Hydrometer (test tube will hold the juice taken out of the bottle by the turkey baster. The Hydrometer will show the specific gravity of the juice mix)
Now, let’s go to the additives that we use. Note that most of these you do not need with the Welch’s Grape Juice because it has already been pastuerized:
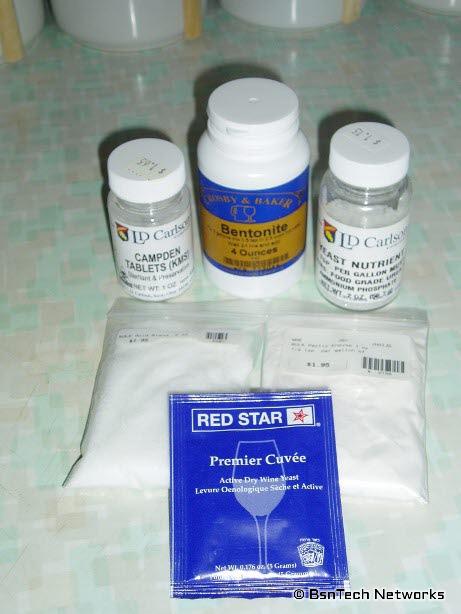
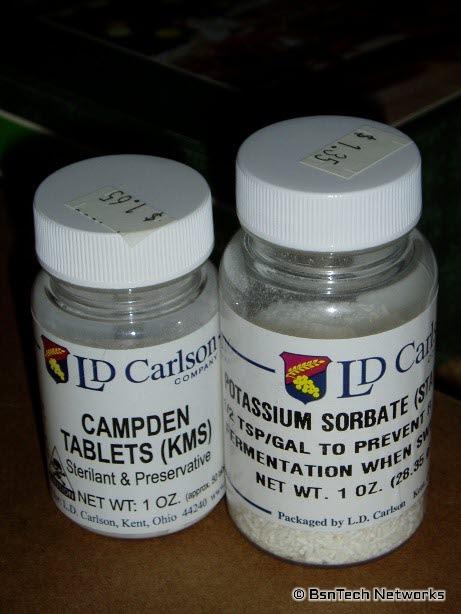
- Campden Tablets (these will help to kill off any wild yeast/bacteria in the juice mixture. It aids in allowing the yeast to set up shop without any competition – this is definitely needed)
- Bentonite (This is a clay-like substance that will help to clear the wine by ‘grabbing’ onto free-floating particles in the wine – this is not required but will make your wine less murky)
- Yeast Nutrient (This provides some needed nutrients that will help the yeast grow quickly and do their job better – this is not required but does help the yeast)
- Acid Blend (This will add additional acidity to the wine if not acidic enough – this one is not required).
- Pectic Enzyme (This will break down naturally-occurring pectin which is made in fruits. pectin can cause globs of juice to form – much like a jelly substance. In the case of using the grape juice, Pectic Enzyme is not required – but would be required if you used fresh fruit and crushed your own to get your juice)
- Premier Curve Yeast (This is the yeast that will convert your sugar to alcohol. Last time we used Montrachet yeast – but I’m trying a different variety of yeast this time)
You will also need a funnel, a sanitizing solution (we use Star San sanitizer) and A LOT lot of sugar!
Now, let’s get started. Below is what we use for a five-gallon batch:
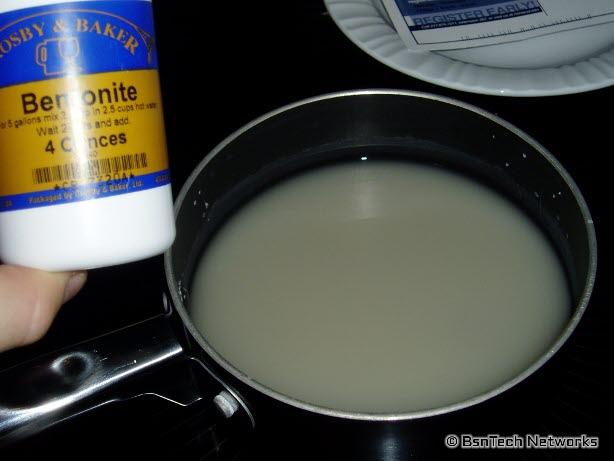
- Mix in 3 teaspoons of Bentonite into 2.5 cups of very warm water and stir. It is then best to let this cool down to room temperature (at least wait 12 hours before adding it into your carboy). It will look like this:
- Sanitize EVERYTHING very well! You can use a solution of bleach but you will have to use many rinses to get the smell and residue off of your materials. The Star San solution we use is makes about 1 gallon with using only 1/4 ounce. It will be foamy and clean things very well. You need to leave the sanitizer in contact for at least 30 – 45 seconds in ALL AREAS of your carboy and materials needed. If you fail to sanitize, you may end up with a bacteria-filled juice that will be like vinegar!
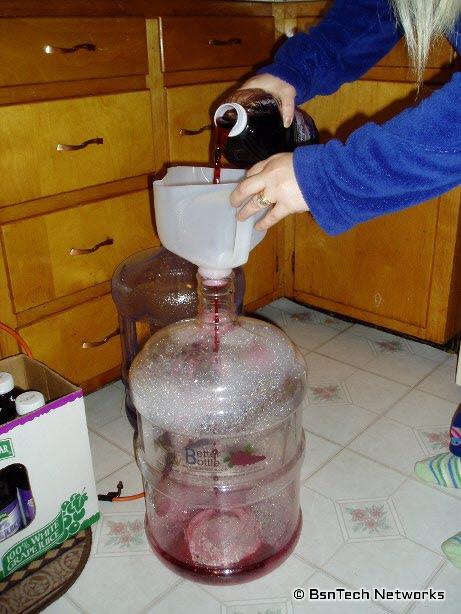
- Pour in your grape juice into your carboy. You will notice below the foam that is at the top of the carboy – this is the left-overs of using Star San. But, it is just fine for adding your juice in and will not give any kind of flavor to it. In addition, below we are just using the top half of a milk jug as a funnel:
- After you add two or three bottles (between 1 gallon and 1.5 gallons) of grape juice, add in four cups of sugar (yes, four cups – it sounds like a lot, but you definitely need it! Welch’s grape juice is not made from the extremely sweet wine grapes – so it is needed in order to get your alcohol content up).
- After adding in some sugar, add in the other additives.
- Crush up one Campden Tablet per gallon of juice (five for five gallons of wine) and add to the mix – required
- Add in 1 tsp of Yeast Nutrient for each gallon of juice (five tsp for five gallons of wine) – Recommended
- Add in 1 tsp of Acid Blend (Others say you should add about 1/2 tsp per gallon, but I only did 1 tsp since this isn’t really needed) – not required
- Add in 3 tsp pectic enzyme (again, about 1 tsp per gallon is indicated from other posts, but this grape juice is already pasteurized) – not required
- Continue to add in your grape juice. After you have put in eight bottles of grape juice, add in another two cups of sugar.
- Mix the juice mixture up very vigorously for a couple of minutes. You need to get all of that sugar and all of the additives to dissolve into the wine if you are to get an accurate measurement in our next step.
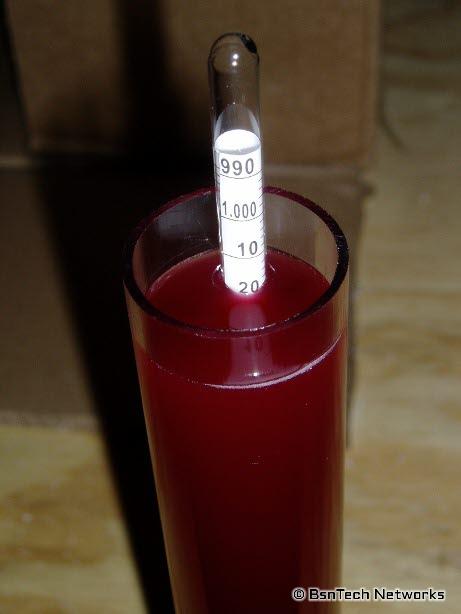
- Now it is time to check your Specific Gravity. You need Specific Gravity ideally to be around 1.10 SG.
- Use the Turkey Baster to draw up some wine and put it into the plastic test tube. Ensure your Hydrometer is in the test-tube before hand.
- Add the juice into the turkey baster until a little after the hydrometer begins to float.
- Here you can see ours is right at 1.10. Specific gravity starting at 1.10 will allow up to about 12.5% alcohol by volume if you allow the femerntation to stop at a reading of 1.00 or below (more on this when the process is completed). To find your alcohol by volume:
(Starting Specific Gravity – Ending Specific Gravity) / 0.8 = % alcohol content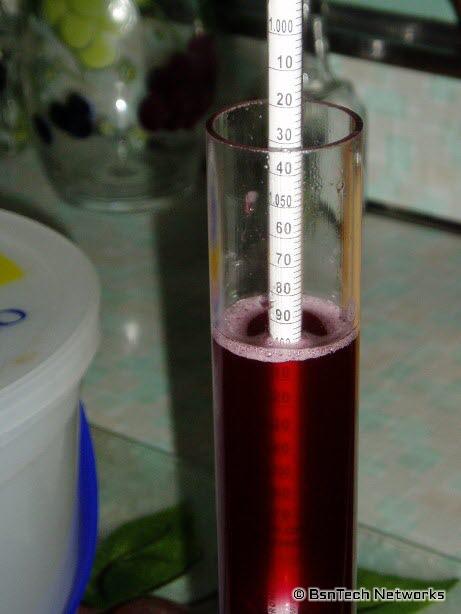
- If you are lower than 1.10 SG, (say 1.095), add another cup of sugar and try again. If you are over 1.10 SG, dont do anything. however, if you are over 1.11 SG, you need to add a little bit of water. Add water in 1/4 cup increments, stir well again, and re-check and get below this number.
- Put your airlock over the top of your carboy and set aside until your Bentonite solution you made above (recommended but not required) has cooled down
Because of the amount of foam, we had to actually take our juice mixture out of the five-gallon carboy and put it into a six-gallon plastic bucket. This gives a lot more head-room and this is considered the best container to use for your ‘primary fermenter’.
November 16
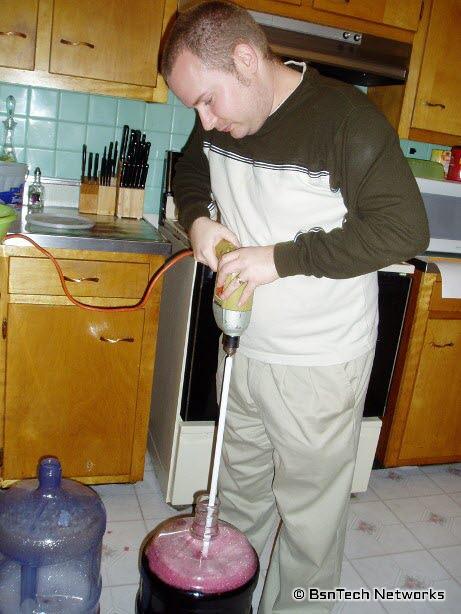
Alright, we waited about 23 hours before continuing on. Now we added in the bentonite solution we made earlier and really gave it a good mixing with our mixing tool that attaches to a drill.
Now you need to check your specific gravity (sugar contents) again and see what the additional 2.5 cups of water with bentonite solution did. Follow the steps above with using a turkey baster to pull the juice out and check. ***Make sure that you SANITIZE the plastic test tube, turkey baster, and hydrometer again before allowing it to contact your juice mix.*** We discovered that the specific gravity dropped down to about 1.096 after adding in just two cups of water! We added one cup of sugar and this brought it back to 1.10.
It is time to “pitch the yeast”! Open your package of yeast and then spread evenly over the surface of your juice. Ours looks like this (you can barely see the little particles in the top of the foamy juice):
Now cover your container again, fit the airlock, and leave it alone for about a week! it should stay in a ‘primary fermenter’ for 5 – 7 days to allow more surface area for the yeast to multiply and get a good head start on their work.
After 5 – 7 days, it will be time to “rack up” – or to take the juice mix from the ‘primary fermenter’ to the ‘secondary fermenter’ – which will be our 5-gallon plastic carboy that is shown above. There it will stay until the airlock no longer bubbles. When the airlock bubbles, this indicates that the yeast is converting the sugar to alochol – and it is releasing the by-product – carbon dioxide – through the airlock – which causes the bubbles.
November 17
Nothing new to report yet. This morning there wasn’t any bubbling from the airlock. After arriving home from work, there isn’t any bubbling as of yet. The yeast is still multiplying and the current sugar-to-alcohol process is negligible.
Update @ 8:15 PM:
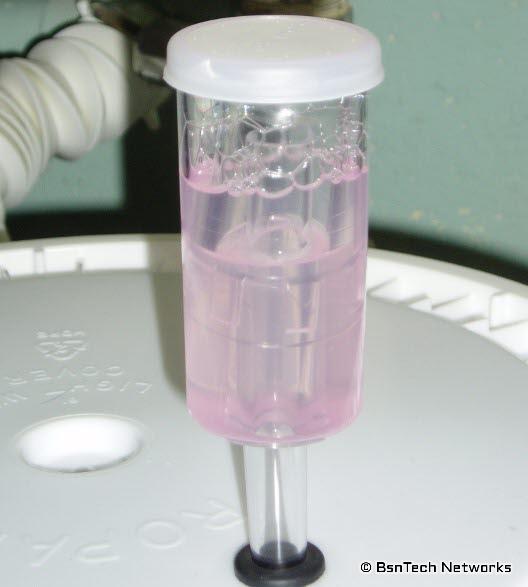
I checked on the airlock and it was raised up from the bottom! The airlock consists of three portions – the top lid (just the lid that comes on and off), a round cylinder inside the airlock with rectangles cut out, and the outer portion that has a pipe that goes into the fermenter.
The round cylnder inside the airlock has now been lifted off the pipe – which means carbon dioxide is now being produce. You can see below that there is a bubbly substance in the top (caused by the Star San sanitizing solution that was put in the airlock). You can also see that the inner cylinder is how bumping up against lid of the airlock.
Currently, it is bubbling at about two bubbles per minute.
November 18
Update @ 7:20 AM:
Airlock is now bubbling at about 11.5 bubbles per minute – up quite substantially from two per minute about 11 hours ago.
Update @ 4:30 PM:
Airlock is now bubbling at about 42 bubbles per minute – almost quadrupling the previous measurement.
Update @ 9:10 PM:
Airlock is now bubbling at about 65 per minute – over one per second on average! With the last amount of wine that we made, the most I counted was 40 per minute. At this rate, the wine will be done much quicker than the two months it took last time. This will give the wine a bit more time to age before we start drinking it to allow it to mellow down in taste.
November 19
Update @ 7:30 AM:
Airlock is bubbling between 91 – 96 bubbles per minute now. It is almost a continuous bubble flow which makes it hard to manually count the number of bubbles.
Update @ 4:20 PM:
Airlock bubbles are beginning to slow down their exponential growth. I cannot keep count with the bubbler anymore because there will be 5 – 10 bubbles that come in spurts then it stops for a few seconds followed by another 5 – 10 bubble spurts. I would peg the bubbles per minute somewhere between 105 – 120 at this point.
November 20
Update @ 4:20 PM:
Airlock is begnning to slow down. It seems yesterday was the peak. This morning the bubble count was down to around 90 – 100 bubbles per minute. At 4:20 PM today, the count was down to around 70 – 75 bubbles per minute.
November 22
Update @ 7:30 PM:
Airlock is now around 60 – 65 bubbles per minute – so it is slowing down even a little more. Tomorrow the wine will be ‘racked’ into the 5-gallon Better Bottle and removed from the 6-gallon bucket – where it will remain until the fermentation is completed.
November 23
Update @ 6:00 PM:
Today was the big day for moving the wine into the secondary fermenter. Before doing so, I checked the bubble count – and it slowed down again to about 56 bubbles per minute – about 10 bubbles per minute slower than yesterday.
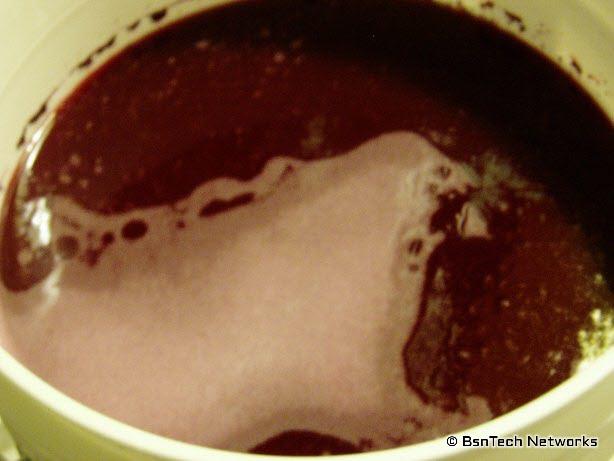
I took the lid off and was greeted with this sight. The wine looks pretty dark and murky. There was some bubbles at the top and the whole container was bubbling like a soda from the yeast still working away:
Before opening the lid, I made sure to start the sanitizing process of the hydrometer, plastic ‘test tube’, the 5-gallon Better Bottle, and everything else that would come in contact with the wine. Again, sanitizing everything is very important – so make sure you do this if anything comes into contact with the inside container where the wine will be held or comes in contact with the wine itself.
After this, i got the plastic ‘test tube’ out along with the turkey baster and hydrometer. I pulled up some wine with the turkey baster to put in the plastic ‘test tube’ and the hydrometer. Amazing! Within a week, the yeast has converted this to about 8 – 9% alcohol already! When we first started, the Specific Gravity was at 1.10. Now, it is at 1.02. That is a pretty big difference in such a short period of time. At this rate, the wine will be done by the end of next week! So much for having to wait two months.
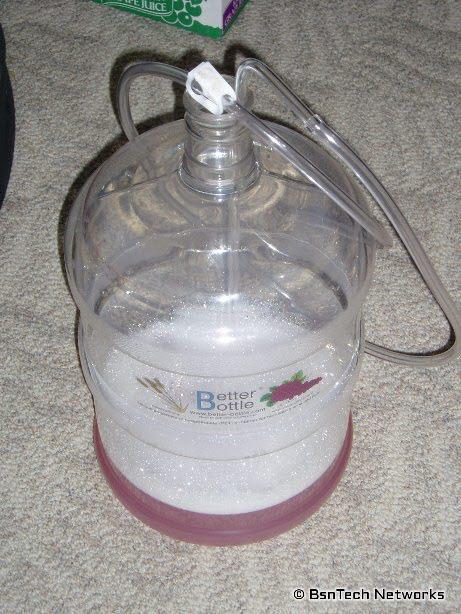
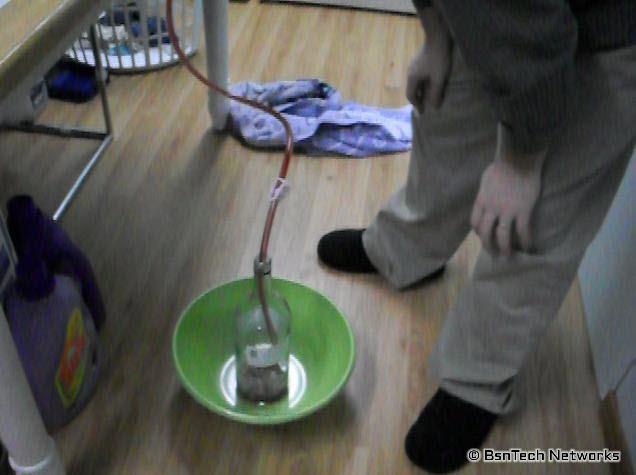
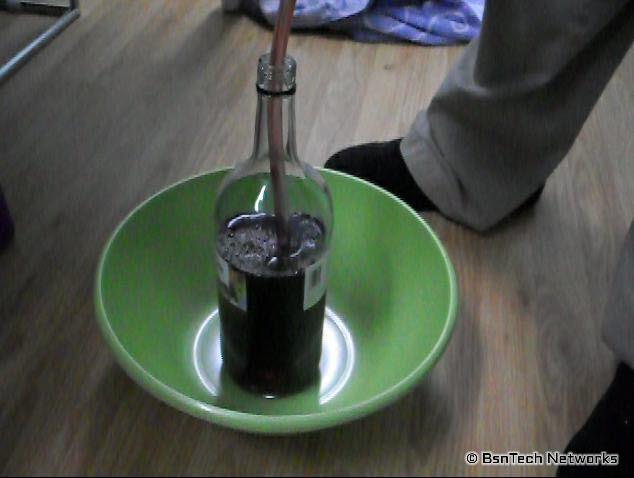
Welp, the last step was to take the wine and “rack it” into the secondary fermenter. The primary fermenter did a great job in aiding the yeast in reproduction and getting the wine off to a good start. Right now, we could add in some Potassium Sorbate and five Campden Tablets (one for each gallon of wine) to kill off the yeast and have 8 – 9% alcohol. The wine is quite sweet and pretty good, but we like to have the extra kick. So, here you can see the process of the wine transferring from the primary fermenter to the secondary five-gallon carboy.
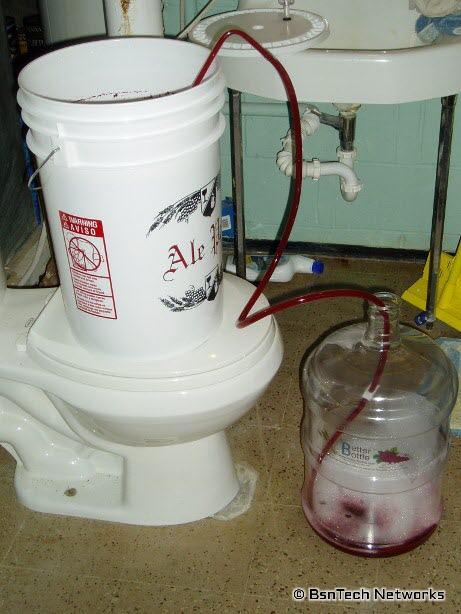
Yes, it is in our downstairs bathroom. We don’t want to get grape juice all over the carpet or good floors! Wine/grape juice surely stains.
And there it is for the next couple of weeks – until the airlock fully stops bubbling.

November 24
Update @ 4:15 PM:
Airlock is bubbling at about 54 bubbles per minute – down a negligible difference from yesterday.
November 25
Update @ 5:45 PM:
Airlock has dropped off considerably and is now down to 34 – 35 bubbles per minute.
November 26
Update @ 9:45 AM:
Airlock bubbles dropped by a factor of two from yesterday. There are now only about 17 bubbles per minute.
Update @ 6:00 PM:
Airlock is now down to 13 bubbles per minute. In addition, I took the top off the carboy and used the turkey baster to pull out some wine to put in the plastic ‘test tube’ to check the Specific Gravity. The Specific Gravity is now at exactly 1.00. So the wine has went from 1.02 on Monday down to 1.00 Thursday night. Once the Specific Gravity gets to 0.999, fermenting is complete.
We also took a taste of the wine and it actually tastes pretty foul at this point. There is still a little bit of residual sugar but it is almost like an alcoholic soda pop – because of all of the carbon dioxide dilluted in the wine plus the yeast. I hope that it will get better otherwise these five gallons of wine will be a bust. It still is way too early to throw in the towel though – because the wine has to be de-gassed (carbon dioxide mixed out), the yeast-killing additives put into the container, and then let to sit a week or to in order to allow the wine to drop all of the heavy debris to the bottom of the container.
November 27
Update @ 7:30 AM:
Airlock is now at 8 bubbles per minute.
Update @ 5:00 PM:
Airlock is now at 6 bubbles per minute.
November 28
Update @ 10:00 AM:
Airlock is at 3 bubbles per minute. Soon we will stop the fermenting process and allow the wine to stabilize and clear.
Update @ 4:55 PM:
Airlock is at almost 2 bubbles per minute (2 in 63 seconds). I decided that it is time to go ahead and stop the fermentation process. It could wait a few more days, but where it is at seems fine.
First thing first – let your items that will touch the wine sanitize:

Next, you need to add two additives to kill any remaining yeast, kill any other bacteria, and help preserve the wine. For this you need to add in one campden tablet per gallon (so a total of five campden tablets for five gallons). In addition, Potassium Sorbate is needed in a dose of 1/2 teaspoon per gallon. So I added in 2 1/2 teaspoons of Potassium Sorbate for the 5 gallons:
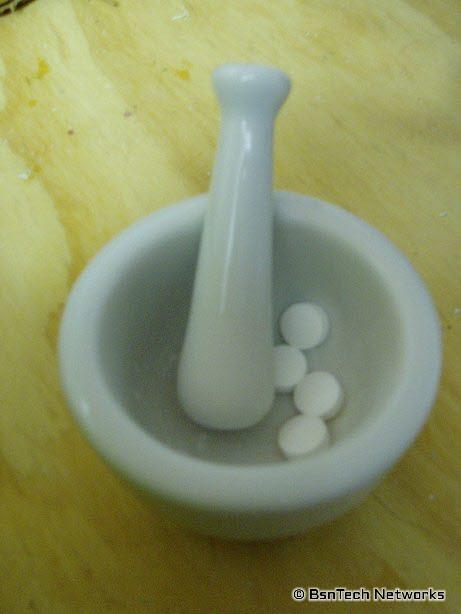
To crush the tablets, my wife has a little crushing bowl and crusher that I used:
After adding the additives into the batch, it is time to mix everything very well. BE CAREFUL with this! You have to start mixing very slowly otherwise the foam will come up well over the top like a volcano exploded (had it happen to me this time)!

After spending a good 30 minutes mixing on and off to get the diffused carbon dioxide out, I put the airlock back on and will let it sit for at least another week – maybe two (no rush since we still have a gallon).
I checked the specific gravity again and it was just below 1.0 – so it is probably around 0.998. Now, let’s see how much alochol this will contain:
( (Starting Specific Gravity) – (Ending Specific Gravity) ) / 0.8
(1.10 – 0.998) / 0.8
0.102 / 0.8 = 0.1275
So, it contains about 12.75% alochol content. We took a sip of the wine that was in the plastic “test tube” and it is much better than it was before. This is because the carbon dioxide didn’t make it like a soda.
Well, until next time – I won’t be posting any updates for a week or two – until it is time to actually start putting the wine into our jugs!
November 30
Nothing has changed much with the wine. The wine is clearing up though and looks like the purple grape juice that was originally used to make the wine. In all of the photos above, it looks like the wine is a magenta-like opaque color that you cannot see through. Now, it has returned back to the dark purple color and is becoming more translucent.
December 13
It has now been two weeks since the fermentation was stopped on the Welch’s grape fruit juice wine. At this point, I wanted to go ahead and “rack” the wine. Racking the wine simply means moving the wine from one container to another. Again, it is very important to sanitize all equipment that will come into contact with the wine. I did this again – by using our Star San Sanitizing solution.
After everything was sanitized down, the wine was moved from the Better Bottle to another bottle I have on hand. The reason to rack the wine is to remove all of the sediment from the wine – you don’t want to put any of this in your bottles! The siphon hose I have has a black tip on the end – this is the lift the siphon off of the bottom of the bottle and this helps to keep from getting the sediment in your second container. If I had an “auto-siphon”, there is a little pump at the top of the siphon. You just pump it a couple of times and the wine starts the siphoned gravity flow automatically. Since I don’t have one of those, I have to suck on the end of the other end of the siphon to get the flow of wine started.
After the wine has been moved to the other container, I refit the stopper and airlock and then I will let this sit for another two weeks. After that two weeks, I will do this process again, wait another two weeks, and then bottle it up! We aren’t in a rush to get the wine out since we still have about a gallon of wine left from our previous batch.
Here is the second YouTube video I made with a Samsung SL30 camera. The first video I made yesterday was a bit better as I had a hard time controlling the camera when performing some actions in the video.
December 24
I opted to not wait the full two weeks to rack the wine again. The same process for racking the wine was done today as done in the previous entry and video – everything was sanitized well and the wine moved back into the Better Bottle with the air lock fit over the top. There was much less sediment at the bottom this time. Next time we will begin bottling the wine.
January 9
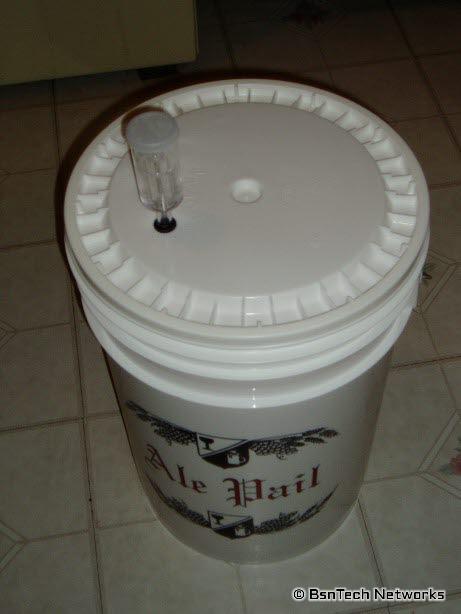
Today we put the wine into the bottles. We first tried to use a submersible fish pump to push the wine through a coffee filter at the end of a food-grade tube, but the force was too great and caused a mess! So, because we racked up the wine three times (twice before and once including today with moving the wine from the Better Bottle to the Ale Pail), we figured this probably is filtered enough.
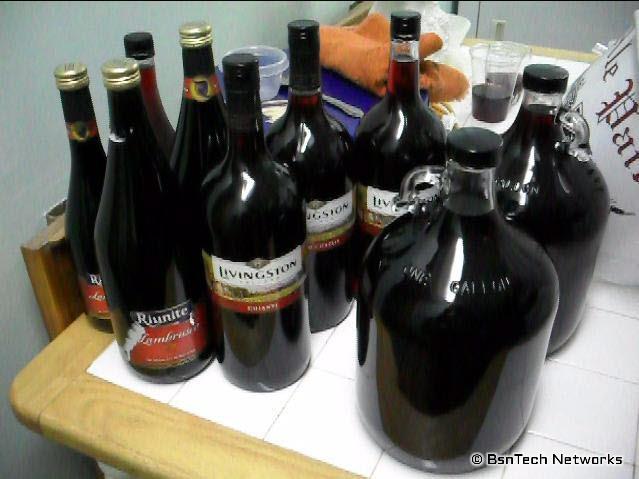
Last year we used five one-gallon jugs to put the wine in. This year, we have accumulated quite a few wine bottles. Most of them are a 1.5 liter size – but we do have two that are 750 mL (half the size of a 1.5 liter).
Again, before we do anything, we must sanitize everything down. Beforehand, we washed the outside of all of the jugs and wine bottles in hot, soapy water to clean the outsides. Then, they were put in the Ale Pail and the sanitizing solution was fed into each of the bottles.
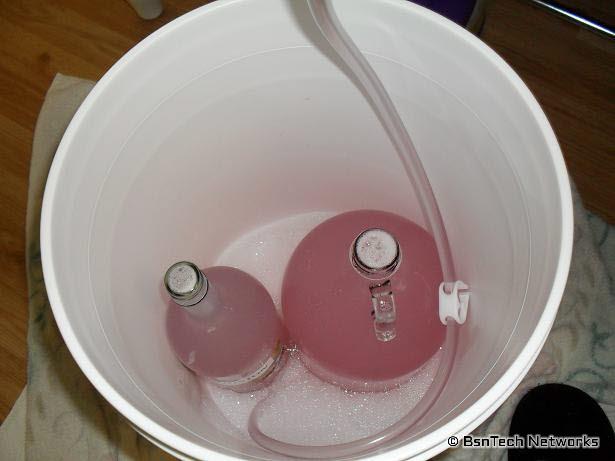
After those were done, we sanitized the Ale Pail itself along with the full siphon hose.
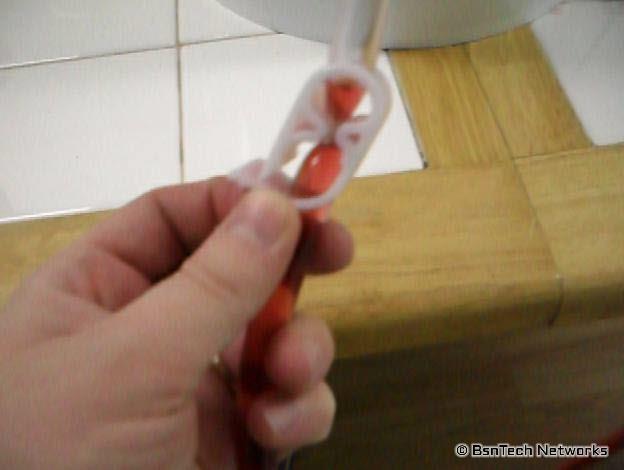
Now, let’s begin the filling! One thing I wanted to show you that I have on the siphon hose is a shut-off clamp. This shut off clamp has several notches in it – so as you push down, it stays in place. This helps to regulate the flow of the wine going into the bottles – and allows you to shut off the flow when you need to get another bottle.
Now it is just a matter of taking the wine out of the Ale Pail using the siphon hose to fill up each bottle!
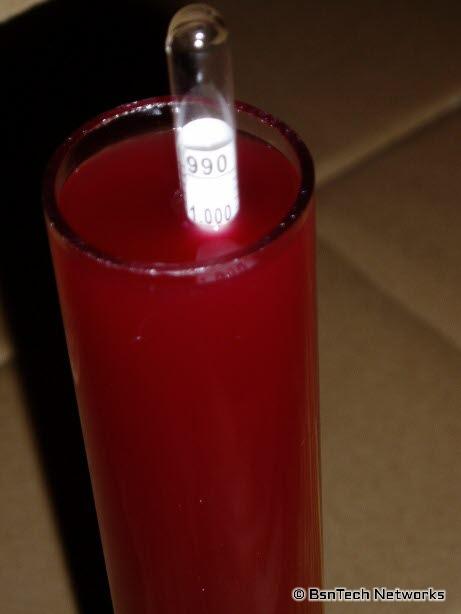
Finally after we managed to get them all filled up, we have a good five gallons of wine ready for storage and “aging”. Our “aging” simply is keeping them stored until we need them. So, the very last bottle will be “aged” for about one year before we open it.
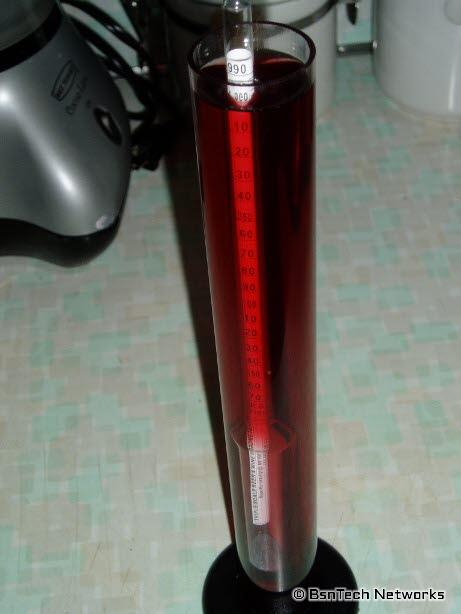
Lastly, here is a picture of the wine in the plastic test tube and hydrometer. The hydrometer is still sitting right at 1.00 for specific gravity. You can see just how well this batch of wine has cleared up!
Below is the YouTube video that was created during the process. I had to do quite a bit of editing to remove all of the footage of us trying to use the submersible fish pump to filter the wine through a coffee filter. That just didn’t work!