Installing Horde 4 WebMail in Linux

Recently I upgraded the BsnTech Networks webmail system from Horde 3 to Horde 4.  Horde has changed the install strategy from downloading the individual files to a Pear-based installation technique.

It took me a few tries to get everything fully running and up, but it is now working very well.  The install process will even upgrade your Horde 3 database to the Horde 4 requirements as well.

So, if you are looking to install the new Horde 4 Webmail system, look no further than this tutorial.

First of all, ensure you do a full backup of your current Horde database!

This tutorial also recommends that you install Pear as a separate instance – specifically just for running Horde – so you are not using the system-wide Pear installation.

Note that below, where you see <PATH>, you need to substitute in the path where you will be installing horde.

#1 – you need to create the directory for where you want to install Horde.

mkdir <PATH>

So if you want Horde to be installed in /var/www/webmail, this will be the command:

mkdir /var/www/webmail

#2 – You now need to create a pear.conf file that contains the configuration data for the standalone Pear install:

pear config-create <PATH> <PATH>/pear.conf

#3 – Now it is time to install Pear into this directory:

pear -c <PATH>/pear.conf install pear

#4 – OK so a standalone Pear is now installed.  Now you need to discover the horde Pear install location:

<PATH>/pear/pear -c <PATH>/pear.conf channel-discover pear.horde.org

#5 – Next, install the horde_role package:

<PATH>/pear/pear -c <PATH>/pear.conf install horde/horde_role

#6 – Now you need to run the package to set the install location for the webmail system:

<PATH>/pear/pear -c <PATH>/pear.conf run-scripts horde/horde_role

When you run the horde_role package, it will ask you where the install location will be for the webmail system.  You will put in the <PATH> that you have specified.  So again, if your <PATH> is /var/www/webmail – you will put that in when asked

#7 – Next, go ahead and set the “preferred state” for package downloads to be “alpha” using the command below.  This will prevent you from getting any errors or other issues during the install:

<PATH>/pear/pear -c <PATH>/pear.conf config-set preferred_state alpha

#8 – It is now time to download all of the needed components for Horde Webmail:

<PATH>/pear/pear -c <PATH>/pear.conf install -a -B horde/webmail

#9 – I would also recommend that you install the Password module for Horde as well – if you want to be able to allow your users to change their passwords within the Horde 4 Webmail:

<PATH>/pear/pear -c <PATH>/pear.conf install -a -B horde/passwd

#10 – Now, because you chose to install Horde using a separate, standalone version of Pear, you need to go to the <PATH> and open the .htaccess file.  These lines need to be added to the file (again, ensure you substitue <PATH> with the install location:

php_value include_path <PATH>/pear/php
SetEnv PHP_PEAR_SYSCONF_DIR <PATH>

#11 – OK – getting close now.  Next step is to run the webmail-install script that will ask you a few questions about getting Horde installed and configured – and update or install your Horde database:

PHP_PEAR_SYSCONF_DIR=<PATH> php -d include_path=<PATH>/pear/php <PATH>/pear/webmail-install

#12 – Alright – the next step is to set the permissions so you’ll be able to login to the system in a web browser and configure the Horde settings.  For easy purposes right now, do the following to set all of the files to be writable by all (we’ll change this back later):

sudo chmod -R 777 <PATH>

#13 – So you should now have Horde all installed and configured.  You should now be able to open your browser and login (hopefully you configured an account as an administrator in the webmail-install process).  The first then you need to do – is to go through and configure each of the components – under the Administration menu and then Setup.  Click on each of the modules (calendar, tasks, notes, mail, horde, passwd, etc) and configure them how you wish – and then generate the configuration.

#14 – Lastly, you now need to change the permissions on the files back to only being writable by the user that installed Horde on the server.  This will prevent you – or others online – from making changes to the configuration files.  In the event you want to change the configuration in the future, ensure you follow step #12 above to allow the files to be writable by all – then change the files to be writable only by the owner.  So, now that you have got the configuration done, make the files writable only by the owner:

sudo chmod -R 755 <PATH>

Setting Up Alarms

One part of the Kronolith (calendar) system – is that you can set alarms to remind you of upcoming events.  In order to ensure this is done effectively, you need to create a cron job that will call a script to check for events in all calendars.  Therefore, the below lines will create that job to check for appointments:

# Horde Alarms
*/5 * * * * root PHP_PEAR_SYSCONF_DIR=<PATH> php -d include_path=<PATH>/pear/php <PATH>/pear/horde-alarms > /dev/null 2>&1

Updating Horde

In the event that there are changes to Horde and it’s appropriate modules, upgrading to the newer installs are easy.  This is the command that will upgrade all modules that are installed with your Pear installation:

<PATH>/pear/pear -c <PATH>/pear.conf upgrade-all

In essence, this one command will upgrade all modules and installs for that specific Pear install – including any dependencies and any updates to Horde or it’s appropriate modules.

e1000_clean_tx_irq: Detected Tx Unit Hang

Since I do website hosting for customers, I have a coupld of HP ProLiant DL380 servers at one of my locations.

These servers have a PCI-Express dual-NIC Intel card in them.  To be more exact, the card is an Intel Corporation 82546EB Gigabit Ethernet Controller.

When the servers would receive a request to download a large file – roughly 1 megabyte or higher (such as a large picture file), the download progress would stop on the visitor’s end and time out.

After doing more research, I finally was able to see the error messages that were appearing in the server logs:

<time> <server> kernel: [1878984.981444] e1000: eth2: e1000_clean_tx_irq: Detected Tx Unit Hang
<time> <server> kernel: [1878984.981447]   Tx Queue             <0>
<time> <server> kernel: [1878984.981448]   TDH                  <b4>
<time> <server> kernel: [1878984.981449]   TDT                  <bf>
<time> <server> kernel: [1878984.981450]   next_to_use          <bf>
<time> <server> kernel: [1878984.981452]   next_to_clean        <ae>
<time> <server> kernel: [1878984.981453] buffer_info[next_to_clean]
<time> <server> kernel: [1878984.981454]   time_stamp           <10b32a4cb>
<time> <server> kernel: [1878984.981455]   next_to_watch        <b6>
<time> <server> kernel: [1878984.981456]   jiffies              <10b32a552>
<time> <server> kernel: [1878984.981457]   next_to_watch.status <0>
<time> <server> kernel: [1878986.981517] e1000: eth2: e1000_clean_tx_irq: Detected Tx Unit Hang
<time> <server> kernel: [1878986.981520]   Tx Queue             <0>
<time> <server> kernel: [1878986.981522]   TDH                  <b4>
<time> <server> kernel: [1878986.981523]   TDT                  <bf>
<time> <server> kernel: [1878986.981524]   next_to_use          <bf>
<time> <server> kernel: [1878986.981525]   next_to_clean        <ae>
<time> <server> kernel: [1878986.981527] buffer_info[next_to_clean]
<time> <server> kernel: [1878986.981528]   time_stamp           <10b32a4cb>
<time> <server> kernel: [1878986.981529]   next_to_watch        <b6>
<time> <server> kernel: [1878986.981531]   jiffies              <10b32a61a>
<time> <server> kernel: [1878986.981532]   next_to_watch.status <0>
<time> <server> kernel: [1878988.981591] e1000: eth2: e1000_clean_tx_irq: Detected Tx Unit Hang
<time> <server> kernel: [1878988.981594]   Tx Queue             <0>
<time> <server> kernel: [1878988.981595]   TDH                  <b4>
<time> <server> kernel: [1878988.981597]   TDT                  <bf>
<time> <server> kernel: [1878988.981598]   next_to_use          <bf>
<time> <server> kernel: [1878988.981599]   next_to_clean        <ae>
<time> <server> kernel: [1878988.981600] buffer_info[next_to_clean]
<time> <server> kernel: [1878988.981602]   time_stamp           <10b32a4cb>
<time> <server> kernel: [1878988.981603]   next_to_watch        <b6>
<time> <server> kernel: [1878988.981604]   jiffies              <10b32a6e2>
<time> <server> kernel: [1878988.981606]   next_to_watch.status <0>
<time> <server> kernel: [1878991.771623] e1000: eth2 NIC Link is Up 100 Mbps Full Duplex, Flow Control: RX/TX

All of these errors occurred within a seven-second timeframe.  Sure, seven seconds doesn’t seem like a lot, but when these errors occurred, the servers looked like they were dead and wouldn’t respond to any queries across the Internet at all.

Both of the HP ProLiant DL380 servers had their on built-in BroadCom card, but I previously also had issues with these cards and the tg3 driver as well – so I opted to buy – what I thought was a very well-supported Intel card.  Ubuntu uses the e1000 driver (as noted above in the errors) for this card.

So far – after several attempts to re-download the same large pictures from the web servers after making the changes below, everything seems to be working well.  Here is how I did it.

First, I needed to add a line to the /etc/default/grub configuration line.  I added the “pcie_aspm=off” entry in the following line:

GRUB_CMDLINE_LINUX_DEFAULT=”quiet splash pcie_aspm=off”

That is supposed to disable the power management features of the PCI-Express components.

After performing a restart, I tested the download of the pictures again – and it hung.  So this didn’t fix the issue by itself.

The next step was to disable something called “TCP Segmentation Offload” – or TSO for short.  Many others indicated that by disabling this alone would fix the problem – but I started with disabling the power management features first.

In order to disable TSO for your NIC, do the following for EACH ethernet port (so if you have a dual-NIC card, you will have to run this command twice and change the ‘ethX’ number):

ethtool -K ethX tso off

Note to change the “X” in “ethX” to the number.  For example, mine are “eth2” and “eth3” for my dual-NIC Intel card.

Now, confirm that TSO is disabled by running this command for each NIC:

ethtool -k ethX

You may have to put “sudo” in front of each command if you are not running as the root user.  After running that command, you should see that TSO is off.

Now, how can you set it so that TSO is automatically disabled upon startup?  Make an init script!  if you use the command above, it is only effective until the next reboot.

So, go to the /etc/init.d directory and make a new file – mine is called “disable-tso”.  Create the file and add one line for each NIC you need to disable TSO on.  This is a copy of my script:

#!/bin/sh
ethtool -K eth2 tso off
ethtool -K eth3 tso off

Of course, ensure you update the “eth2” and “eth3” to your NIC card numbers

Now, you need to make the file executable – so I’d run this:

sudo chmod 755 disable-tso

And now, run this to update the startup process:

update-rc.d disable-tso defaults

And you are done!  Each time the server reboots, it will disable TSO upon startup.  Hope this is useful to others that have the Intel Corporation 82546EB Gigabit Ethernet Controller card in their servers using the e1000 driver in Ubuntu.

How to Take Apart the Gateway MT3422 Laptop

A couple of weeks ago, our Gateway MT3422 laptop wouldn’t boot up.  We noticed that over the couple of weeks prior, the laptop would freeze up and sometimes a lot of different colors would fill the screen.  We would then need to perform a hard-boot on the Gateway MT3422 laptop.

Well, to our dismay, when we tried to turn the laptop back on, the laptop would turn on, the CD-ROM drive would blink a couple of times, but nothing would appear on the screen.  We left it sit for about five minutes – and still nothing would come on the screen.

That means that the MT3422 laptop wouldn’t perform it’s POST operation.

When it comes to laptops, there really is only one thing to replace in this case – and that is the motherboard.  The power was clearly working, the battery was fine, CD-ROM and hard drives were fine – so it was the motherboard.

I found a motherboard online for just under $85 online.  I searched the Internet to try to find a video tutorial or something that would help me take apart the Gateway MT3422 laptop – but nothing could be found.  So I wanted to ensure I could take the laptop apart before ordering it.

Certainly was able to do so!  So, here is a tutorial on how to do it.  I’ve also shown the YouTube video on how to do it as well.  I apologize in advance for the bad quality of the pictures below – as I took screenshots of the video to show the step-by-step here as well.

1.  Remove the battery.  Ensure that you remove the battery before going any further.

2.  The next step is to remove the two covers that cover the wireless card and the memory.  There is a screw for each of the covers.  Simply unscrew the cover.

3.  There are tabs on either side of the memory that will release the memory.  Push the tabs out and the memory will pop up.

4.  With the wireless card, there are two wires connecting it – a black and gray wire.  The black wire is to the left (next to the large silver box) and the gray is to the right.  The wires snap off very easily.  After you get the wires removed, there are the tabs on both sides – push those out and the wireless card will come up.

5.  Next, you will need to remove all of the screws on the back.  There are screws around the perimeter.  There are three different sizes of screws.  Two screws are where the hard drive is towards the front of the laptop:

Gateway MT3422 Hard Drive Screws

These screws are very short and they have a different “bit” type for taking them out.  A Phillips screwdriver will get them out – but make sure you use these screws when re-assembling.

Next, there are five other screws that are larger than the hard drive screws – but smaller than the others.  Two of the screws are found under the battery area, on the back of the laptop, and one is over by the CD-ROM drive.

There is then one long, silver screw that is used to hold the CD-ROM drive in.  Ensure you use this same screw when re-assembling as well.

Lastly, there are other screws that are longer than the hard drive screws and the five other shorter screws, but shorter than the CD-ROM drive screw.  These screws are black like the others.  I can’t recall at this time how many of them there are – but I believe there are seven of them.

6.  After all the screws are out, remove the CD-ROM drive by pulling it out – and remove the hard drive by pulling it out.  Under the hard drive bay, you will find two more screws that need to be removed.  These are also the black long screws as well.

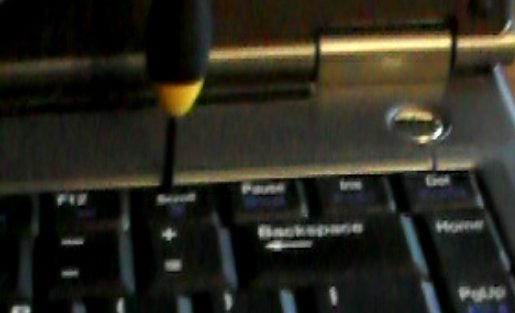
7.  Now, turn the laptop over and open the lid.  There is a plastic piece that runs above the keyboard.  You will need a small flat screwdriver to place just above the keyboard and be very careful to pry up the plastic piece.  It runs the full width of the Gatewya MT3422 laptop with four or five areas you will need to pry up on.

Gateway MT3422 Plastic Bezel Removal

8.  After you have the plastic loose, the plastic also covers up the hinges of the LCD display.  Behind the LCD display by the hinge, pry the plastic up just enough to release it.  Then you will need to tilt the LCD display all the way back to remove the plastic.

Gateway MT3422 Screen Tilt

9.  After you have the plastic up, you should be able to push the keyboard up slightly towards the LCD display and lift up a bit.  There is a ribbon that connects the keyboard to the laptop.  There are two black plastic tabs on either side of the connector holding the ribbon in.  Pull those straight down from the white connector to release – then the ribbon and full keyboard should come out.

Gateway MT3422 Keyboard Connector

10.  The next step is to remove the display.  There are four screws holding in the display – two on either side.  On either side, there is both a black and a silver screw.  The silver screw is connected to the gray-looking fiber.  The black screw is on the plastic.  After these screws are removed, there is then a connector that connects the display to the motherboard on the left side.  Gently pull the wire connected to it towards the LCD.

LCD Connector on Gateway MT3422 Laptop

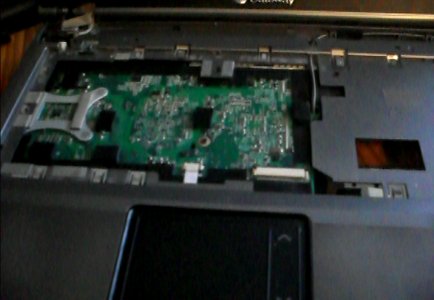
11.  There are then a total of six screws that holds down the silver plastic, palm rest, and touch pad over the top of the motherboard.  Two of the screws are in the upper left and right – just where you removed the LCD display.  There is then another screw in the lower right above the palm rest, once straight above the palm rest towards the top, and two over on the right-hand side.  These all need to be removed and then you will almost be able to pull up the whole plastic piece.

Palmrest Plastic on MT3422

12.  There is a small connector that connects the touchpad to the motherboard as seen below.  It is just above the touchpad.  There are two black tabs on either side of this connector – just like the keyboard.  Pull these two black tabs straight down and gently pull the white ribbon cable out of it.  You should now be able to lift off the entire plastic that covers the motherboard.

Touchpad Connector on MT3422 Laptop

13.  You should now see the full motherboard.  There are two speakers in the front that now need disconnected.  Each have their own wire and connector on the motherboard.  Gently pull the wire out away from the connector to remove them.

Speaker Connector on Gateway MT3422 Laptop

14.  After the speakers are removed, it is time to remove some screws to be able to pull the motherboard out.  One screw is over on the left-hand side of the motherboard at the top.  Another screw is towards the center of the motherboard.  Another screw is then down at the bottom right of the motherboard.  And a final screw is on the upper-right hand side of the motherboard.  Remove all of these.

15.  There are then two silver screws in the upper-right.  One of them holds the motherboard to the power outlet – and the other holds the power outlet into the bottom plastics of the laptop.  The smaller screw holds the power connector into the motherboard and the longer screw holds the power connector into the bottom plastics.  Both of these need removed.

Power Connect Screw 1 on MT3422 Power Screw 2 on MT3422

16.  Now, you should be able to fully remove the motherboard!  You will have to be gentle and pry on the right-hand side where the VGA connector is – because it is under the plastics of the laptop.  So pull the plastic out away from the laptop gently to release the VGA connector and lift up on the board.  You should then be able to take it right out!

Add a Watermark to a Bulk of Images

Over the years, I have had a lot of pictures that I’ve added to my picture gallery.  Today, I was adding more pictures and I thought – maybe I should start protecting my pictures with a watermark in case someone tried to use them on their site.

The gallery that I use allows for a watermark – but the watermark is only applied to those pictures that you add AFTER you enable the watermark feature.  Up until today, I have had the watermark feature disabled.  I figured that I could simply turn it on at any point, and using the GD library of PHP, the watermark would simply appear over all of the images.  Not true.

So I began looking for a way to add a watermark to a batch of pictures.  There were some programs out there that did it – and even some scripts in Gimp – but the ones I found only allowed you to add a text copyright watermark to the graphics.  The one I tried in GIMP actually used a map effect that made the text look embedded into the picture – but in some of the pictures, you could barely see the watermark.

Knowing that the picture galleries could add an image watermark to a picture when adding it to the site, I knew that there must be a way to add a watermark to a bulk of pictures.

Finally after doing some coding and work for a couple of hours, I found the solution.  Sure, it took a few hours to code this and get it working, but think of the amount of time it would take if I were to add the graphic watermark to over 1,500 pictures that I already have on my site.  It would take days!

After I wrote the code, it took less than ONE MINUTE to add the watermark to over 1,500 pictures on my hosting servers that have a 2.8 GHz processor.  Amazing.  So two hours and one minute to add a watermark to a large number of pictures – amazing.

So, here is the quick PHP script that you can add to your hosting directory and then run it from a browser.  There are a few variables that need to be changed in order to add a watermark to a mass number of pictures and I’ll cover those.


<?php
error_reporting(E_ALL);
ini_set(‘display_errors’, 1);
getDirectory(‘ENTER PATH OF YOUR IMAGE DIRECTORY HERE‘);

function getDirectory( $path = ‘.’, $level = 0 )
{
    $ignore = array(‘.’, ‘..’,);
    // Directories to ignore when performing the watermark.
    $dh = @opendir( $path );
    // Open the directory to the handle $dh
    while( false !== ( $file = readdir( $dh ) ) )
    {
        // Loop through the directory   
        if( !in_array( $file, $ignore ) )
        {
            // Check that this file is not to be ignored
            if( is_dir( “$path/$file” ) )
            {
                // This is a directory so we need to recurse into the directory
                getDirectory( “$path/$file”, ($level+1) );
            }
            else
            {
                // We found a file – so now we need to ensure the file is a .jpg or a .JPG or we shouldn’t process it
                if(strpos($file, “.jpg”) !== false || strpos($file, “.JPG”) !== false)
                {
                    // Print out the full path of the file that is having the watermark applied
                    echo “$path/$file<br />”;
                    $watermark = imagecreatefrompng(‘ENTER FULL PATH OF YOUR WATERMARK IMAGE‘);
                    $watermark_width = imagesx($watermark); 
                    $watermark_height = imagesy($watermark); 
                    $image = imagecreatetruecolor($watermark_width, $watermark_height); 
                    $image = imagecreatefromjpeg($path . ‘/’ . $file); 
                    $size = getimagesize($path . ‘/’ . $file); 
                    $dest_x = $size[0] – $watermark_width – 10; 
                    $dest_y = $size[1] – $watermark_height – 10; 
                    imagecopy($image, $watermark, $dest_x, $dest_y, 0, 0, $watermark_width, $watermark_height);
                    imagejpeg($image, $path . ‘/’ . $file);
                    imagedestroy($image); 
                    imagedestroy($watermark);
                }
            }
        }   
    }
    closedir( $dh );
    // Close the directory handle
}
?>

If you would rather download the code, simply do so by clicking this watermark.txt link.

So, there are two areas that you need to change that are highlighted in bold in the script above.

On the fourth line – you see it calls “getDirectory”.  In here, you need to put the directory where all of your images are stored at – which you want to have a watermark applied.

NOTE – All files with a .jpg or .JPG extension in the directory you specify – and any subdirectories – will have the watermark applied – so you may want to make a backup before hand!

So, if I have all of my files in /home/user72/images/gallery – the line would look like:

getDirectory(‘/home/user72/images/gallery’);

Now, there is one more setting you need to change – and that is the full path to the actual image that is your watermark.  Here is the line:

$watermark = imagecreatefrompng(‘ENTER FULL PATH OF YOUR WATERMARK IMAGE‘);

So, you need to enter the full path to the image that will be the watermark over each of the images.  So if my watermark file is:

/home/user72/images/gallery/watermark/copyright-watermark.png

I will then make the line:

$watermark = imagecreatefrompng(‘/home/user72/images/gallery/watermark/copyright-watermark.png’);

NOTE – All watermarks MUST be in PNG format – NOT GIF or JPG or any other file type for this to work.

After you have set those two settings and saved the file in your hosting account (ensure the file is named <file>.php), simply open your browser and go to your location where the file is stored.  So if I named the file watermark.php and put it right in the main html folder of my site – and my domain was just domain.com, I would open up a browser and type in “domain.com/watermark.php”.

Depending upon how many pictures you have and how much processing power your hosting provider gives you, it may take some time to run this script.  Like I said, I have full access to my hosting servers and I ran one of the processor cores at 100% for just under one minute to add a watermark to all of my 1,500+ images.

Once done, you should see a listing of all of the files that were watermarked.

That is all!  I hope this script is helpful to those looking to add a watermark to a group of pictures.

Can You Hook Up Two OTA TV Antennas?

OK – this post doesn’t really belong in the Computers blog – but it certainly fits here since it is “techie” compared to the gardening blog.

So the question is – can you hook up two OTA TV Antennas?

In a nutshell – YES!  You certainly can combine two tv antennas to get a better signal.

Why would you want to hook up two tv antennas?  Well, let me explain.

We had just a small little OTA TV antenna – maybe 2.5 feet long.  Believe it or not, this antenna worked well to pick up the TV stations in our area.  We have a couple of towers about 11 miles away from us to the east, a couple more about 45 miles away to the east, and another one or two over to the west of us by about 22 miles.

OK – so do you see a dilemma here?  The TV towers are to the east and west of us.

Here is the funny thing.  The station that is only 11 miles away from us – would cut in and out on our TV.  But, the TV stations that were 20+ and 45 miles away came in just fine.

Therefore, I went to buy a new antenna.  I got one that said it would work for up to 100 miles away.  The box was about five feet long.

Boy was the looks of that box misleading!

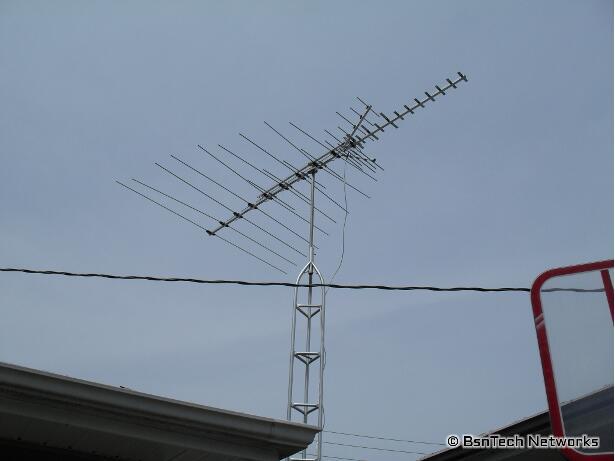
I got it home and found three different sections that were all about five foot each.  The whole thing took about an hour to put together – and it is three times larger than the previous one!

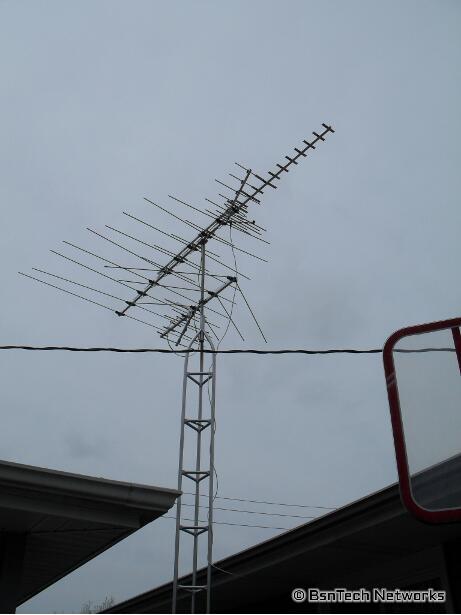
OTA Antenna

It certainly doesn’t look very large about 20 feet up into the air, but it was a bear to get setup!

Alright – now you see the “V” section that is headed towards the right side of the picture?  That means that the TV stations you want to pick up are in that direction.  That direction is East in my case – which would be the TV towers that are 11 miles and 45 miles away.  This was originally the way I had the old antenna – but yet the towers 11 miles away still would cut out.  Interesting eh?

So I went to re-scan for TV channels!  Alas!  We got maybe four more channels – although they were basically just repeats of other channels we had anyways.

Now for the bad news.  The TV stations that were to the west (would be to the left of the photo above) were cutting out!  That was FOX and ABC.  Can’t have that!  So, my question is, is a larger OTA antenna better than a smaller one?  Well, certainly – in my case – it must be!  The smaller antenna was better than the larger one.  Although the larger antenna DID fix the problem with the tv tower 11 miles away cutting out, now the stations 22 miles to the west (FOX and ABC) now are cutting out!

So, I got to thinking – is there a way to combine two OTA antennas together?  I looked online and found folks talking about hooking up two TV antennas and then combining them with a splitter – which then runs back into the house.  However, many folks said that this would cause dual-pathing and other interference.  Now, because everything is digital, I’m not really sure if that would matter anymore or not.

I came up with another idea – why not connect both TV antennas together using a wire – and only one of them hooked to the coax!  So, that is just what I did.  I connected a 12-guage electrical wire (two wires) to the large antenna – and then connected it to the smaller antenna.

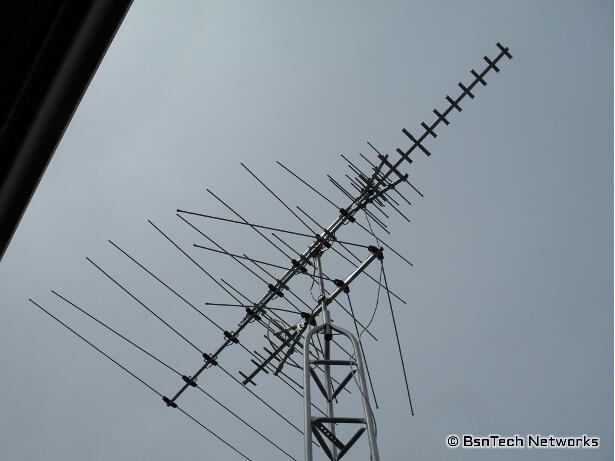
Now, this is my configuration.  You can definitely see the difference between the old TV antenna and the new one – it must be three times as big (or larger)!.  Notice the configuration – I have the “V” sections pointed in opposite directions; the largest antenna still pointing to the east – and the small one pointing to the west.

Hooking Up Two TV Antennas

The two antennas are maybe separated by two feet at the most.  it is hard to see how I have them hooked together in the above photo.  The wire you see on the right side is the coax cable – it is hooked to the largest antenna.

Combining Two TV Antennas

Look at the difference in size between those!

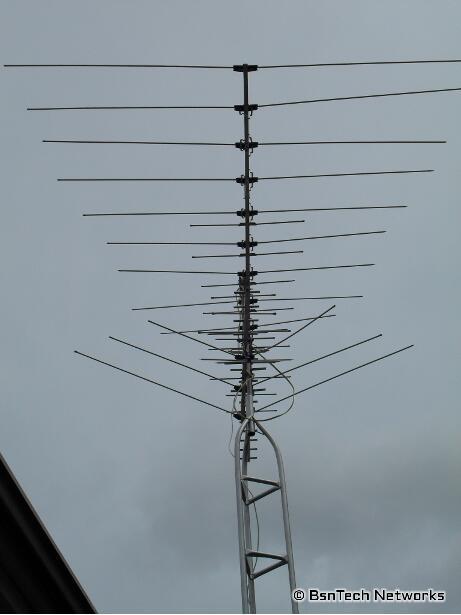
Hooking Up Two TV Antennas

Alright – this is the back view (looking to the east).  Do you see that wire that looks like is is looped a bit just above the TV tower on the right side?  That is my 12-gauge, 2-wire electrical wire that connects the two antennas together.

While it wasn’t exactly simple to hook up when you are on a tower, it is possible.

Down to the TV I went!

Guess what?  Now, I get all the stations in without any problems!  So, it goes to prove that you can hook up two OTA antennas together to get better reception!

I almost had a notion to take the larger antenna back – because it simply is too big.  It was $84 at a local garden/home store.  They had a smaller variety that was $20 less.  But, it just isn’t worth dismantling both antennas from the mast, taking apart the large one, returning it, then putting it all back up again.

So overall, this did fix the issue with the TV cutting out on the station that is only 11 miles away – and we picked up about four more channels – but they are all repeats of each other.

How to Change Your Joomla Administrator Folder

EDIT:  This page was updated on 8/29/2013 per some forums posts indicating I missed a <?php in a command below.

One thing that is a bit of an issue for Joomla pages is the fact that your administrator folder is not easily changed.  Well, it certainly would be nice if there was a feature in the Global Configuration that allowed to easily change your Joomla administrator URL, but it isn’t available.

There is a way that it can be done so it doesn’t upset your other 3rd-party components and plugins.

Previously I went into the includes/define.php and administrator/includes/define.php files and changed the administrator folder there – then renamed the folder to something else.  But after doing so, I saw this error on a page:

The configuration file for VirtueMart is missing!

It should be here: /administrator/components/com_virtuemart/virtuemart.cfg.php

So, I had to revert everything back to how it was.  Then I stumbled upon another way to rename the Joomla administrator folder – and it works well.

However, this method requires you to rename your htaccess.txt file to .htaccess.  Basically what this does – is it sets up a cookie and then it lets you access the administrator folder.  Without the cookie, you’ll get a 404 error if you attempt to access the Joomla administrator folder.

So first – make a new directory in the root of your Joomla installation (where your administrator, includes, components, modules, and other folders are).  Name it to the folder that you want to use to access your admin site.  So if you wanted to access your Joomla administrator directory using “joomla_admin”, then you would make a new folder called “joomla_admin”.

Now, go into the folder and create an “index.php” file and copy this contents into it:

<?php
$admin_cookie_code=”192837465“;
setcookie(“JoomlaAdminSession”,$admin_cookie_code,0,”/”);
header(“Location: /administrator/index.php”);
?>

Now save that file.

The next step is to add some rewrite rules to your .htaccess file.  Copy this code and add it somewhere in the .htaccess file in your main Joomla install directory; it can be placed right at the bottom if you desire:

RewriteEngine On
RewriteCond %{REQUEST_URI} ^/administrator
RewriteCond %{HTTP_COOKIE} !JoomlaAdminSession=192837465
RewriteRule .* – [L,F]

Note the numbers in the bold text.  You can change this to another number if you’d like – but you MUST ensure that the number is the same in both files.

Now – try to go to your site’s administrator page.  You’ll get a 404 error.  But, if you then type in the new folder path (such as “joomla_admin” as specified above), you will then be redirected to the administrator page – and this time it works!

How to Force Windows Wallpapers to Change

There are a few configuration changes that I make on computers that need to be set in the Windows registry.

With having over 600 computers that I oversee, making sure certain settings are configured are needed.  Our System Admins do a good job at configuring most things – but there are other changes that I like to take on myself.

One of the things that is unique to us is the fact that we change our desktop wallpaper across all computers as needed.  Unfortunately, there have been many cases where users change their own wallpaper to something else they’ve downloaded from Internet Explorer.  Once the users change this to something else, we were unable to force the windows wallpapers to change on the computers.

Not until I did a bit more digging and research.  Now, whenever we have a new wallpaper that needs to go out, we force it to do so based upon a login script.

First of all, this procedure is a bit more complex than my previous posts.  In essence, a batch file was created that automatically runs when a user signs into the computer.  So, that means that the person can change their wallpaper after logging in and the wallpaper is forced to be what we want, but once they log off and back onto the computer, it reverts back to our company’s wallpaper.

The login script does three things – (1) it copies the wallpaper from a share on the server so we just update this one file and it is automatically deployed to all computers when they log on, (2) it updates the user’s registry settings that revert back to the required wallpaper location, and (3) immediately forces the update of the wallpaper.

Here is our login script:

copy /Y \\<SERVER>\<FOLDER>\wallpaper.bmp C:\Windows\wallpaper.bmp
regedit /s C:\<FOLDER>\UpdateWallpaper.reg
RUNDLL32.EXE USER32.DLL,UpdatePerUserSystemParameters, 1, True

So just as previously described, the wallpaper bitmap file is copied from a server share to the local computer, the registry command is run to automatically import a registry file (showing that next), and then RUNDLL32.EXE is started which will force the changes to be updated immediately.

Alright – and now for the registry file.  It took many tweaks to get this right – but it finally is working.  The below registry file is imported every time someone logs into the PC – which then forces the Windows wallpaper to go back to what we want.  As in the login script above, this file is named “UpdateWallpaper.reg” and can be placed on the local computers – or even on the same server share.

Windows Registry Editor Version 5.00

[HKEY_CURRENT_USER\Control Panel\Desktop]
“Wallpaper”=”C:\\Windows\\Wallpaper.bmp”
“WallpaperStyle”=”0”
“TileWallpaper”=”0”
“OriginalWallpaper”=”C:\\Windows\\Wallpaper.bmp”
“ConvertedWallpaper”=”C:\\Windows\\Wallpaper.bmp”
“ConvertedWallpaper Last WriteTime”=hex:00,d8,8a,68,59,f2,c8,01

[HKEY_CURRENT_USER\Software\Microsoft\Windows\CurrentVersion\Policies\Explorer]
“NoChangingWallpaper”=dword:00000001

And that is all!  Just ensure you set that login script somewhere (maybe on the same server share) and set the computers so that the script is run upon user login.  This will then force all computers to have a standardized background wallpaper in Windows.

How To Disable Taskbar Grouping in Windows

There are a few configuration changes that I make on computers that need to be set in the Windows registry.

With having over 600 computers that I oversee, making sure certain settings are configured are needed.  Our System Admins do a good job at configuring most things – but there are other changes that I like to take on myself.

So – you don’t like the taskbar grouping of similar programs eh?  Well, let’s get rid of that!

This setting will be effective for all NEW users that login to the PC after this setting is made.  That means any user profiles that are already on the computer will not be affected – unless you delete them.  This process will disable the grouping of similar programs on the taskbar in the registry.

First, let’s open your favorite Registry editing program (regedit.exe).

Now, click the HKEY_USERS key and go up to File and choose “Load Hive”.  In there, you need to open the Default User profile’s registry file.  Type this in the box:

C:\Documents and Settings\Default User\NTUser.DAT

After you click Open, the Registry editor will ask you to give it a name.  Simply type in “ntuser” and hit OK.

Now, you have the Default User registry file opened for editing.  Now, it is time to disable the automatic grouping of programs on the taskbar.

Go to this location in the registry (assuming you named the file above ‘ntuser’ as indicated):

HKEY_USERS\ntuser\Software\Microsoft\Windows\CurrentVersion\Explorer\Advanced

You now need to create a new REG_DWORD key.  Right-click on the right frame and choose New – then DWORD Value.

Name:  TaskbarGlomming
Value:  0

Yes, definitely an odd value name to disable the grouping of similar items via the registry, but it works!  If you want to enable it, change the value to 1.

That is all!  Now any new users that login to the computer will have the grouping of programs in the taskbar disabled.

How to Disable Microsoft Office Communicator From Loading At Logon

There are a few configuration changes that I make on computers that need to be set in the Windows registry.

With having over 600 computers that I oversee, making sure certain settings are configured are needed.  Our System Admins do a good job at configuring most things – but there are other changes that I like to take on myself.

One of those configuration items that I change in the registry is to disable the automatic loading of Microsoft Office Communicator when new users login.  In many circumstances, the program is not used – and should not be used – by the majority of  our staff.  So when a new user logs into a computer, we do not want Microsoft Office Communicator automatically starting.

To remove the automatic loading of Office Communicator when new users sign into a Windows computer, you’ll need to make a change in the registry.  This setting is stored in the ntuser.dat file in the C:\Documents and Settings\Default User folder.

So to disable Microsoft Office Communicator from loading in the registry, open up the Registry program (regedit.exe).  Click the HKEY_USERS key and then to up to File and choose “Load Hive”.

You will then browse to the C:\Documents and Settings\Default User\NTUser.DAT file.  Open this file and it will ask you to name it.  Simply enter ‘ntuser’.

Now, you have loaded the default user registry hive so you can make the change needed.  Go here in the registry:

HKEY_USERS\ntuser\Software\Microsoft

Now you need to create a new folder here – so right-click in Microsoft, choose New and then Key.  You will name this key “Communicator”.

After the folder has been made, ensure you have the Communicator folder selected.  Now, you need to create a new REG_DWORD entry.

Right-click in the white pane on the right-side and click New – DWORD Value.  The name of the key needs to be “AutoRunWhenLogonToWindows”.

Now, give this key a value of “0” to disable Microsoft Office Communicator from automatically starting up upon login.  If you want it enabled, set the setting to “1”.

Change Internet Explorer Cache Size In The Registry

There are a few configuration changes that I make on computers that need to be set in the Windows registry.

With having over 600 computers that I oversee, making sure certain settings are configured are needed.  Our System Admins do a good job at configuring most things – but there are other changes that I like to take on myself.

One of those changes is to set the maximum cache size in Internet Explorer 6, Internet Explorer 7, and Internet Explorer 8 via the registry.  Setting the Internet Explorer cache size in the registry is simple to do – and here is how you do it.

If you just need to set it for only the currently logged-in user account, it is much simpler to just open Internet Exploer, go to Tools – Internet Options, and click Seettings on the browser cache.

However, if you want to set the Internet Explorer cache size in the registry for all users, you need to open the ntuser.dat file in the C:\Documents and Settings\Default User directory.  Note that any users that have already logged into the computer, this technique will not work – it will only take affect for those users that will login to that computer for the first time after you update the ntuser.dat.

Open your Regsitry Editor (regedit.exe).  Click the “HKEY_USERS” key and then go to File – Load Hive.  In the box to open, you’ll open the C:\Documents and Settings\Default User\ntuser.dat file.  It will then ask for a name – so just enter ‘ntuser’.

After that is loaded, you will now need to navigate to this location:

HKEY_USERS\ntuser\SOFTWARE\Microsoft\Windows\CurrentVersion\Internet Settings\5.0\Cache\Content

In this area, there already should be a “CacheLimit” REG_DWORD entry in there.  Now – the number you enter in this area needs to be a hex number.  So, here is what you do to get the hex.

Open your calculator on the computer and ensure it is in Scientific Mode (View – Scientific).  Now, type in the number you want the Internet Explorer maximum cache size set to.  For example, if you want 128 megabytes, you will enter 128 * 1024 (you multiply by 1024 because this is kilobytes).  This yields 131072 KB.  Now, click the Hex option.  This will yield “20000”.  This is the number you would then enter in the “CacheLimit” registry setting to set the maximum cache size for Internet Explorer in the registry.

All done!  The Internet Explorer cache size for all new users that login to the computer should be set at 128 MB.