Website Design for Exterior Arts, LLC

Tom, the owner of Exterior Arts, LLC, contacted us a few weeks ago looking for help with his website.  He was wanting to have a facelift for his site amongst some changes that needed to be done.

The original site was a “static HTML” site so it was difficult to make changes and updates.  We proposed creating a site with a newer open-source platform called WordPress.

After providing an estimate, we got started on the site.  The site has nine pages, it is mobile friendly, social networking with an Instagram feed, hover over menu navigation, a picture gallery, and a basic contact form.

Today, the website was approved and it is now live!

We appreciate the trust Tom placed in us for his website needs.  The Exterior Arts, LLC website is at exarts.com.

Website Design for NW Cyber Security & Lock

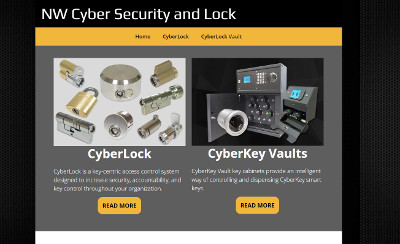
Tim called us in mid-January asking about our website services.  He was looking for a basic website to get his business name out.  He runs NW Cyber Security & Lock and is a dealer for some specialty locks for residential and commercial clients.

After the phone call, he was ready to get started on the site and went through our online ordering system and placed his order.  Within 24 hours, we had the website created and sent to Tim for his review.

A few changes were made to the website after the initial build and it has now been completed!

The website is our simple three-page web design service plus the add-on feature of a basic contact form.

The website for NW Cyber Security & Lock is at nwcybersecurityandlock.com.

Mail Delivery Failures On Contact Forms

Recently, BsnTech Networks has started to see an increase in the number of mail delivery failure notifications from contact forms on customer websites.

Why?  The larger e-mail providers – such as Gmail, Yahoo, and Hotmail (Outlook) have started to use some of the spam frameworks that are many years old.  One such policy is DMARC – which is what Google Gmail has started using in the past few months.

In essence, DMARC is a policy framework that ensures that a mail server is “authoritative” for sending e-mail from a specific domain name.  Because many contact forms are setup to have the “From” address as the e-mail address that someone filled in on the customer’s contact form, it makes it look like the message is coming from their e-mail address.

As an example – if someone goes to a customer’s contact form on their website and fills in an e-mail address of “johnny@yahoo.com”, it will send out the e-mail to the website owner and show it came from “johnny@yahoo.com”.  Well, if the website owner wants the form to be sent to an e-mail address on Gmail, Yahoo, or another provider, they may reject the message because the mail server / web server that sent the e-mail is not allowed to send a message from Yahoo users.

To fix the mail delivery failures on customer contact forms, you must hard-code the “From” address to one that matches the customer’s domain name.  As an example, our domain name is bsntech.com.  In the contact form settings, we would set the “From” address to something like “noreply@bsntech.com”.  The main key here is to ensure the From address has their domain name in it.  So it could be <anything>@bsntech.com – just as long as it has their domain name in there.

Because web hosting and mail servers are authoritative for the domain name of the website, the message should then be allowed through to providers like Gmail or Yahoo.

BsnTech Networks would be happy to help anyone that has a website contact form that is having difficulty receiving e-mails from their contact forms.  We have experience with fixing the mail failures from contact forms on websites.

LayerOnline Web Hosting Review

A customer contacted us back in March in order to do some updates to his site.  Originally, his site was on iPage but he was having major problems with iPage as a web hosting provider.  Therefore, one of his notes indicated that while the changes would be made, he would be looking for another web hosting provider.

We provided him the details and information about our website hosting but he opted to choose another provider that was slitly less expensive – LayerOnline.

During the course of our work with LayerOnline, we still ran into problems using FTP and sometimes getting into the cPanel account.  These were short lived luckily.

However, other issues existed – one of which is a major red flag to us.  This is why we opted to write a review about LayerOnline website hosting. On the website for LayerOnline, they note front and center on their website that they have 24/7 toll free tech support.  But wait – there is absolutely no phone number at all – anywhere – on their website!  Try to go to Contact Us or choose one of the other options, and it directs you to a contact form.

This was problematic for us when we needed support fairly quickly.  We had no direct contact with anyone – other than to submit a ticket that might take 24 to 48 hours to get a reply from.  So, they said we have 24/7 toll-free tech support and the search began to find their number.

Well, we found their number by doing a WHOIS query on their domain name.  What we found was a phone number of 877-665-2937.  It took us a good 30 minutes of searching online to find this phone number!

So I picked up the phone to try and call LayerOnline so we could get some issues resolved quickly – at least that was the idea.  I called the number and was greeted by the “Welcome to LayerOnline” message with an IVR of options.  I pressed the option for Tech Support – and then a voice came on asking me to say my name followed by the pound key.

That voice tipped me off about the IVR system.  They use a FreePBX IVR system – which is the same one that we use as well.  No problems there, just figured they would have a more enterprise-grade phone system since they are a MUCH larger company than us.

Before I could even say my name or hit the pound key, it immediately started playing some hold music.  About ten seconds later, the call dropped.

I called in again.  Chose the option for tech support, voice prompted me again, went to hold music.  Again, about ten seconds later, the call dropped again.

What does this tell me?  That tells me that they simply have the 877 number to say they provide a 24/7 toll-free number (which I guess is true), but you certainly are NOT going to get any support over the phone.

Hopefully this LayerOnline review of web hosting services is beneficial to those looking for a new provider.  BsnTech Networks also provides web hosting services and we have a fully functioning 888 phone number (although you may have to leave a message for us to return your call).

Securing Your WordPress WP-Admin Directory

Has your WordPress site been hacked or defaced?  That may be due to an insecure username or password that was setup for your wp-admin administrative portal.  BsnTech Networks has come up with a solution that will take care to secure your wordpress wp-admin directory by providing an additional layer of protection.

This protection will not work if you simply set the username and password for the password-protected directory to the same that your WordPress login is.  So take care to actually use a good username and password that isn’t guessed.  I recommend to not use a username like “admin” or “administrator” – but make it more personalized instead.  That will allow you to help prevent access to the wp-admin folder better.

With this method, we provide a pop-up box that asks for username and password if anyone attempts to access the wp-admin folder before it shows the actual login page. If this method is used in conjunction with the ConfigServer Firewall (CSF) instructions that I previously wrote about, there is a clear amount of security provided to your WordPress administrator portal.  CSF can be installed if you using a hosting provider that uses cPanel – or if you want this protection built-in, contact BsnTech Networks so we can host your website and make it much more secure than other providers out there.

So, if you at least want to help protect your WordPress wp-admin administrator folder more, you need to setup the folder as a password-protected directory – but also make it so that any other file within that folder can be accessed from components, plugins, and modules.  The instructions below are for web servers running Apache.

  1. Use the HTPASSWD generator to set a username and password.
  2. Create a file in the administrator folder named “.htpasswd”.  Note the dot in front of the file name.  Now copy and paste the line of code from the HTPASSWD generator into the file and save it.
  3. Create a “.htaccess” file in your administrator folder.  Again, note the dot in front of the file name.
  4. In the .htaccess file, use these lines and then save the file.
<Directory “<FULL_PATH_TO_ADMINISTRATOR_DIRECTORY>”>
     AuthName “Administration”
     AuthType Basic
     AuthUserFile <FULL_PATH_TO_HTPASSWD_FILE>
     require valid-user
</Directory>

<Directory “<FULL_PATH_TO_ADMINISTRATOR_DIRECTORY>/*/*”>
     Satisfy-any
</Directory>

<Files “admin-ajax.php” >
    Order allow,deny
    Allow from all
    Satisfy any
</Files>

Here is the information on what each of the lines above mean.  First, you need to know your full path on your web hosting provider and fill that in to the “FULL_PATH_TO_ADMINISTRATOR_DIRECTORY”.  So as an example, if you login to your web hosting account and see that your account is in the /customer/7828374/home/public_html folder – and you have WordPress installed right in your main directory, that “FULL_PATH_TO_ADMINISTRATOR_DIRECTORY” should look like this:

/customer/7828374/home/public_html/wp-admin

Next – AuthName “Administration”.  When the pop-up box comes up asking for username and password, it will show “Administration” in the popup box

AuthType Basic – This indicates that it is a basic authentication type against an Apache web server and to show the pop-up box.

AuthUserFile <FULL_PATH_TO_HTPASSWD_FILE> – This points to the .htpasswd file that you previously created that has the username and password in it.  As an example, if WordPress is installed in the root hosting directory and your hosting directory is /customer/7828374/home/public_html, that <FULL_PATH_TO_HTPASSWD_FILE> should be set to:

/customer/7828374/home/public_html/wp-admin/.htpasswd

require valid-user – Just that.  It means that the username and password that is in the .htpasswd file must be exactly matched to access the page.

Now, there is a second directory in there – “FULL_PATH_TO_ADMINISTRATOR_DIRECTORY/*/*” with a “Satisfy-any” clause.  This tells the server that anyone can access any sub-directory under the wp-admin folder and no password is required.  That is what allows other plugins for WordPress to work if they are referenced from within the wp-admin folder.  Notice the “/*/*” in the directory – that is the wildcard path that ensures that they are at least going down to another sub-directory in the wp-admin administrator directory.  If that is left out, then the WordPress administrative login page will not be protected.

Finally, there is another group of lines that start with <Files> and ends with </Files>  With WordPress, there is an AJAX file that many plugins need to use.  Those few lines ensure that the file can be accessed – but it has to be set exactly as noted above since it is right in the wp-admin folder and not in a subdirectory.

Do note that the above instructions will provide a second layer of security by protecting the WordPress administrator directory – but it still must be used in conjunction with a good username and password for the actual administrator login for WordPress.

Finally, let’s take a total look at the .htaccess file (again, should be placed in the administrator folder for WordPress) using the example /customer/7828374/home/public_html as the web hosting root folder:

<Directory “/customer/7828374/home/public_html/wp-admin”>
     AuthName “Administration”
     AuthType Basic
     AuthUserFile /customer/7828374/home/public_html/wp-admin/.htpasswd
     require valid-user
</Directory>

<Directory “/customer/7828374/home/public_html/wp-admin/*/*”>
     Satisfy-any
</Directory>

<Files “admin-ajax.php” >
     Order allow,deny
     Allow from all
     Satisfy any
</Files>

Securing Your Joomla Administrator Folder From Attackers

Previously, I wrote a way on how you could help protect your Joomla administrator folder from hackers.  However, that method doesn’t always work in many cases.  Why?  Because some components, plugins, and modules will need to use some materials from the administrator folder.

So, there is a better way to do it.  The absolute best thing to do is to password protect the Joomla administrator folder to help prevent attacks.  If this method is used in conjunction with the ConfigServer Firewall (CSF) instructions that I previously wrote about, there is a clear amount of security provided to your Joomla administrator portal.  CSF can be installed if you using a hosting provider that uses cPanel – or if you want this protection built-in, contact BsnTech Networks so we can host your website and make it much more secure than other providers out there.

So, if you at least want to help protect your Joomla administrator folder more, you need to setup the folder as a password-protected directory – but also make it so that any other file within that folder can be accessed from components, plugins, and modules.  The instructions below are for web servers running Apache.

  1. Use the HTPASSWD generator to set a username and password.
  2. Create a file in the administrator folder named “.htpasswd”.  Note the dot in front of the file name.  Now copy and paste the line of code from the HTPASSWD generator into the file and save it.
  3. Create a “.htaccess” file in your administrator folder.  Again, note the dot in front of the file name.
  4. In the .htaccess file, use these lines and then save the file.
<Directory “<FULL_PATH_TO_ADMINISTRATOR_DIRECTORY>”>
     AuthName “Administration”
     AuthType Basic
     AuthUserFile <FULL_PATH_TO_HTPASSWD_FILE>
     require valid-user
</Directory>

<Directory “<FULL_PATH_TO_ADMINISTRATOR_DIRECTORY>/*/*”>
     Satisfy-any
</Directory>

Let me go through these settings so it is easy to understand.  First, you need to know your full path on your web hosting provider and fill that in to the “FULL_PATH_TO_ADMINISTRATOR_DIRECTORY”.  So as an example, if you login to your web hosting account and see that your account is in the /customer/7828374/home/public_html folder – and you have Joomla installed right in your main directory, that “FULL_PATH_TO_ADMINISTRATOR_DIRECTORY” should look like this:

/customer/7828374/home/public_html/administrator

Next – AuthName “Administration”.  When the pop-up box comes up asking for username and password, it will show “Administration” in the popup box

AuthType Basic – This indicates that it is a basic authentication type against an Apache web server and to show the pop-up box.

AuthUserFile <FULL_PATH_TO_HTPASSWD_FILE> – This points to the .htpasswd file that you previously created that has the username and password in it.  As an example, if Joomla is installed in the root hosting directory and your hosting directory is /customer/7828374/home/public_html, that <FULL_PATH_TO_HTPASSWD_FILE> should be set to:

/customer/7828374/home/public_html/administrator/.htpasswd

require valid-user – Just that.  It means that the username and password that is in the .htpasswd file must be exactly matched to access the page.

Now, there is a second directory in there – “FULL_PATH_TO_ADMINISTRATOR_DIRECTORY/*/*” with a “Satisfy-any” clause.  This tells the server that anyone can access any sub-directory under the Administrator folder and no password is required.  That is what allows components, plugins, and modules to access any files in there that may be needed.  Notice the “/*/*” in the directory – that is the wildcard path that ensures that they are at least going down to another sub-directory in the Joomla administrator directory.  If that is left out, then the Joomla administrative login page will not be protected.

Do note that the above instructions will provide a second layer of security by protecting the Joomla administrator directory – but it still must be used in conjunction with a good username and password for the actual administrator login for Joomla.

Finally, let’s take a total look at the .htaccess file (again, should be placed in the administrator folder for Joomla) using the example /customer/7828374/home/public_html as the web hosting root folder:

<Directory “/customer/7828374/home/public_html/administrator”>
     AuthName “Administration”
     AuthType Basic
     AuthUserFile /customer/7828374/home/public_html/administrator/.htpasswd
     require valid-user
</Directory>

<Directory “/customer/7828374/home/public_html/administrator/*/*”>
     Satisfy-any
</Directory>

Installing ConfigServer Firewall on Ubuntu 12.04

It was time to change out server security from using Fail2Ban to a more robust security package – ConfigServer Firewall (CSF).  Fail2Ban has done a great job over the years with doing temporary bans on attackers going after services such as POP, SMTP, IMAP, and others.

But if you are looking for a more dynamic firewall solution for Ubuntu, ConfigServer Firewall (CSF) may be a good solution for a good security suite that allows for a higher degree of system protection.

ConfgServer Firewall can even check your core operating system files on a regular basis and uses hashes to determine if any files were changed.  CSF also will watch processes and alert you whenever your load is over a certain amount.  Plus the features that Fail2Ban offers with banning – plus the ability to do a more permanent ban after the same IP address (or IP adddress range) continues to attack for a certain number of times.

I’ve only had the software installed for a few days – but it is amazing to see all of the things that go on that you may not have known about.

One big event that I was starting to see with our servers was attacks against our customer websites.  Because I believe in providing the best security for website hosting to our customers, I enacted CSF along with some other changes (see the other two posts about protecting the admin folders for Joomla and WordPress sites).  When it comes down to it, website hosting customers just want their site secure and not to be hacked – so requiring an extra layer of security is a small annoyance but it pays off by having a much more secure website.

Enough background information as to why I installed it and some of the features of CSF.  Let’s get into installing CSF on Ubuntu 12.04

First, download it:

wget http://www.configserver.com/free/csf.tgz

That will download the file to your computer. Next, unzip it:

tar -xzf csf.tgz

Now, go into the folder where the files were unzipped and run the install script:

cd csf
sudo bash install.sh

The ConfigServer Firewall should now be unzipped and installed. You will find the configuration files in the /etc/csf directory.

Now, you need to configure the software. Open up the csf.conf file in the /etc/csf directory. There are a lot of notes in that file on how to configure and how to set the settings. Set these up to your liking.  Definitely ensure that you change the TESTING = “1” line to TESTING = “0”.  Also ensure that you set your TCP_IN, TCP_OUT, UDP_IN, and UDP_OUT variables correctly.  Don’t forget to add in all ports – especially SSH (or however you get into your server) otherwise you will lock yourself out.

There are other files that you should be aware of. If you want to specifically always make sure that some IP addresses are never blocked, open up the /etc/csf/csf.allow file. Put one IP address per line (or you can do a range – such as 1.2.3.4/24 where 24 is the subnet bits).

In addition, if you run a mail server and want to prevent some connections from known spammers at the firewall level, open the /etc/csf/csf.blocklists file. There are many different providers that keep a list of IP address ranges that are known to be a nuisance so you can “uncomment” those lines by just removing the “#” sign in front of the list.  Those that I’ve decided to use include SPAMDROP, SPAMEDROP, DSHIELD, HONEYPOT, BFB, and OPENBL.

Once you have your configuration set how you want it, you now need to start the two services that make ConfigServer Firewall work:

sudo service csf start
sudo service lfd start

If everything is configured properly, then the firewall should be up and active!

CSF.Conf Setting Ideas

Here are a few csf.conf setting ideas that you may want to consider.  Of course, it fully depends upon what your server does.

LF_DAEMON = “1”

  • The LF Daemon is the service that will watch certain logs on your server for attempted brute force attacks.  The LF Daemon is basically the same as Fail2Ban.  By setting LF_DAEMON to 1, it enables the feature.  Then you will need to go to the section in the CSF.conf that sets the ban limits (also shown in this post just below)

SMTP_BLOCK = “1”

  • If you run a mail server on your system, I would HIGHLY recommend that you sent the SMTP_BLOCK to 1.  This ensures that only the actual mail service (postfix, exim, etc) has the authority to send out messages to the Internet.  One of our customer’s websites was attacked about a year ago and they were able to upload a script that was able to bypass all of the mail system and send out spam directly to the Internet.  By setting SMTP_BLOCK to 1, it will prevent this from occurring.  Also note to set “SMTP_ALLOWUSER” and “SMTP_ALLOWGROUP” with the user accounts and groups that the mail server actually runs from.

SMTP_ALLOWLOCAL = “1”

  • Definitely ensure that this is set to “1” to allow your local server to send messages using the loopback connection, especially if you have SMTP_BLOCK set to 1.

SMTP_ALLOWUSER = “<users>”
SMTP_ALLOWGROUP = “<groups>”

  • In our case, we use Exim as our mail system.  On Ubuntu, Exim runs as the “Debian-exim” user /group.  Therefore, the SMTP_ALLOWUSER and SMTP_ALLOWGROUP is set to “Debian-exim” in our case.  If you leave any of the proper users/groups out when you have SMTP_BLOCK set to 1, your mail service itself won’t be able to send outgoing e-mail.

SYNFLOOD = “1”
SYNFLOOD_RATE = “100/s”
SYNFLOOD_BURST = “150”

  • Turning on Synflood protection.  If you have a fairly decent server, it won’t take much of any processing usage for this although the csf.conf file says it will slow down IP connections.  I’ve not seen any performance issues when turning this on.  In essence, SYN packets are sent to open a connection to the server – but SYNFLOODs are used to send half-open connections to a server and possibly cause a denial of service (DoS) attack.  Therefore, you can turn on the protection by setting SYNFLOOD to 1.  Then you can set the rate of how many SYN packets you are OK with receiving per second and then a burst rate.  The rate and burst were set to the defaults.

CONNLIMIT = “21;2,25;5,80;20,443;20,587;5”

  • This allows you to set how many connections you want to allow per IP address.  This also helps to prevent attackers that want to try and flood a service on your server.  As an example, I limit only two connections to port 21 (hence the 21;2) from the same IP.  I limit port 25 connections to 5 (25;5) from the same IP and so on.  You will put in the port – a semicolon – then the limit.  Separate each by a comma as noted above.

UDPFLOOD = “1”
UDPFLOOD_LIMIT = “100/s”
UDPFLOOD_BURST = “500”

  • Basically the same as SYNFLOOD as noted above – except this is for UDP floods.

LF_PERMBLOCK = “1”
LF_PERMBLOCK_INTERVAL = “86400”
LF_PERMBLOCK_COUNT = “2”
LF_PERMBLOCK_ALERT = “1”

  • I love this.  This is one thing that CSF has over Fail2Ban.  In essence, you can set when you want to “permanantly” ban an IP address after they have attempted several times.  Down further for the settings is the LF blocks setup per service.  Those are temporary bans and you can specify a temporary ban in those spots.  But after someone has been blocked temporarily so many times, it is time to do a more permanent block since they are nothing but trouble.  LF_PERMBLOCK set to 1 enables this feature.  The LF_PERMBLOCK_INTERVAL sets the “permanent” time period.  86400 is 24 hours.
  • LF_PERMBLOCK_COUNT needs a little bit of clarification.  In my case, I have it set to 2.  This means that after someone has been temporarily banned (using the settings for the specific services), the IP address will be banned for the LF_PERMBLOCK_INTERVAL.  However, even though I have it set to 2, it actually is 3.  That is because they will be blocked temporarily two times.  Then on the third time, they will be “permanently” blocked.
  • LF_PERMBLOCK_ALERT is set to 1 – which means I am alerted by e-mail whenever a permanent block goes into effect.

LF_NETBLOCK = “1”
LF_NETBLOCK_INTERVAL = “86400”
LF_NETBLOCK_COUNT = “2”
LF_NETBLOCK_CLASS = “C”
LF_NETBLOCK_ALERT = “1”

  • This is must like the PERMBLOCK noted above, but this actually will block a network range.  In the event that more than one IP address from the LF_NETBLOCK_CLASS is attempting to infiltrate your system, CSF will actually do a “permanent” block (set to the LF_NETBLOCK_INTERVAL) for the entire range of IP addresses.  I would definitely keep the LF_NETBLOCK_CLASS set to C – which means it will block and monitor only a class C network (254 addresses).  If you set this any higher, you are blocking thousands of IPs.

LF_TRIGGER = “0”

  • I would recommend keeping the LF_TRIGGER to 0 unless you are OK with setting the same trigger amount for each of your services.  In essence, this trigger can be set to “5” if desired – which means that after five failed attempts against any of the services you want to monitor – that IP address will be blocked temporarily.  By setting this to 0, it gives you more granular control over how many failed attempts you want to set on a per-service basis.  In my case, I wanted to block FTP after three attempts – and everything else after 5.

LF_TRIGGER_PERM = “0”

  • Again, I set this to 0 so I can specifically set the triggers for each service.  If you want to have the same trigger amount for each service, then this value can be set to the time period you want to temporary ban the IP address that is attempting access to your server.  As an example, set it to 300 seconds if you want to temporarily ban for 5 minutes.

LF_SELECT = “0”

  • I am debating about changing this.  If this is set to 0, that means the IP address that has undergone a temporary ban is only banned from that service (such as POP, IMAP, web, SMTP, etc).  If set to 1, then that means the IP address will be blocked temporarily from accessing anything on the server.

LF_SSHD = “5”
LF_SSHD_PERM = “300”

  • Here is where I specifically say that upon five failed attempts (LF_SSHD), the IP address will be temporarily banned for 300 seconds (LF_SSHD_PERM).  The “PERM” in the variable name is misleading – because it is not a permanent block – only temporary.  Of course, that temporary time period is set based on what you want.  With my systems, I set it to 300 seconds (five minutes) and then because I have the LF_PERMBLOCK set to 1 (noted above), they will be fully blocked for a full 24 hours (LF_PERMBLOCK_INTERVAL) after three temporary bans.

LF_SMTPAUTH = “5”
LF_SMTPAUTH_PERM = “300”
LF_FTPD = “3”
LF_FTPD_PERM = “300”
LF_EXIMSYNTAX = “10”
LF_EXIMSYNTAX_PERM = “300”
LF_POP3D = “5”
LF_POP3D_PERM = “300”
LF_IMAPD = “5”
LF_IMAPD_PERM = “300”
LF_HTACCESS = “5”
LF_HTACCESS_PERM = “300”
LF_MODSEC = “5”
LF_MODSEC_PERM = “300”

  • The settings above are just like the LF_SSHD.  The first one will tell CSF / LFD how many invalid attempts to allow before temporarily blocking the IP address.  Make note of LF_HTACCESS and LF_MODSEC.  I have some custom Regex rules listed below that will help you watch for bots attempting to access password-protected directories.  This is a HUGE benefit to us.

HTACCESS_LOG = “Log_Locations”
MODSEC_LOG = “Log_Locations”

  • One neat thing you can do with CSF is use wildcards (*) in the log file names.  Why?  Well, because if you do web hosting and keep separate log files for each of your customers, you will want to be sure that CSF / LFD scans those logs for any kind of unauthorized access attempts (401 errors).  So, let’s say that you have a setup like this:
    • Customer base path is /var/www/<user-login>
    • Logs are kept in /var/www/<user-login/logs
    • Access log is named access.log
    • Error log is named error.log
  • Well, you can set HTACCESS_LOG = “/var/www/*/logs/error.log” and MODSEC_LOG = “/var/www/*/logs/access.log” to scan every log file in all user directories.  Note the asterisk (*) where the <user-login> is.  Very beneficial.

Speaking of MODSEC logs, that leads me into the next topic of Custom Regex.

Custom Regex Files

This is where things really can help out if you have non-standard services that you also want to monitor connections for.  As an example, I have ensured that some of our other web programs that allow for logins are logged into a file that is already monitored – and then regex items were made to check those for invalid logins.  That way if attempts are made against those systems, they can also be blocked there.

A Regex helper can be found here: http://regex101.com/r/uO1vS2

That allows you to put in the log line that you want to try and match – and then a box above that to fill in the regex.  You will see that it was filled out with a log line I used along with the regex noted below in the first example.

Blocking 401 Unauthorized Attempts Against A Web Server

The big thing that I think will help out many people is to sense whenever someone is attempting to access a password-protected directory on your web server (think wp-admin for WordPress or administrator for Joomla).  When an invalid attempt is made, it throws a “401” error in the access log.  So, ensure that you have MODSEC_LOG set to monitor the log.  Then you will want to add this to your /etc/csf/regex.custom.pm file:

     if (($config{LF_MODSEC}) and ($globlogs{MODSEC_LOG}{$lgfile}) and ($line =~ /(\S+)(.*) 401 (.*)/)) {
          $ip = $1; $acc = “”; $ip =~ s/^::ffff://;
               if (&checkip($ip)) {return (“mod_security triggered by”,”$ip|$acc”,”mod_security”)} else {return}
     }

In essence, you can see the “401” in the first line.  That Regex will find any lines in the MODSEC_LOG file(s) that have a 401 in them (spaces on both sides to ensure it isn’t in an actual URL) and will temporary block the IP based on your LF_MODSEC setting (or LF_TRIGGER if you didn’t want to set the services independently with different trigger values).

Additional Regexes For ProFTPD

The Regexes included with CSF don’t fully match all of the items for ProFTPD logins.  Therefore, I made a couple of extra Regexes to ensure they worked right.  The first one will find any line that has “Login failed” in it.  Of course, if the login failed, you want it to be noted.  The Regex built in with CSF is more restrictive than this one:

     if (($config{LF_FTPD}) and ($globlogs{FTPD_LOG}{$lgfile}) and ($line =~ /(\S+\S+\s+\d+\s+\S+) (\S+) proftpd\[\d+\] (\S+) \([^\[]+\[(\S+)\]\): USER (\S+) \(Login failed\)(.*)/)) {
          $ip = $4; $acc = $5; $ip =~ s/^::ffff://; $acc =~ s/:$//g;
               if (&checkip($ip)) {return (“Failed FTP login from”,”$ip|$acc”,”ftpd”)} else {return}
     }

Here is another Regex that will find and block any that have SECURITY VIOLATION in it. This is done if someone tries to login to FTP using a root account:

     if (($config{LF_FTPD}) and ($globlogs{FTPD_LOG}{$lgfile}) and ($line =~ /(\S+\S+\s+\d+\s+\S+) (\S+) proftpd\[\d+\] (\S+) \([^\[]+\[(\S+)\]\): SECURITY VIOLATION: (.*)/)) {
          $ip = $4; $acc = $5; $ip =~ s/^::ffff://; $acc =~ s/:$//g;
               if (&checkip($ip)) {return (“Failed FTP login from”,”$ip|$acc”,”ftpd”)} else {return}
     }

Additional Regex for Dovecot IMAP

The built-in IMAP Regex into CSF didn’t work for me – maybe it is because of how I have logging setup, I’m not sure.  So I had to modify the regex to simply look for any line that has “failed” in it:

     if (($config{LF_POP3D}) and ($globlogs{POP3D_LOG}{$lgfile}) and ($line =~ /(.*)imap-login(.*)failed(.*)rip=(\S+)\,(.*)/)) {
          $ip = $4; $acc = “”; $ip =~ s/^::ffff://;
               if (&checkip($ip)) {return (“Failed IMAP login from”,”$ip|$acc”,”imapd”)} else {return}
     }

Well, I hope that this tutorial about setting up ConfigServer Firewall (CSF) on Ubuntu has come in helpful for some of you out there. Especially the bits including the csf.conf recommended settings and the custom regex help for CSF.

How to Delete all Unread Mesages in the Deleted Items

If you are like me, you want to keep your deleted items for a while.  In general, I will keep a rolling one-year backup.

But what happens if you have a lot of unread e-mail in your Deleted Items folder that you don’t want?  No problem.  This quick tutorial will help you understand how to delete unread e-mail out of your Deleted Items folder in Outlook.

For some reason, Outlook doesn’t allow you to sort based on whether an e-mail is read or not.  Thunderbird – Mozilla’s free e-mail program, does allow you to do this.

This tutorial was specifically written for Outlook 2010 – but may also be the same for Outlook 2013 as well.

First, you will click on your Deleted Items folder.

Now, go up to the ribbon and choose “View”.

Delete Unread Messages

After choosing the View option, click the “View Settings” button – should be the second from the left (as shown above).  The box that is shown below will then show on your screen:

Now, click on the “Filter…” option and then the “More Choices” tab:

Now put a check mark next to “Only items that are:” and ensure “unread” is shown in the drop-down menu.  Hit OK to get out of the Filter screen and then OK again on the Advanced View Settings.

You should then have a filter on your Deleted Items folder that shows only your unread messages.  Now you can select them all and delete!

Once you are done, just hit the “Reset View” button (third from the left) in the ribbon under the “View” menu.

A few extra steps compared to easily being able to sort unread e-mails in Thunderbird.  But either way, you can quickly delete unread e-mails from your Deleted Items folder in Outlook using just a few steps.

How To Compact a VirtualBox VDI

I’ve been struggling with this issue for a while, and I’ve uncovered how to do it now.

Many times, I setup a VirtualBox virtual server and do a lot of copying.  So, this will grow the dynamic drive from 4-5 GB up to about 20 GB or more.

Once the copying is done and the files are deleted, I’d like to then reduce the size of the VDI file to get back the hard drive space.

That is what is nice about using dynamic-sized VDI files in VirtualBox – you can specify how large the virtual server can grow to, but it doesn’t use the space on the drive unless the virtual machine actually DOES use that space.

But, compacting a virtual machine in VirtualBox isn’t just a matter of doing a single command – as many believe it to be.  There is another step that you must do first.

The first step is to zero out the space that was previously being used in the virtual machine – that no longer is being used.

You will need to login to the virtual machine itself (in this case, these instructions are for Linux-based virtual machines).  This command will zero out all of the free space on the dynamic drive.  So if you have a dynamic drive of 120 GB, it will zero out all of this free space (even if never used).

cat /dev/zero > zero-file

Alright, that might take a few minutes.  Believe it or not, I was surprised that it didn’t take very long.  You’d think with making a single file that could be 115 GB or so, it would take a very long time to do.  That wasn’t the case.

Now that the entire free space of the drive has been zeroed out, you need to now delete the file:

rm zero-file

Now, it is time to actually compact the virtual machine in VirtualBox.  I ran the command below over and over again, but it never changed the space being used by the VDI file.  That was because the steps above was missed.  VirtualBox will only compact a VDI file IF the space that was previously used – is zeroed out.  That tells VirtualBox that it is indeed free space.

VBoxManage modifyhd “<VDI_FILE_HERE>” –compact

Now be a little patient.  This will take care of compacting your VirtualBox VDI file!  Mine went from 19 GB down to 3.6 GB after about 10 minutes of waiting.

Running Ubuntu Without A Monitor Attached – X Fails

Recently I just setup another set of servers for my website hosting business.  In doing so, these new servers did not have the standard nVidia video card installed – but had an ATI HD Radeon and the other had an Intel graphics card.

When attempting to get them to boot without an attached monitor, the X server would not – giving errors saying ‘no screens found’.  Both the intel and the radeon drivers kept saying “No outputs definitely connected, trying again…”.

I restarted the servers several times trying things.  I re-ran “X -configure” to capture all of the details – but everytime the ubuntu servers restarted, it simply would not enable the screens when no monitors were connected.

I spent at least a full day browsing the Ubuntu forums trying to find a solution for this issue.  The thing is – I do not have any screens connected to the servers in the data centers – nor do I need them.  What I do need is the ability for the X server to still load so a cron script will start x11vnc and allow me to remotely connect in and access them.

Many posts later, I was stumped.  But, there were a number of pointers that I took from several posts.

The main thing is – if you are not using a monitor and just need a standard 1024×768 screen resolution, my solution seems to work well in Ubuntu 10.04.  I’m sure it also works in Ubuntu 11.04 and probably Ubuntu 12.04 as well.  In the coming weeks, I’ll be upgrading to the newer release to get up to date.

OK, without further introduction information, here is how I did it.

The first part was to down the EDID file from the monitor.  This was no easy task.  I kept reading over and over how I needed to run nvidia-settings and hit “Acquire EDID” to get a copy of the EDID BIN file.  But, I don’t have an nVidia graphics card, so this wouldn’t work!  Therefore, I managed to find a program – “get-edid”.  I then used the command below to obtain a copy of my monitor’s EDID file and save it:

get-edid > edid.bin

This then made the EDID file on my computer.  If you’d like, and you just simply need a 1024×768 VNC connection with 32-bit depth, my EDID file will work fine for you.  You may download my monitor’s EDID file here.

After this was done, I then copied the EDID file to the /etc/X11 directory.

Next step was to get the X configuration:

X -configure

This will then make a file in your home directory – xorg.conf.new.  Open that file and carefully pay attention to the “BusID” that is in the “Device” section.  This piece you definitely will need when creating your /etc/X11/xorg.conf file (if you choose to just copy my file below).

Next step – was to NOT use the radeon or intel driver.  If you just need to make a remote VNC connection to a computer without a monitor connected, you shouldn’t need any performance tweaks or other proprietary functionality.  So, I then copied the xorg.conf.new over to /etc/X11/xorg.conf and made a few modifications.

#1 – I added some information for a monitor (the monitor I made the EDID file for).  This highlights those changes under the “Monitor” section.

Identifier   “VGA-0”
VendorName   “ACR”
ModelName    “Acer S202HL”
HorizSync    30.0 – 80.0
VertRefresh  50.0 – 76.0
Option      “DPMS”

As you can see, I hadded HorizSync and VertRefresh.  The other settings were in there by default.

#2 – Under the Device section, I changed the driver from either “intel” or “radeon” to the generic “vesa” driver and added a CustomEDID option:

Option   “CustomEDID”    “VGA-0:/etc/X11/edid.bin”
Identifier  “Card0”
Driver      “vesa”

Please note the VGA-0 there – which is the name of the monitor listed above.  Ensure these all match up.

#3 – I modified the “Screen” section just slightly:

Monitor    “VGA-0”

Again, this matches up with the Monitor and Device sections.  Finally, I saved it, rebooted the machines, and BOTH of them worked!  Neither of them have a monitor connected, and now the X server starts up and shows a GUI without a problem.

So, for reference, here is my complete xorg.conf file.  You can certainly choose to use this if you are just wanting a 1024×768 VNC remote connection with a depth of 24 bits.

Section “ServerLayout”
        Identifier     “X.org Configured”
        Screen      0  “Screen0” 0 0
        InputDevice    “Mouse0” “CorePointer”
        InputDevice    “Keyboard0” “CoreKeyboard”
EndSection

Section “Files”
        ModulePath   “/usr/lib/xorg/modules”
        FontPath     “/usr/share/fonts/X11/misc”
        FontPath     “/usr/share/fonts/X11/cyrillic”
        FontPath     “/usr/share/fonts/X11/100dpi/:unscaled”
        FontPath     “/usr/share/fonts/X11/75dpi/:unscaled”
        FontPath     “/usr/share/fonts/X11/Type1”
        FontPath     “/usr/share/fonts/X11/100dpi”
        FontPath     “/usr/share/fonts/X11/75dpi”
        FontPath     “/var/lib/defoma/x-ttcidfont-conf.d/dirs/TrueType”
        FontPath     “built-ins”
EndSection

Section “Module”
        Load  “glx”
        Load  “dri”
        Load  “dbe”
        Load  “record”
        Load  “extmod”
        Load  “dri2”
EndSection

Section “InputDevice”
        Identifier  “Keyboard0”
        Driver      “kbd”
EndSection

Section “InputDevice”
        Identifier  “Mouse0”
        Driver      “mouse”
        Option      “Protocol” “auto”
        Option      “Device” “/dev/input/mice”
        Option      “ZAxisMapping” “4 5 6 7”
EndSection

Section “Monitor”
        #DisplaySize      440   250     # mm
        Identifier   “VGA-0”
        VendorName   “ACR”
        ModelName    “Acer S202HL”
        HorizSync    30.0 – 80.0
        VertRefresh  50.0 – 76.0
        Option      “DPMS”
EndSection

Section “Device”
       Option   “CustomEDID”    “VGA-0:/etc/X11/edid.bin”
       Identifier  “Card0”
       Driver      “vesa”
       VendorName  “ATI Technologies Inc”
       BoardName   “Unknown Board”
       BusID       “PCI:1:5:0”
EndSection

Section “Screen”
        Identifier “Screen0”
        Device     “Card0”
        Monitor    “VGA-0”
        Defaultdepth 24
        SubSection “Display”
                Viewport   0 0
                Modes “1024×768”
                Depth     1
        EndSubSection
        SubSection “Display”
                Viewport   0 0
                Modes “1024×768”
                Depth     4
        EndSubSection
        SubSection “Display”
                Viewport   0 0
                Modes “1024×768”
                Depth     8
        EndSubSection
        SubSection “Display”
                Viewport   0 0
                Modes “1024×768”
                Depth     15
        EndSubSection
        SubSection “Display”
                Viewport   0 0
                Modes “1024×768”
                Depth     16
        EndSubSection
        SubSection “Display”
                Viewport   0 0
                Modes “1024×768”
                Virtual 1024 768
                Depth     24
        EndSubSection
EndSection

I hope this post comes in useful for others looking to simply be able to remotely connect to a computer using VNC without having a monitor attached!