Garden Update for May 22, 2009

Here is the garden update, as promised, for May 22, 2009.  Things have really grown since the last full set of pictures.

Full Front Garden
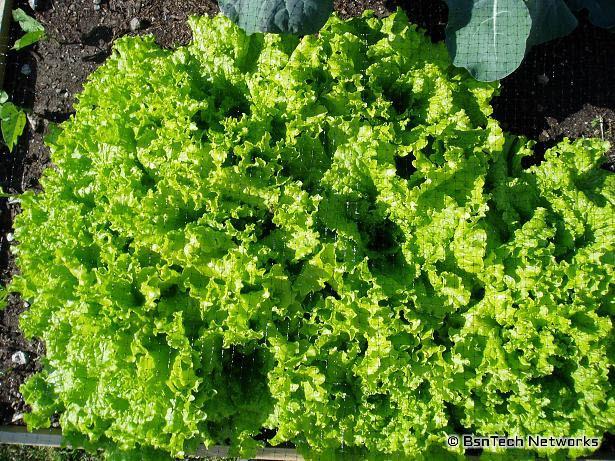
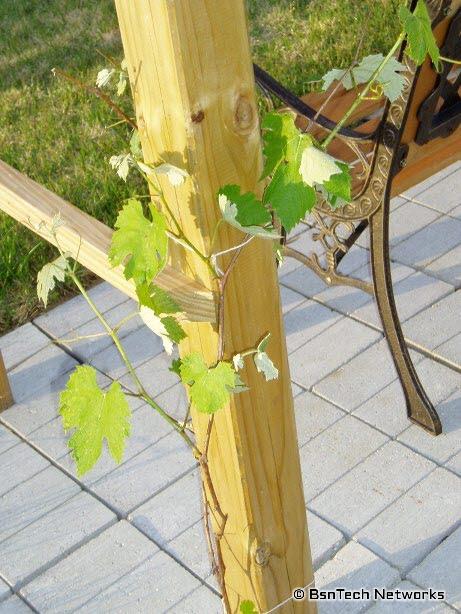
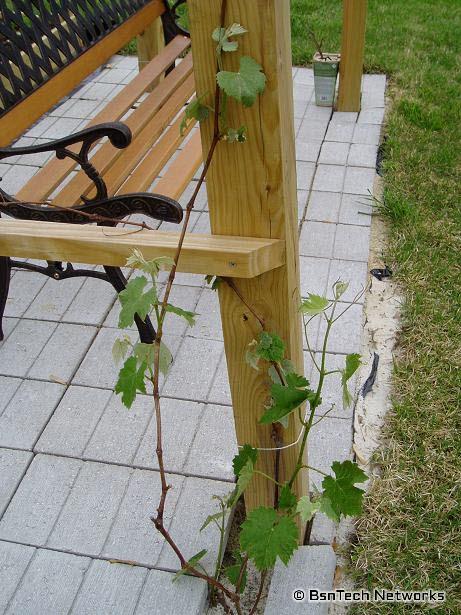
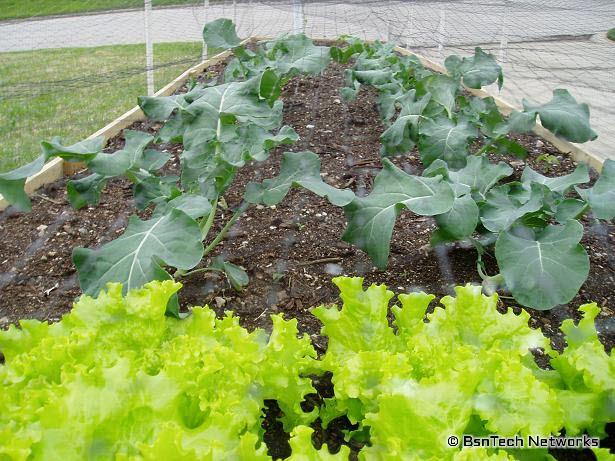
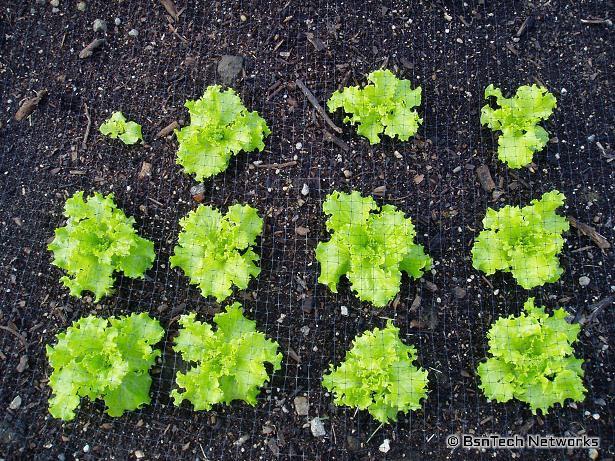
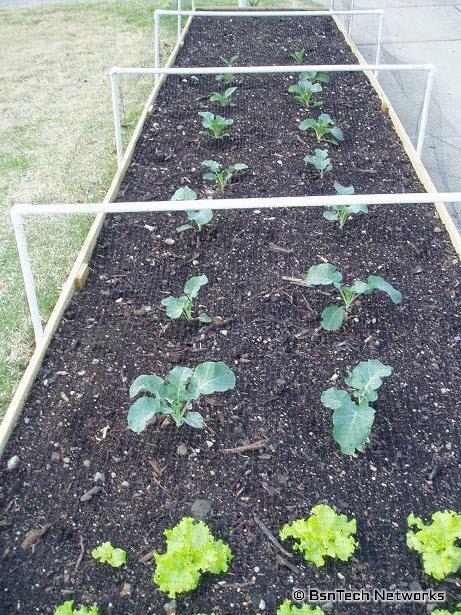
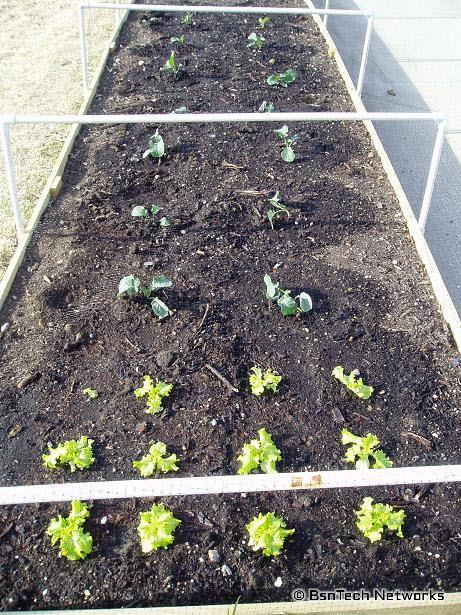
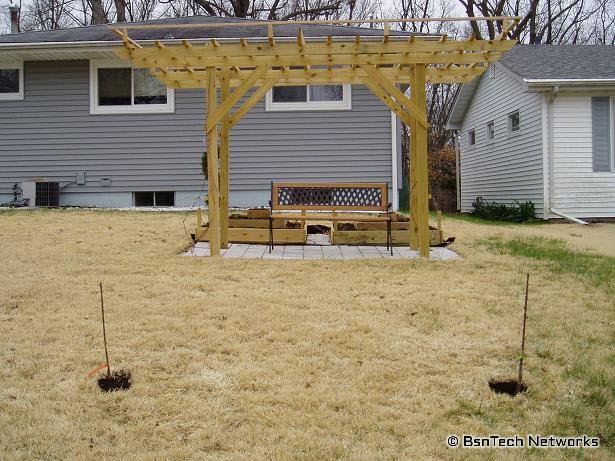
Picture of the front garden.  You can see the lettuce to the very left followed by the broccoli and cauliflower.  Not pictured are the peppers.  In the back, you can see the grape arbor and the two strawberry pyramids on the left in the background.

Front Garden #2
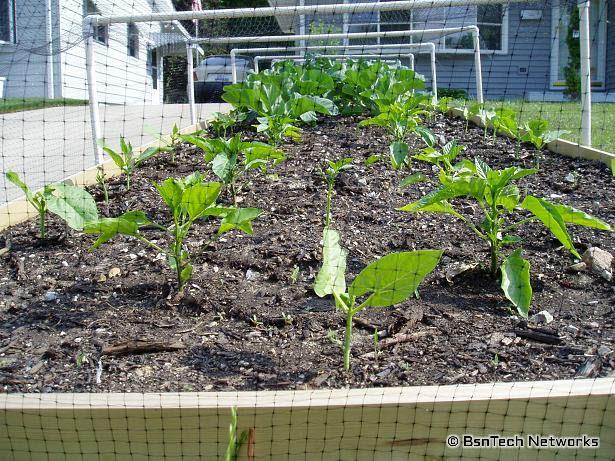
A picture of the front garden from the side where the peppers are.  Along the very two sides (and right in front) are the bush blue lake 274 beans.  I'm not too happy with the number of germinations with these.  Out of 84, about 52 came up.

Broccoli
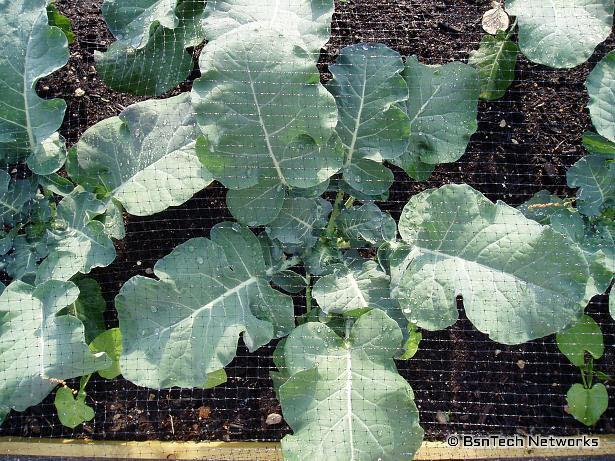
Top view of one of the broccoli plants.  They are doing very well!

Cauliflower
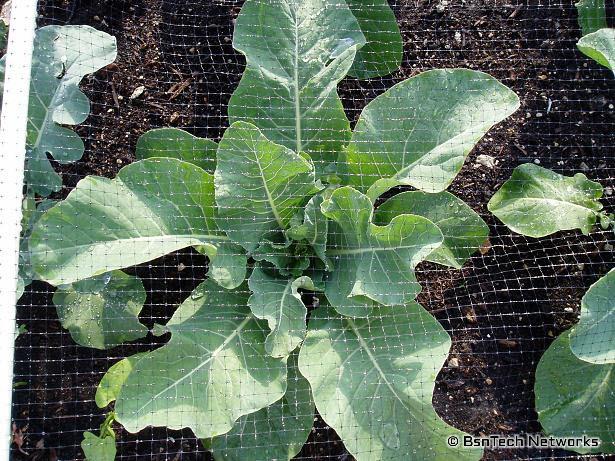
Top picture of one of the cauliflower plants.

Strawberry Patch
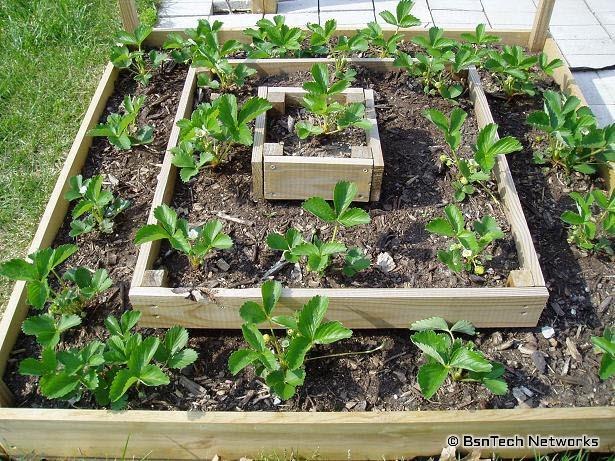
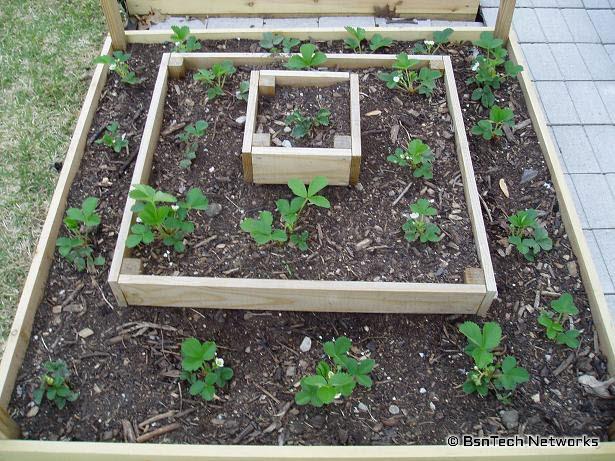
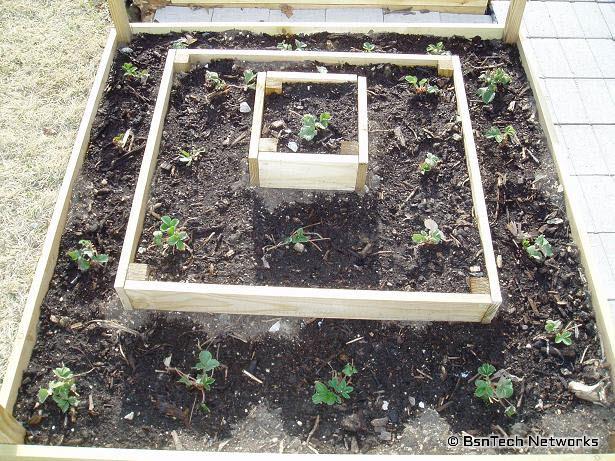
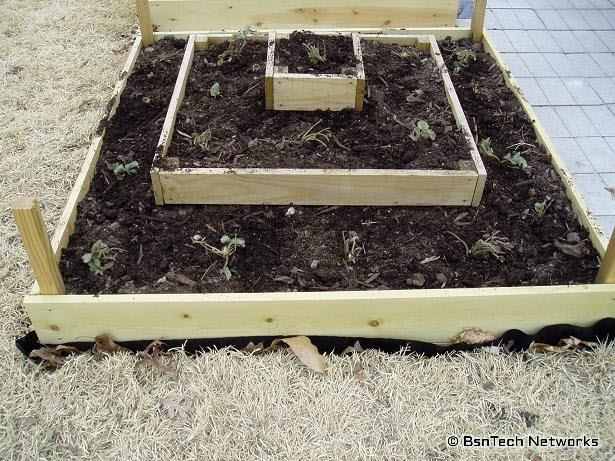
Picture of one of the strawberry pyramids.  The strawberries are growing very well and many have already lost their flowers and producing strawberries!  You can see – ever so closely in the second box on the very right, there is a little strawberry growing!  Right in the front you can see one of the tri-star strawberry plants putting out a runner off to the right.

Potato Bin
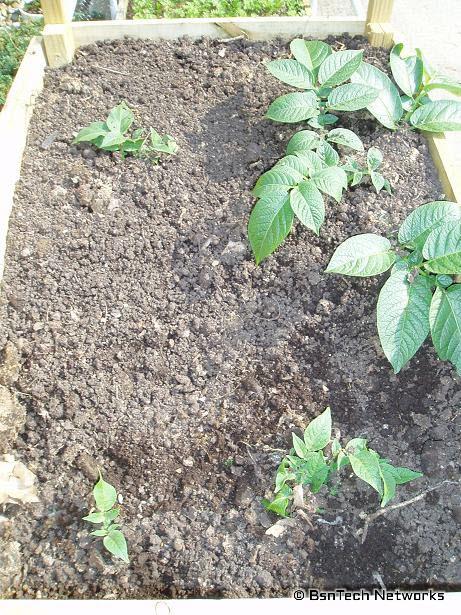
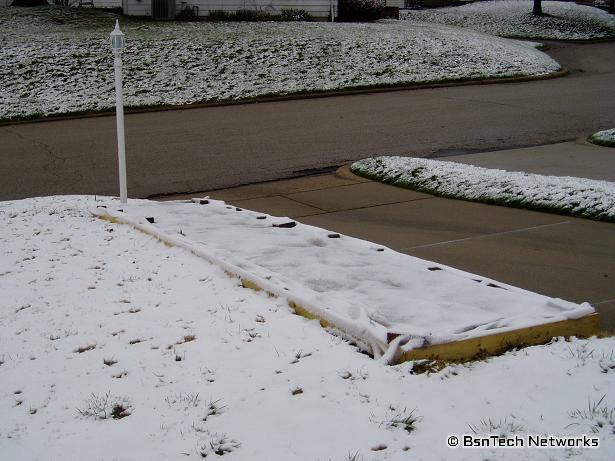
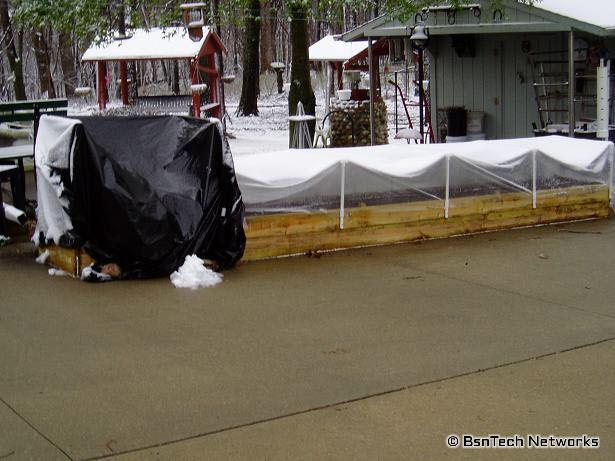
A picture of the potato bin.  I have added the rest of the boards to the bin.  The two front-most potatoes are still way behind the two back ones.  Although you can't see it in this picture, the soil is sloped downward towards the smaller potatoes.  Thank you to Sinfonian for assisting me with some questions.  He says that you do need to bury the full stem and leaves in order for the potatoes to be made all the way up.  Unfortunately, I didn't do this until recently so I still hope that this experiment is a success.

Potatoes
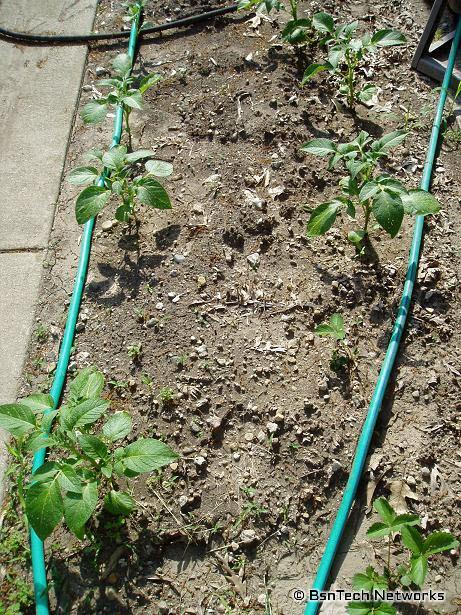
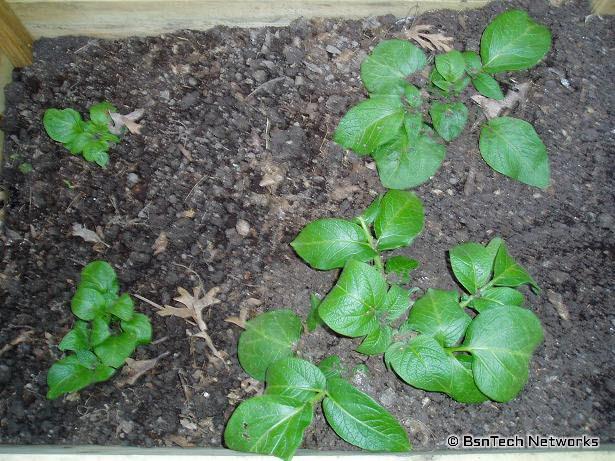
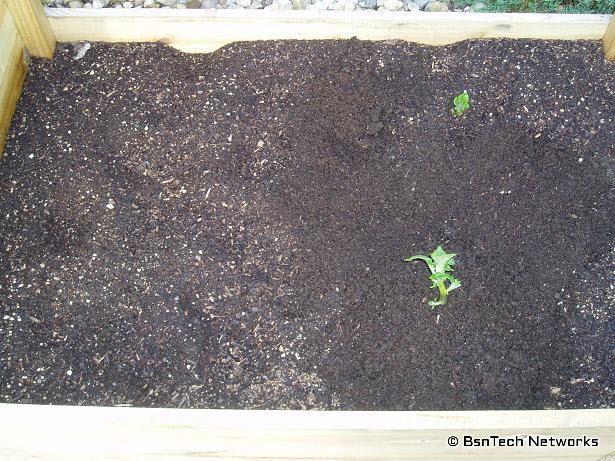
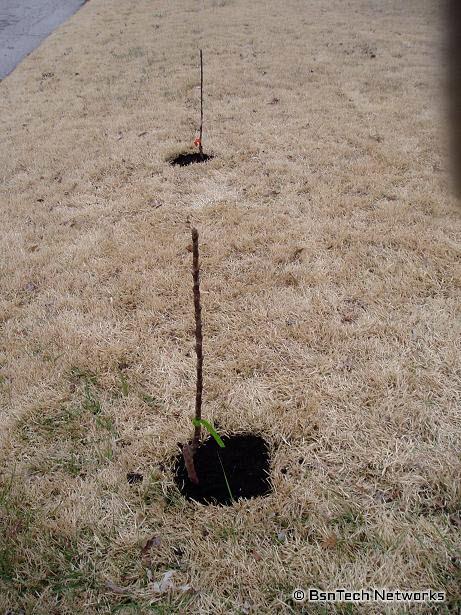
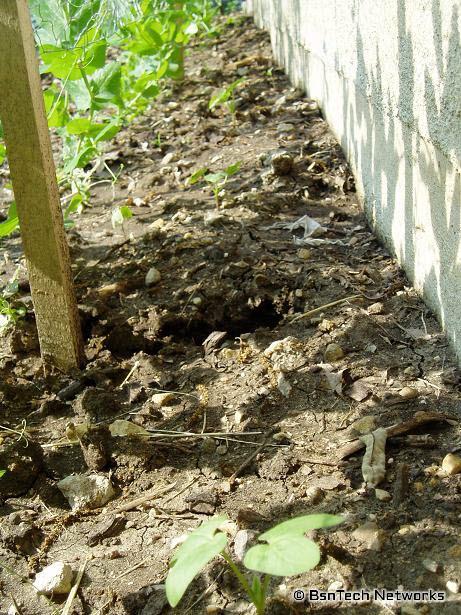
Potatoes growing by themselves in the garden.  The bottom right plant is not a potato – but is an extra strawberry plant I put here since there wasn't any room in the strawberry pyramid.

Carrots
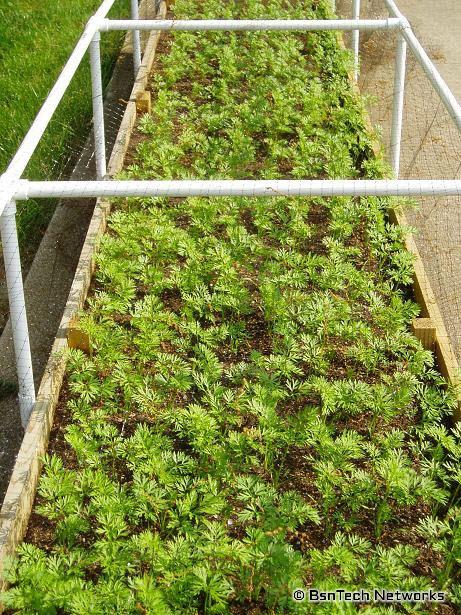
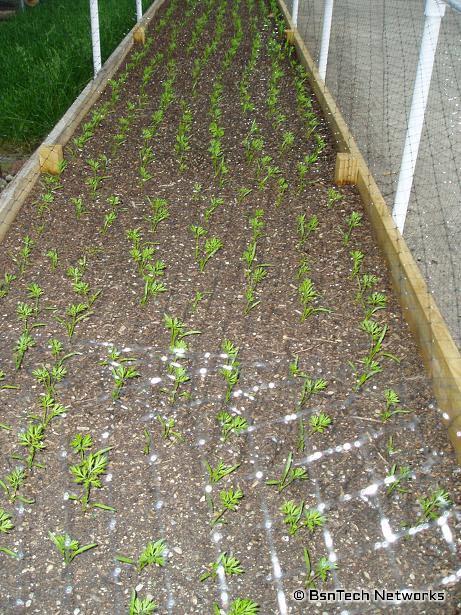
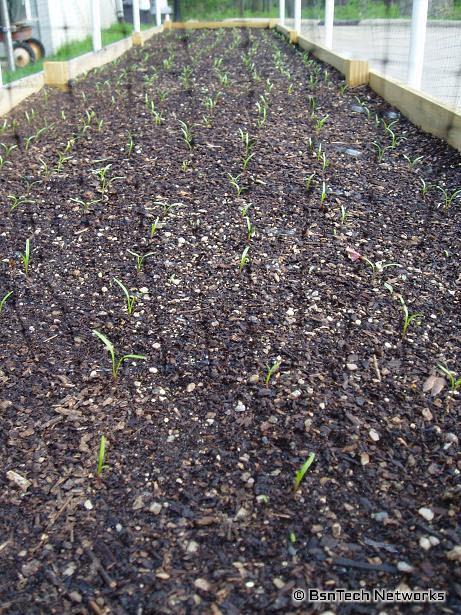
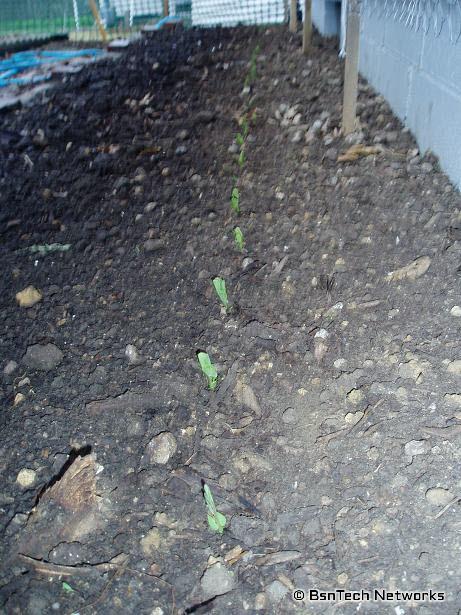
Oh my how the carrots have grown!  They are getting to be pretty bushy and growing very well.  Unfortunately, with any kind of rain or water, they all bend over and it takes overnight to get them back up.  I guess the water must be like alcohol and they all fall over!

Side Garden
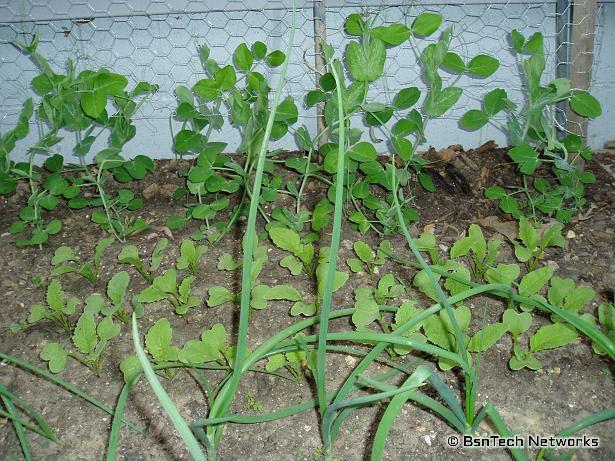
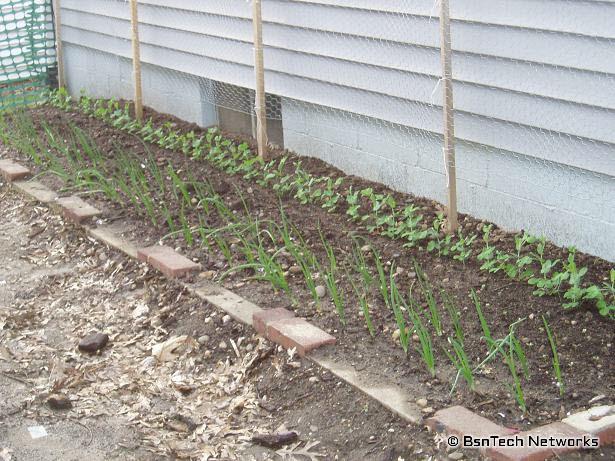
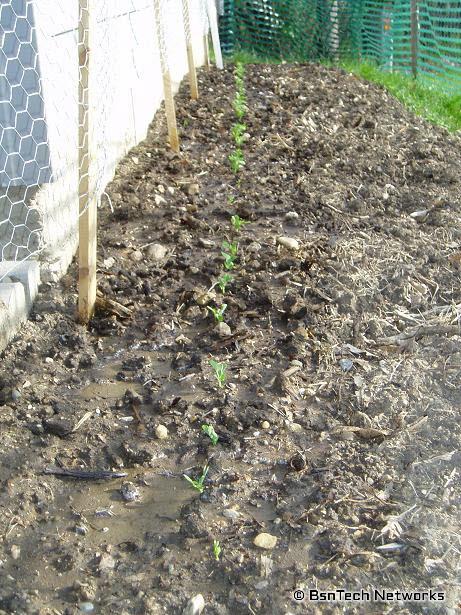
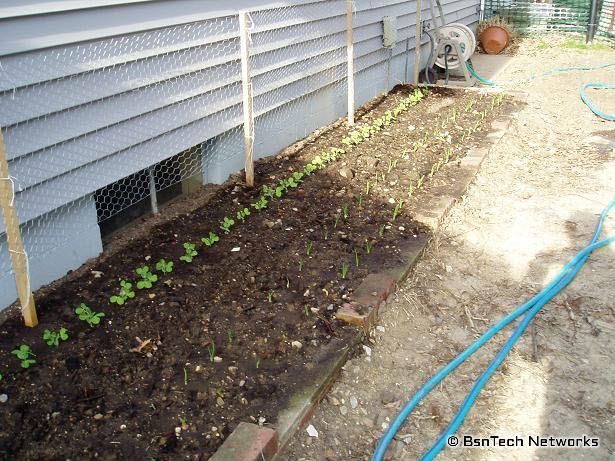
The side garden with a combination of onions down the left side, radishes in the middle, and the peas on the left side.  The peas have at least tripled in size in the past few weeks!  A few more days and the first batch of radishes should be ready for picking as well.

Peas & Radishes
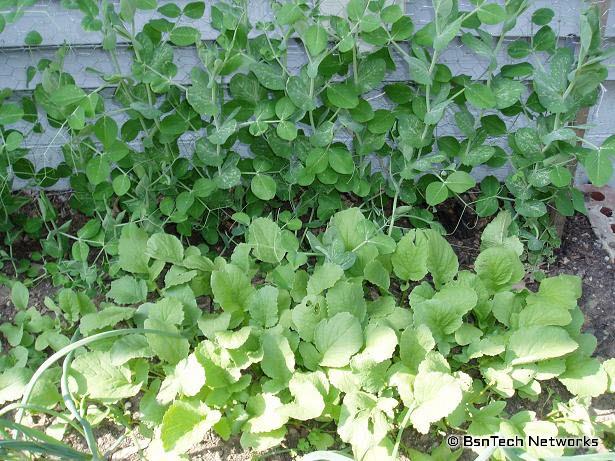
A closer look at the peas and radishes.  The peas are being held up by chicken wire fencing.  They definitely needed to be trained to grasp the fence when they were young – because I didn't put the fence all the way at ground level, but about six inches higher.  I chose to do this because the chicken wire fencing is only 24 inches tall (two feet) and the peas can grow to three feet.

Tomatoes & Peas
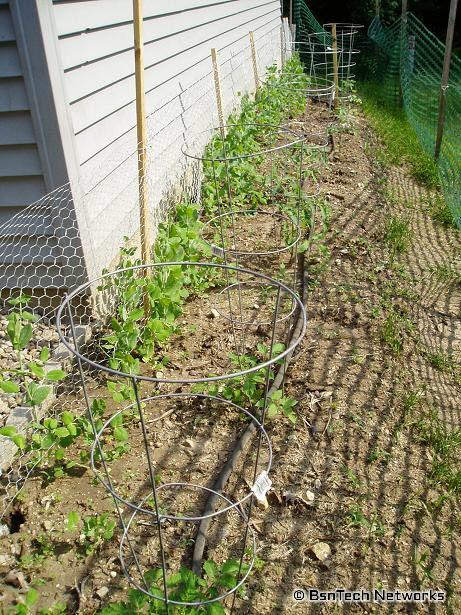
The back garden with the three varieties of tomato (best boy, roma, and red cherry tomato).  Peas on the left side along the chicken wire fence.  These peas aren't doing as well as the ones against the house, but they also sprouted a whole week later – if not later.

Tomato
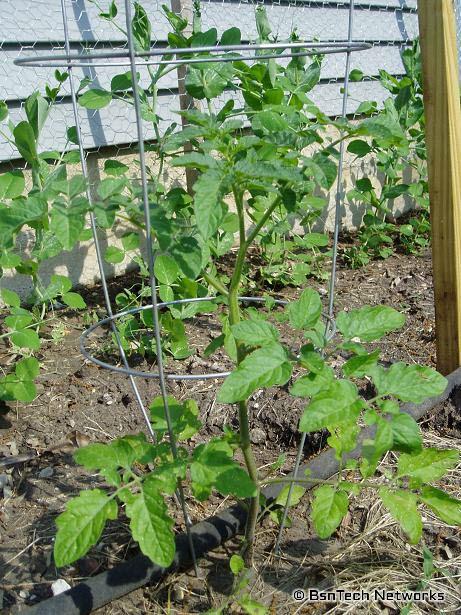
A close-up of one of the tomatoes in the garden.  They have at least doubled in size since they were put out two weeks ago.

Cucumbers
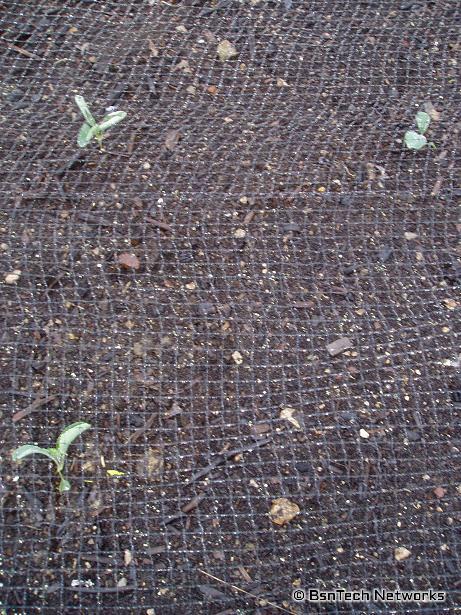
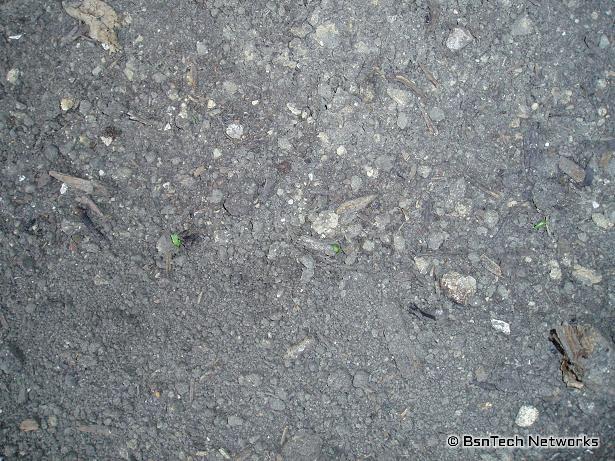
Here are the three cucumbers that have sprouted.  I believe these are the burpee picklers.  None of the marketmore 76 cucumbers came up – but I think it is because the seed was at least two years old.  That is unfortunate because that means no large cucumbers this year.  It was hard to take this picture because I put them behind the peas so they will use the same fencing.

Welp, everyone come back to see next week's update!  Not too much longer and I believe the peas are going to start putting on flowers and making those edible pods!

Lettuce Pickings!

The Black Simpson Elite lettuce is doing great!  So far we have plucked over a two pounds from the 12 lettuce plants.  The first round of lettuce came in around 6 ounces, the second round at 3.75 ounces, the third round a few days ago yielded 13 ounces, and the newest picking – today – weighed in at 1 pound 6.75 ounces!  The lettuce were starting to take over the area very well so I had to pick a lot more last time.

Lettuce from May 15th

Above the lettuce picked from May 15th that weighed 13 ounces.

Lettuce Garden - May 21 2009

The lettuce garden before picking on May 21st.

Lettuce Picked May 21, 2009

Lettuce picked on May 21.  The scale only shows 14 ounces because I couldn't fit it all in the bowl!  In total, there was 1 pound, 6.75 ounces picked.

Unfortunately, one of the 12 plants succumbed to some sort of disease or parasite.  I noticed on Sunday that it appeared the leaves were turning yellow and getting holes in them at the ground surface – and falling off the plant.  Yesterday I went out to look and the rest of all of the leaves were off and withered.  I had to still pull some of them from the main stem.  There were a whole bunch of rollie pollies making home under the lettuce – so I wonder if they are the culprit.  I sure hope not – otherwise that means they will get into the rest of them – just a matter of time.

The rest of the garden continues to grow and I'll have to post new pictures soon.  The peas have really taken off and the carrots have tripled in size.

We’ll Have Grapes This Year!

Well, I am pretty impressed.  I purchased four different grape vines and a Granny Smith tree from an online nursery – Willis Orchards – in the fall of 2008.

From other posts, I put some pictures ot the Granny Smith tree with blooms on it.  Willis Orchards noted that the tree was "fruiting size" and it indeed appears there will be little clusters of apples on the tree this year.  We'll have to pluck most of them off to keep the apples from weighing down the branches.

For the grape vines, we purchased a Niagara, Concord Seedless, Crimson Seedless, and a Flame Bunch Seedless.  The reason I chose those varieties was because they all ripen at different times – and they are all different colors!  Niagara is green, Concord has a dark purple, the Crimson Seedless is an orange-like color, and the Flame bunch grapes are red.  It was going to look great on the arbor out front with all of the colors!

Unfortunately, when I received the four, I was less than happy with two of them.  The Niagara and Crimson grapes looked like little twigs and were very busy with twigs going every which way out of the main vine.  The Concord Seedless and the Flame bunch looked fantastic with two or more canes that were two or more feet long.

I e-mailed Willis Orchards with the below pictures and complained again about the Niagara and Crimson grape vines.  When I first got them, I asked if they were sure that they were three-year old plants (I made sure to get the three-year old instead of the one-year old vines so they would mature and produce grapes quicker).  At that time, they ensured me that they were three-year old vines.

Concord Seedless:
Concord Seedless Grape Vine

Flame Bunch:

Flame Bunch Grape Vine

As you can see, those two grape vines are doing great with good growth.  Now, for the ugly.  These two were planted exactly the same as the Concord and Flame – but look at the difference with them.

Niagara:

Niagara Grape Vine

Crimson Seedless:

Crimson Seedless Grape Vine

These two bad grape vines are going to really throw off the coloration of the arbor – not to mention there will be a lot of spots to fill in.  Even if I get two new grape vines, they will now be a year behind the other two.  I usually do not complain as I am a quiet and timid individual, but this sort of ticks me off that they sent such small twig-like vines.

On a positive note, both the Concord Seedless and Flame bunch have small grape clusters on them!  Each vine has one small grape cluster – so it looks like we will at least have a few grapes this year.

Concord Seedless grape bunch:

Concord Seedless Grape Bunch

Flame Bunch:

Flame Grape Bunch

Gardening Update

Not too much has happened around the garden except the veggies growing very well!  We did plant about 250 seeds of Sugar Dots corn last weekend – and only about 42 of them have come up thus far.  About 200 of the seeds planted could have been up to two years old – and out of those, very few have come up.  The 50 new Sugar Dots seed that was received this year seems to have about 75% of them up thus far.

Today I also planted 24 more crimson radishes along with three each of the Marketmore 76 and Burpee Pickler cucumbers.  The Bush Blue Lake 274 green beans were also planted last weekend – about 83 were planted.  Many have broken the top of the soil with a few that have some leaves on them already.

 Anyways, here are some pictures of the garden.

Grapes – this one is the Concord Seedless.  The Flame Bunch also is doing nicely – although the two runts – the Niagara and Crimson – look completely dead.  I wasn't too happy with these two varieties I received from the nursery because they were very small unlike the Concord Seedless and Flame Bunch.
Concord Seedless Grapes

And the strawberries.  I just had to replace another one today that was dead in the pyramid.  I now have two extras planted in the back just in case another one dies.  So far I've replaced two of them.
Strawberry Pyramid

A picture of the green onions in the front, crimson radishes in the middle, and the dwarf gray sugar peas growing in the back.  For next year, I will know that I need to start the fencing at ground level.  These poor little peas have needed a lot of help clinging and starting their way up the fencing.
Dwarf Sugar Grey Peas

Potatoes are coming along nicely in the potato box.  I've been filling the box up pretty good.  The one on the bottom right is doing fantastic while the other three are still small.
Potatoes in the Potato Bin

The carrots are also doing great.  They keep on growing!
Burpee Carrots

How about the Black Simpson Elite leaf lettuce!  I pulled a large leaf off of each of the 11 plants here yesterday and had a salad for two people.  Very fresh.
Black Simpson Lettuce

And lastly – the broccoli patch.  The Bush Blue Lake 274 green beans were placed down the entire raised bed here on either side – all six inches apart. 
Broccoli

Welch’s Grape Fruit Juice Wine Completed

Back in February, we began making our own wine.  I wanted to experiment a little bit first before the grapes begin to produce their fruit – which will be used to make wine as well.  The grape vines still have about three more years before getting any decent amount of fruit.

So, we started off using Welch's Grape Fruit Juice.  One thing to note when buying grape fruit juice for this purpose is that it cannot contan any sorbate.  This hinders the yeast from growing and therefore you cannot make wine from the fruit juice.

We purchased five gallons of grape fruit juice.  After putting it into a plastic carboy – known as a "Better Bottle", we then had to mix in quite a bit of sugar.  Although I do not remember how much sugar was used, the specific gravity (measured with a Hydrometer), was approximately 1.105.

The yeast we used – Red Star Montrachet – is known to have a weakness with too much over 1.10 specfic gravity.  After mixing in the grape fruit juice, the yeast, and sugar, we let the solution sit in the Better Bottle for about 2.5 months.  On top of the Better Bottle, you need to put a cap on the top in addition to an airlock.  This prevents any oxygen from getting into the container and contaminating your wine.

It is also VERY important to ensure that all of the tools and containers that come into contact with your solution is very well sanitized – I used Five Star StarSan for this purpose.

While not required, I also added five campden tablets (basically this is Potassium Metabisulfate) into the five gallons of solution as well and mixed it in.  By adding the campden tablets, it helps the yeast compete against any other bacteria – if any got in without proper sanitation.  Stir everything in very well and then place your cap and airlock on.

Wine Stirring

 We went to a place in Maryville, IL – William James Trading – that sold wine and beer brewing materials.  While we were there, we purchased a REAL Better Bottle (the one shown above is just a five-gallon water container), a mixing rod that connects to a drill for quick mixing, a few chemicals that would be needed down the road, more yeast, and a five-gallon "Ale Pail" bucket.  The first order was done through Leeners onlne for a few items to even get this far – such as the campden tablets, yeast, and a few other items like some clear tubing.

After a few months, I went back to check since the air lock was only bubbling once about every two minutes.  While I could have let it go on longer, I decided this was enough.  I did another specific gravity reading – and this time it was at 1.007.  I have been told that to find the alcohol content, you simply subtract the beginning measurement from the ending.  So:

1.105 – 1.007 = 0.098

That represents 9.8% alcohol by volume.  While that isn't exactly a perfect match, its good enough to go off of.

After this, the folks at William James told me that I should add one campden tablet per two gallons and one teaspoon of sorbate per two gallons.  We crushed up the campden tablets, poured the sorbate in, and really stirred it up good.  You have be careful though – because it really brings up the carbon dioxide out of the wine – and to the top – almost like shaking up a can of soda and then opening it!

After adding that all in, we then put the cap and air lock back on.  We waited a week and there was zero activity with the airlock – which means it is ready for bottling.

The reason you add the campden tablets and sorbate to the finished product is to kill off any remaining yeast and bacteria in the wine.  If there is still yeast in the wine after you bottle it, your bottles will explode and make quite the mess!

So today, a week after adding the stuff, we bottled the wine.  It made four gallons and 1.5 liters.  We opted to buy the 1 gallon jugs from the William James Trading place – because I didn't want the extra expense of buying all of the bottles, corks, and a corker for this first time.

As funny as it may sound, we also filtered the wine when bottling it.  When I took the last specific gravity measurement with the Hydrometer, we noticed there was a lot of sediment in the container.  So, we racked the wine from the Better Bottle into the five-gallon Ale Pail.  There was a huge amount of sediment left on the bottom, but that still wasn't good enough for me.  So, I got an old powerhead from a fish tank (it was very well cleaned first) and we put a coffee filter over the intake.  After we filled each gallon jug, we changed the coffee filter.  It was a very inexpensive way of filtering the wine – instead of buying one of those $200 wine filtering systems.

So, we now have quite a lot of wine to drink!  It will hopefully be in storage for a few months, but right now it is quite sweet but has a kick to it as well.  We usually drink a Lambrusco series of wine around the house, but our wine isn't as sweet as Lambruso, but has a higher alcohol content.

Wine Equipment

Finished products

Gardening Pictures

Here are some more photos for the week of April 26th.

Here are the peppers and tomatoes coming along under the lights.  There are a few cauliflower and broccoli mixed in that I seeded as backups in case one of the others don't make it.

Seedlings

Seedlings

The Granny Smith apple tree is also putting on flowers.  Maybe we will get some apples this year!  I bought this last year from Willis Orchards online – and they called it "fruiting size" so I hoped we would get some apples this year or next.

Granny Smith Apple Tree

The tri-star strawberries are coming along well!  I had to replace one because some stray cats dug one up.  Luckily I received about 50 strawberries with my order to RainTree Nursery and I have four extras that wouldn't fit in the two pyramid boxes – so I just transplanted one to replace it.  The strawberries are also getting flowers on them, but they will need to be plucked off until mid-June.

Strawberries

The peas and onions are coming along very well.  I hope that I do not need to move the fencing up a little bit, because the fencing is about two inches behind the peas.

Peas & Onions

I have two potato plants coming up out of the five that were planted in the 2 x 3 potato bin.

Potatoes

The carrots sprouted over the past weekend.  I counted today and there are 313 carrots that have come up thus far.  That isn't too bad considering I planted around 400 or so.

Carrots

The lettuce has really taken off as well!  This time last week they were still very small, now they are starting to take over the space.

Lettuce

Lastly, the cauliflower and broccoli have taken off as well.  Pretty amazing what a week does.

Broccoli & Cauliflower

The wife and I also planted 252 Sugar Dots corn today.  Over the weekend we visited her parents.  I worked most of the day tilling a 6 x 40 area and got the Yukon Gold and Kennebec potatoes planted.  I was wore out after all the work and quite the sunburn.  I also wanted to get the area for the corn tilled up, but it just didn't happen.

Garden Progress

Just a quick update on the progres of the garden so far.  I planted two more broccoli and two more cauliflower today – to make a total of eight for each of them.  I will be planting the green beans next week and the peppers in a few weeks.  I still have yet to figure out where to put the cucumbers.  I used all the space for the peas and forgot about the cucumbers!  I might just have to seed the cucumbers in with the peas since the peas will be done in mid-June.

Here is the front garden as of today with the broccoli, cauliflower, and lettuce.

Front Garden

The Granny Smith apple tree also has started to grow a few leaves here and there this week.

Granny Smith

… And the strawberries are growing very well too!

Strawberries

The peas against the back of the garage finally started to make progress starting this past weekend.  Apprxomiately 58 of the 64 peas have sprouted thus far.

Peas against the garage

And lastly, 100% of the peas against the house sprouted several weeks back now (all of them sprouted before one pea sprouted behind the garage!).  You can also see the two rows of onions doing very well; those were planted two weekends ago.

Peas & Onions

Carrots/Potatoes Planted, Peas Sprouting, Front Garden

Got back from a weekend away visiting family in Chicago.

Before going, I planted the onions outside in the same area where the peas are – since there is still plenty of room to use there.  I planted approximately 30 – 40 each of the yellow onion and white onion sets.  I placed them about six inches apart because I'm not looking for too many of the green onions, but the full bulbs that we can use in cooking.  The green onions are not used very much in our cooking.

In addition, I put some deer "fencing" (more like a plastic mesh) over the front garden to keep the deer out.  I didn't want to return after a weekend away to see all the lettuce, broccoli, and cauliflower were all eaten!

Front Garden

In addition, it has been quite windy lately and also has still been getting down into the middle 30's at night.  Some of the cauliflower may not like it – I need to look up to see what causes the leaves to curl in like they are here:

Curled Leaves

When we returned from the weekend trip, I looked at the peas.. wow!  All except one of the peas has now sprouted in the area just next to the house.  But, for some reason, not ONE has sprouted against the back of the garage.  Maybe the house is keeping the ground warmer next to the house.

Peas Sprouted

Yesterday, since the weather man said it was to be in the 70's at the end of the week, I also got the potatoes and carrots planted in the box on the back driveway.  I opened the Kennebec potato bag and there were already large sprouts everywhere!  I have had them stored for over a month now – I just hope that they still sprout and will live.  I put four of them in a 2 x 3 foot area in the box where the potato box was built, and then about 400 carrots in the 13 x 2 foot area.  I still will maintain the clear plastic over the carrot area until they begin to sprout, this way it will help hold the moisture in until then.

Columnar Apple Trees, Strawberries, and Peas!

At last, the two columnar apple trees and 50 tri-star strawberries arrived on Wednesday from Rain Tree Nursery!

Columnar apple trees?  What are those??

I did some digging on how I could potentially put more fruit in the front yard.  I started to come across these things called 'columnar apple trees' on Google.  There are a few varieties of these type of trees.  Basically, the columnar apple trees grow vertically up – and put off really short branches that may be 1 – 2 feet long.  If kept properly pruned, then it could look like a giant shrub in a way.  Columnar apple trees have been noted to grow in pots, but the yield of apples will be less in this manner.

The varieties I ordered were the Golden Sentinal columnar apple tree and the North Pole columnar apple tree.  I chose these two varieties because they will pollinate each other mid-season.  In addition, the North Pole columnar apple tree will ripen its fruit in mid-to-late September and the Golden Sentinel columnar apple tree is early October.

Columnar Apple Trees

With these trees, you can really see where the graft was established.  On the Granny Smith tree I bought earlier, there was no graft line that I could see although it was put on a semi-drawf rootstock.  The two columnar apple trees have an M7 rootstock.

Here is the full setup of the fruit area in the front yard now.  The two columnar apple trees were put in front of the layout.  It looks as though the apple trees were placed pretty far apart, but they were actually placed directly in a line with the posts of the arbor – so they are about six feet apart.

Full Fruit Layout

In addition, I planted all of the tri-star strawberries in the strawberry pyramids just behind the arbor.  I was able to fit 24 strawberries in each although I think it is a bit too many.  The bottom of the pyramids are four feet wide, and at one foot apart per plant, a total of 12 should fit at the bottom.  The middle is 3 feet wide and should accomodate 8, and the top holds 1.  So that is only 21 strawberry plants.  But, I put three additional plants at the bottom of the pyramids so there are 15 in the bottom.

Apparently the nursery also sent me an extra strawberry for each pack of 25 as well.  I had four left after planting the 24, so I just put those in the back garden area for the time being – in case one up front doesn't make it then I can change it out.

Strawberry Pyramid

They aren't too much to look at now, but I hope they bust with growth!  I chose the tri-star strawberries because the U of I extension site recommends them and they are also a 'day neutral' strawberry.  The day neutral strawberries do not produce as many runners as the other varieties of strawberry, which was a good thing for me.  In the small area for the strawberries, I didn't want little strawberry plants popping up everywhere.  Although having a few runners each year will provide me some additional strawberry plants each year.  The plants are only good for three to four years before they need replaced because they slow production.  On the other side of that, newly planted strawberries need to get a good root system going before you should allow them to produce.  For day neutral, they will produce two harvests of strawberry (another plus).  So since I just planted them, it is recommended that they not produce for the first harvest, but we can let them produce for the second harvest.

Quick Facts about Tri-Star strawberries:

  • Day-neutral strawberry that will produce a spring harvest and a summer/fall harvest
  • Resistance to red steele and verticilium wilt
  • Produces fewer runners than june-bearing varieties
  • Allowed to produce a summer/fall harvest in the same year they are planted (unlike june-bearing that only produce one harvest and should not be allowed the first year)

In addition to receiving the apple trees and strawberries, I took a gander at the back garden area and noticed I saw some green beginning to appear.  It is very odd, but there are three peas that I saw just peaking out of the ground!  Seems they started about four – five days early compared to what I was expecting.  In addition, these three peas that sprouted were the three peas that I planted first as well!  I planted all of them within an hour period of each other (100+ of them), but the very first three that I sowed are the ones that have peaked up so far.

Sprouted Peas

It is a bit hard to see, but you can see three little green colors in the above picture.

Inside the house where the seedlings are growing, I am fully out of space for putting anything else under the fluorescent lights.  For that reason, the three original lettuce, three broccoli, and three cauliflower were all planted outside yesterday as well.  I took the plastic cover off of the front garden bed and was not too happy to see – what appeared to be – thousands of weeds!  On the forums at GardenWeb, I was told that the horse manure mix from the compost facility would most likely have quite a few weed seeds in the material since horse digestive systems don't break down weed seeds.  Well, I was outside picking the weeds for at least an hour, and I probably have about half of them picked.  I can tell that I will be busy all summer pulling these weeds out which I am not looking forward to.

So overall, a pretty busy day out in the garden yesterday.  Apple trees planted, strawberries planted, a few peas sprouted, and transplanting of broccoli/cauliflower/lettuce into the front garden after picking a lot of weeds!

Snow In April

Well it is a good thing I haven't put out some of the other seedlings in the gardens yet!

I planned on direct-sowing the carrot and onion seeds into the raised beds this weekend, but I checked the weather and we were to get snow!  I was also debating about putting the broccoli out in the garden as well since they are frost-hardy and from what I've read in the "Square Foot Gardening" book, they should be planted about 4 weeks prior to the last frost date.

It got pretty cold last night, and will be down to a low of 29 degrees tonight.  But, the temperature is supposed to go back up into the high 50's with lows in the high 30's starting Wednesday.  I think I will still hold off until next week before planting items.

There haven't been any peas that have sprouted yet -and it has now been a week.  I expect to start seeing some next Monday or so.

Anyways, here are some pictures of the dusting of snow we received.  We also had some sleet on and off throughout the day that looked like small hail.  I would have liked to get a picture of the road by our house.  On the way to work, it was quite pretty to see the small green leaves beginning to come in – with a covering of white snow on them and the tree bark.

Arbor in the Front Yard with Snow

Front Raised Bed in the Snow

Back Raised Beds in the Snow