Seedlings Getting Bigger!

The seedlings have been really growing over the past few weeks!  Here is an update on how they are doing.  I carried them all outside today in order to get some direct sunlight (and to save some power from the four 40-watt bulbs that are on 16 hours a day).

Broccoli & Cauliflower

A tray of the broccoli and cauliflower planted throughout the past five weeks

Broccoli & Cauliflower

A close-up of a few of the broccoli/cauliflower plants that were first grown four weeks ago.

Lettuce & Peppers

Lettuce and peppers.  The original first three peppers and three lettuce are on the left side that were planted four weeks ago.  Newer lettuce less than two weeks old on the right.

Lettuce & Peppers

Close up of the three original peppers and three original lettuce seeded four weeks ago.

Tomatoes

Tomatoes planted two weeks ago.  All five of the "Best Boy" tomatoes have sprouted and only two of the five "Red Cherry" tomatoes have sprouted.  None of the Roma sprouted within the first week, so I used the same containers and put another seed of each in the five.  I hope to get at least two Roma tomato plants.  I have the two "Red Cherry" tomatoes that I wanted, but have about three extra "Best Boy" tomato plants I will probably give to either my parents or in-laws.

Peas Sowed & Deer Fence Up

Believe it or not, we got a little bit of snow Saturday night into Sunday morning!  The weather man said we could get between four and six inches of snow, but we ended up only getting a slight dusting of snow.  It did stay cold for most of Sunday and only got to about 37 degrees.

Today, Monday, the weather was a bit nicer.  The sun was out in its fullness and the temperature got up to about 57 degrees.  The rest of the week is to be around the same temperatures; higher 50's, with rain every other day.

So I took the opportunity to get out and get the Dwarf Gray Sugar (Dwarf Grey Sugar some people spell it) peas planted out in the garden behind the garage and the new garden area between the garage and the house.

In the "Square Foot Gardening" book, it says that the peas can be planted three inches apart from one another.  To me, that is way too close.  On the package, it says to thin to six inches apart.  So, I went between the two and chose to plant them five inches apart.

The area between the garage and house was 200 inches long, so I was able to sow 41 peas in this area.  I pushed the peas down about 3/4 the length of my thumb – which is just a little less than two inches – and then covered them back up.

The area behind the garage was 320 inches long, so I was able to sow 65 seeds there.  That makes a total of 106 pea plants!  I hope we get quite a lot of peas for the season.  We will be freezing the whole peas with the pod (since these are snow peas and the pods are edible).  It would take too long to get the peas out, and there is no reason to since you can eat the pods anyways.  One of my favorite chinese dishes uses the full pods, which is where I got this idea to plant peas.

Backyard Garden

Later on this same area will be used to grow the tomatoes, so I'm trying to get a harvest of peas in before that.  Later in the year, probably late July/early August, I will plant another set of peas in the other garden area (between the house and garage) to get another harvest just before the winter comes in.

You can also see the green fencing on the right side of the picture.  This was also put up today.  You can see in the background that we have a forest preserve, so we have quite a lot of deer that come up into the driveway and the yard.  I used the fence last year and it did a great job keeping the deer out – and we had the tomatoes here and corn between the house and garage during that period.  The fence is four-feet tall, but the deer don't jump it since it is so close to a structure.

As in the previous post, I noted that I wanted to get some pictures of the Macon County Compost Facility.  I had to go back to the compost facility to load up many containers of compost.  We went to the in-laws house on Sunday and dumped two car loads of compost.  So, the area where the corn will be planted is ready to be tilled (couldn't since it was rainy and wet Sunday in their area).  So, here is a picture of part of the compost facility.  There is a lot you can't see here, but you mostly see the new mounds of leaves that are less than a year old:

Compost Facility

Just to the left of the picture was the small mound I was getting the manure mix from.  I pretty much used the whole mound with filling everything around the house.

Lastly, here is a picture of one of their tractors turning a pile of leaves/compost that is less than a year old.  You can see all the steam coming off the pile since compost heats up while it is decomposing.

Compost Facility

Another Day In The Garden…

I took some time off of work today in order to get the rest of the garden beds filled up.  The Macon County Compost Facility is only open from 7 am to 3 pm during the weekdays and closed on the weekends, so this conflicts with my normal work schedule.

Unfortunately, I forgot to take a picture of the compost facility as it would be a nice touch to see where I get all the "black gold" from for the gardens.

The car was full again and it took me about five trips to the facility today to take care of everything that needed filled.  This time the trunk was full with nine five-gallon bucks, the backseat with eight buckets, and the passenger seat with one.

Strawberry pyramids were the first on the list to be filled.  They are now all done, and in this photo they are in front of the grape arbor, but from the road they are behind the grape arbor.

Strawberry Pyramids Filled with "Black Gold"

The next place was behind the house.  A few weeks ago this area was filled with rock, but I moved all the rock and re-did the landscaping.  This area is between the house and garage, and there is only about six-seven feet between the two.  Since this is the north side, I had to clear all the rock so the little amount of sun that makes its way between the house and garage goes here.  In this area, my wife and I put up some chicken wire fencing (was cheaper than the plastic fencing believe it or not).  The fencing will be used to hold up the dwarf peas.  I read that even though they are dwarf, they grow about three-feet tall, and need some support.  So, the top two feet will be supported, but not the bottom foot.  In front of the peas we will grow the onions and some radishes.

Peas

It was already past 5 pm so the sun was setting and is now lighting up the walkway between the rock bed and the new garden area.

Lastly, I got some dirt and put some over the top of the area we had the tomatoes last year – this is behind the garage.  We did the same thing here and put the chicken wire fencing since I hope that I can get a harvest of peas in before the tomatoes take the area over again – just like last year!  I know you are not supposed to plant tomatoes in the same place year after year, but this will make the second year in this area – and there just isn't any other place to put the monstrous plants these grow into!

Peas2

That closes the day off in the BsnTech garden.  Quite a day worth of work.  This weekend we will go to the in-laws house and take two car loads of compost to fill in the area for the corn and potatoes.

How Much Dirt Can You Fit Into A Car?

How much dirt can you fit into a car?  Apparently quite a bit.

Here is the front seat with a big cooler and a small bucket:

Front Seat with Dirt

And here is the back seat with two five-gallon buckets and a huge tote that holds another 35 – 40 gallons:

Back seat with more Dirt

And lastly, a trunk filled with nine more five-gallon buckets:

Trunk with more dirt

That is a whole lot of dirt!

I had time today without anything planned, so I figured I would spend a good part of the day down at the local compost facility.  I took all the buckets, a big shovel, the tote, the cooler, and a big coarse-sized screen so I could get some good dirt/compost without any big sticks, rocks, or globs in it.  I wanted to finally get the garden on the driveway completed.  The dirt/compost in this container has to be without big rocks and the like because the carrots will be grown in it.

Overall, it took me from about 11 am today to 5 pm to fill the containers.  I had to make two trips to the place to finally fill the driveway garden, but I got it all done.  Here it is turned into a "greenhouse" with some clear plastic over the top.  I did this to keep the rain out (which incidentally it rained on and off today).  When I get all the carrots planted out there, I will wait until they are mostly all sprouted with a few leaves before taking the plastic off – that way the rain won't do any changes to the soil and move the seeds around in the ground.

Driveway garden all completed

I was very surprised today as well!  I've had a heck of a time getting the peppers to germinate so I went out and bought a heating mat to put underneath the new peppers I planted last weekend – thinking that it is too cold in the house (hey, it is between 59 and 64 in the house since I have to save on the gas bill – and peppers – from what I read- need at least 70 to germinate).  Well, finally after 18 days, ALL THREE of the peppers – that were not on the heat pad – all germinated at the same time!  What a coincidence was that!  Amonst the peppers, there also were two more cauliflower that sprouted.

So, another good day for gardening around here.

Backing up a bit – we went to my in-laws house – whom own quite a substantial amount of land.  There, they set aside some land for us to grow things and use for whatever we would like.  Well, we will be planting about 300 seeds of sweet corn (so we can eat it on the cobb and also take the kernels off and freeze them so we don't have to buy the canned corn) and potatoes. In addition, we will be putting in our grape vines on the property too.

So with the help of my father-in-law, we put up some 2-foot fencing around part of the area where the corn will be.  I only had 50 feet of fence, so there is still some work to be done.  We also get the grape trellis finished.  It is just standard 5-foot metal poles and some 13-guage wire.  The length of the trellis is about 80 feet for ten grape vines.  I used some earth anchors on either side and on one side (hard to see in the picture below), but there is also a fence strainer.  The fence strainer allows you to use a small little tool, like a crank, and tighten the wire.  So, the wire is pretty tight.

Grape trellis fecing

We already have the grapes (as in the previous blog entry).  Three of them are Niagara, three are Concord, three are Catawba, and the last one is a Mars.  The Mars is seedless so the in-laws can pick and eat them, and the other three are seeded – and will be used to make about nine gallons of wine each year (after the first three years of getting settled).  Each grape vine will produce about one gallon of wine from what I read elsewhere.

We'll be going down again next week to finish up a few more things before the season starts.  Last time we all drove on car and the car was loaded with the compost that we spread over the area the corn will be at and also onto their little garden. There is a lot more that needs covered – so we'll drive both cars and have both of them fully loaded with containers of compost!

Area where Corn will be grown

Garden – Week of March 15th

Quite a lot has happened since the week before when I first planted out some seeds.

Last time I planted out three of the following:

  • Broccoli
  • Cauliflower
  • Radish
  • Pepper
  • Bush Green Bean
  • Carrot
  • Lettuce

The goal was mostly to test the soil that I have picked up from the Macon County Compost Facility where they have an 80% horse manure mix and 20% compost mix.  Out of all of those, the following sprouted:

  • 2 Broccoli
  • 2 Cauliflower
  • 3 Radish
  • 0 Pepper
  • 0 Bush Green Bean
  • 3 Carrot
  • 3 Lettuce

I'm not sure what to make of the pepper plants not coming up.  I'm sure the bean plants didn't sprout because the seed is at least three years old and was not taken care of.

Here are the seedlings that sprouted along with a picture of my fluorescent light unit:

New Seedlings 3-15-09

Light Fixtures 3-15-09

I have two fluorescent fixtures that hold two 40 watt bulbs each.  I have two standard bulbs and have two grow-lux bulbs – which you can't see in this picture.

You'll notice a whole bunch of cups right up front in the last picture.  On March 14th, I planted ten more broccoli and ten more cauliflower plants.  I need at least eight of each to sprout to put in the garden.  So far as of this writing, there have been three broccoli and two cauliflower that have sprouted out of these containers.

I also transplanted the two other broccoli and cauliflower from the small six-packs to the 16-ounce cups as well.  After a week between the pictures, they have grown quite a bit!

Broccoli & Cauliflower 3-20-09

Out of the three, the cauliflower (on the left) looks the best out of them.

The lettuce has also grown very well as well:

Lettuce 3-20-09

We had some pretty good weather at the beginning of the week – in the 60's – so the plants were all put outside to get the benefit of direct sunlight.  Thursday and today it has been in the 50's so I have kept them in the house under the lights.

On Thursday, I received the test results back from the lab that did the soil test.  I was pretty surprised with the results, because the home kit showed something completely different.

pH:  7.2
Phosphorous:  310 lbs/acre
Potassium:  800 lbs/acre
Organic content:  3.8%

I'm surprised the organic content is that low, but I don't really know too much about that number.  However, I called the lab and they said that optimal phosphorous levels are 50 lbs/acre and optimal potassium levels are 300 lbs/acre.  That means I have six times the amount of phosphorous and almost 3 times the amount of potassium!  They said that it will not harm the plants, it will just remain in the soil and eventually will be used up.

I was a bit worried still about the pH – but at least it wasn't the 8.0 that the home tests said it was.  They said to spread sulfur over the area at a rate of about 5 pounds per 1000 square feet to get down to a pH of 6.5.

I got my front yard garden bed all filled in with the compost from the county compost facility and then spread about a half pound of sulfur over the area – it is about 80 square feet.  I did not use elemental sulfur like other websites say to use since I couldn't find any locally.  A local store did have a 2.5 pound bag of sulfur that also has gypsum and calcium in it.  I hope that is enough to get the level down to at least 7.0 or lower.

I also have been filling the bed along the back driveway.  With this bed, I'm being a bit more picky with the material from the compost facility since carrots will be in this bed – and they do not tolerate big chunks, wood, or rocks.  So, I have been sifting through all of it.  So far I've put in a couple hours over two days and have filled about 1/8 of it.  I still have a ways to go!

Driveway Garden 3-20-09

I also have some PVC pipes up so I can put some clear plastic over the top of the area to make it enclosed.  I will do this after I plant the carrot, onion, and radish seeds in here to keep the rain from beating down the plants.  Once most of them are all sprouted, I will take the clear plastic off and replace it with a deer mesh netting to keep the deer, birds, and other animals out of it.

Well, that is all for this week's gardening adventure.  I hope I get some pepper plants come up sometime soon – it has been two weeks now for the first set of three and nothing has sprouted!  I alloted space for eight pepper plants in the garden, so I hope I can get that many!

Soil pH Testing

After talking with some folks at GardenWeb on my post, I opted to go to Lowe's and buy a soil test kit and a pH/moisture/light meter just for some piece of mind.  While someone told me to quit worrying about it and just plant, I couldn't let it pass my mind because of all of the work and expense going into the garden this year.  I want it to be productive right from the start – not a year later after amending the soil.  You know what they say – garbage in, garbage out.

Anyways, I first started with the pH meter.  In the instructions, it says to put the probes about 5 inches down into the soil you want to test – but the soil needs to be muddy.  So, I brought in a cup full of soil and filled it until it was nice and muddy with tap water.  Well wel – the pH meter just barely moved off of the default 8 the needle points at, and went to maybe 7.8 or 7.9.  Not happy let me tell you!  People on the board said that the stuff should be around 7.0 – and most veggies need between 6.5 and 7.0 to grow well.  So I have stuff that is basically about 9 times more alkaline!

A bit upset, I then went back outside and got a cup full of soil from where I grew the tomatoes last year, and a cup from where I grew the corn.  I had them separate and made them into a muddy mush – put the meter in – and about the same thing!  It shows around 7.5 – 7.6 for them!  Now, corn can grow in a pH of 5.5 to 7.0 and tomatoes in a pH of 5.5 to 7.0 also.  So how on earth did these grow as well as they did last year?  Is this tester broke or are the pH scales for the veggies over/under stated in some way?

So, I got out another cup and put a few tablespoons of lemon juice in it and then filled it to the top with tap water again.  Well, the pH scale sure moved this time!  It showed a pH of about 3.5.  So the pH meter did move and showed that lemon juice was more acidic.

I then got out the soil test kit which tests for nutrients like nitrogen, potassium, and phosphorous that plants need to grow – and it also has a pH test as well.  After reading the instructions well, I followed the procedures for the pH to check it one more time.  After a few minutes, I checked it and the color was a medium green hue.  Holding up to the pH chart provided showed that it was showing about 8.0 again.  OK, I give up – so apparently the soil in this area – even the manure/compost mix is more alkaline.

The nutrient tests were then done and showed medium nutrients in each of the three tests – so those checked out fine.

Since it still is a bit too early to start planting, I figured I would get some of the manure mix today and sift it through a fine screen to see if the seeds or plants will even sprout.  I planted three of each variety that will be in this soil type – carrots, broccoli, radishes, lettuce, peppers, cauliflower, and green beans.

Afterwards, I knew that I needed to make a stand for the 4-foot fluorescent light to hang from to put over the seedlings.  So I got out some scrap wood and made the litle hanging thing which wasn't too much work at all.

Plants to test soil

I was also reading online how to preserve seeds / how to preserve vegetable seeds.  In the Square Foot Gardening book by Mel Bartholomew, it mentions to put the seeds in a container and then place them in your refridgerator because seeds need dry conditions and cold conditions to keep the seeds in good shape.  So, although a small investment of $10 was purchased on seeds this year, there are plenty of seeds that will be left of carrot, broccoli, radishes, lettuce, pepper, tomato, and cauliflower for the next five years!  I will have to get more green bean, pea, and corn seeds each year though since they are larger and you don't get nearly as many of those as you do the other seeds.

Gardening in Boxes

The growing season is coming in fairly quickly!  I have been getting ready and making new spots in the yard for the garden this year.

Last year I had good luck growing tomatoes and corn – but that was about all.  The corn was even a bit stunted because it was grown between the house and garage – which is a sliver of five feet so when the sun was moving directions, some corn only got maybe an hour of sunlight a day.

This year I am doing things completely different and there is quite a start-up cost involved in it unfortunately.

I have been reading the "Square Foot Gardening" book by Mel Bartholomew which was given to me by my grandpa.  In the book he details how you can save much more space and get more yield out of the square-foot method of a garden versus planting in rows and using all that space.

This works with what I am needing to to – because I can't have the typical garden in my yard since it is a big garage and a concrete driveway in the backyard.  So, this year, I am making two large container growing units.

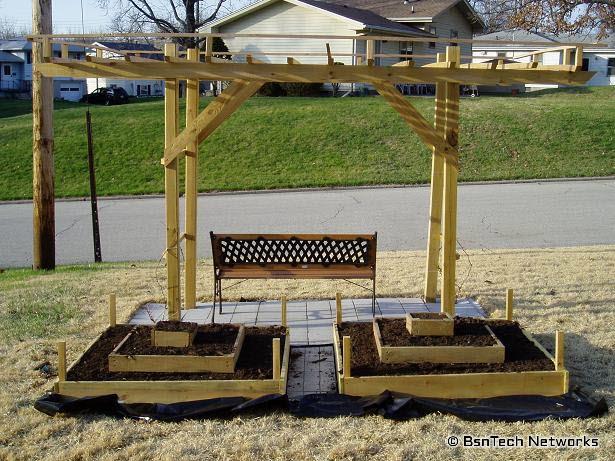
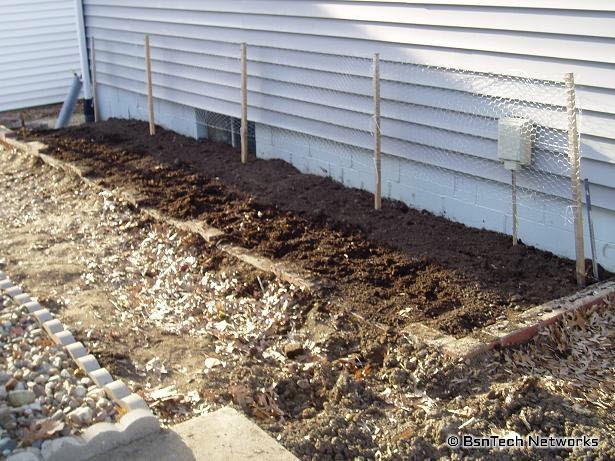
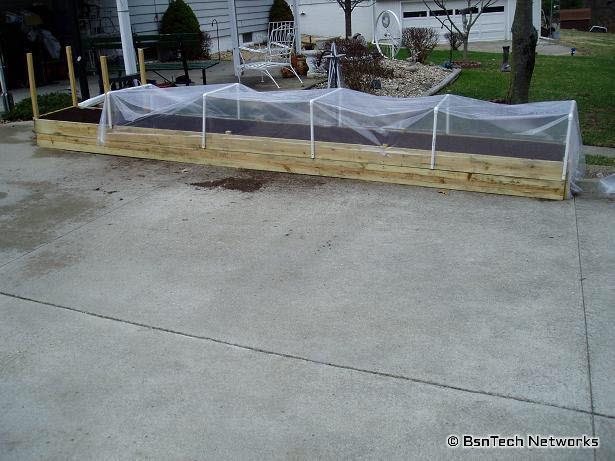
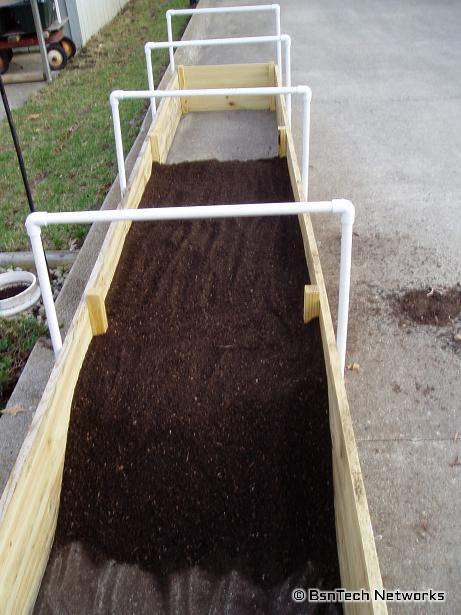
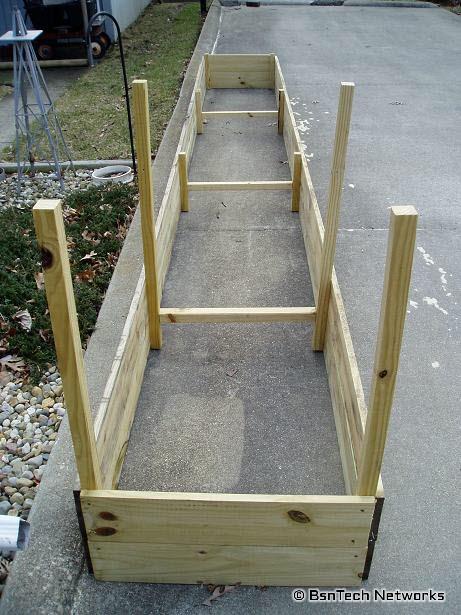
The first one is 2 foot by 16 foot long and is 1 foot deep.  I set it right on the edge of the driveway and is pointing north/south.  On the north end of the container, I also have an area that is 2 foot by 3 foot marked by posts that are three-feet high.  I was reading online on how to maximize space for potatoes – and you can grow potatoes vertically and they will branch out and make potatoes on their way up as long as you keep covering all but the first inch of the plants up.  So, as the plants grow, I will add more 1×6 pieces of wood around those posts and fill with more dirt.  This way I will potentially have a good amount of potatoes in a small space.  One website I found said that in a 4 foot by 4 foot container that is 2.5 feet tall yielded about 100 pounds of potatoes.

Driveway Garden Box

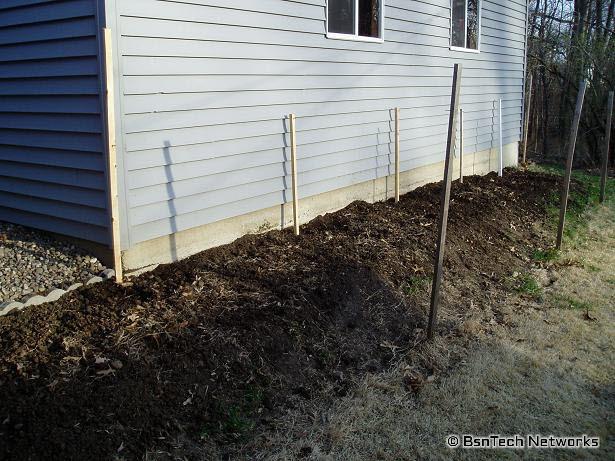
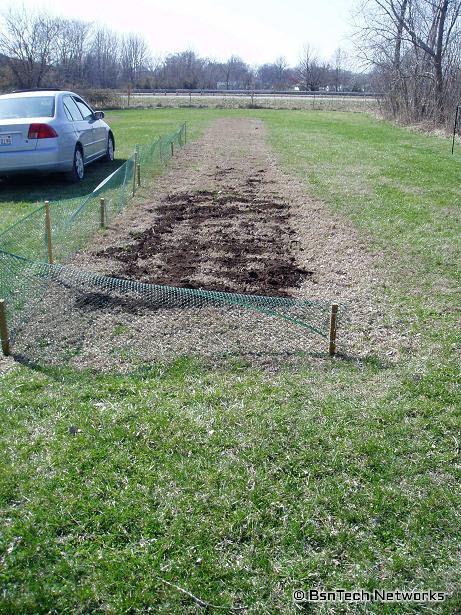
I started woking on the second container yesterday.   For the second container, I had to dig up part of the front yard – again right along the driveway.  Last night I excavated a pretty large portion of sod, but I still have about 25% to go – which is because I decided to make the container bigger since it would only cost another $4 to increase the size by 25%.  This container is going to be 4 feet wide by 20 feet long – and will vary in depth since it is on a little bit of a hill.

So far this project has been fairly high in price – but hopefully in the long run I will get the investment back out of it.  For the 2×16 container, the cost was about $70 ($15 was from the extra wood for the vertical building of the potato box) and for the larger, 4×20 container, the cost was $53.  I made sure to use the arsenic free treated wood so they will last many years.  The cost is fairly similar although they are different sizes – because I only need one 1×6 board on one side of the large box and 2 1×6 boards on the other side because of the hill.  So effectively it needed three large boards for the length, but the smaller box required four.

Front Garden Box

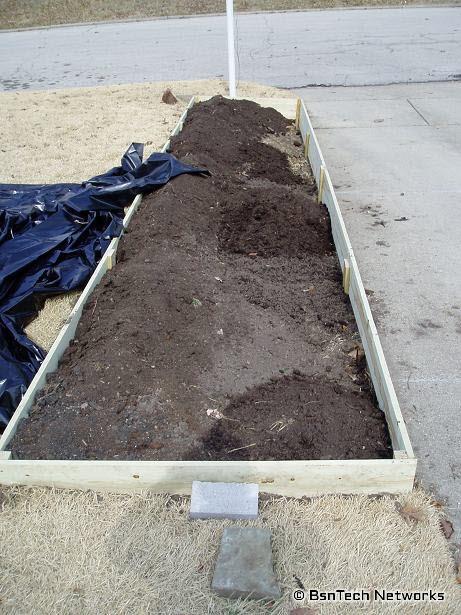
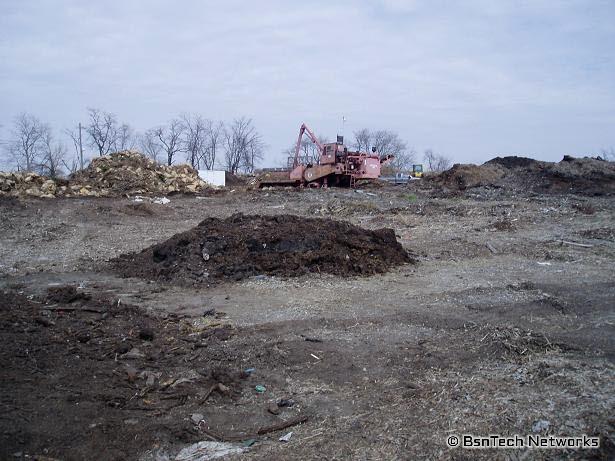
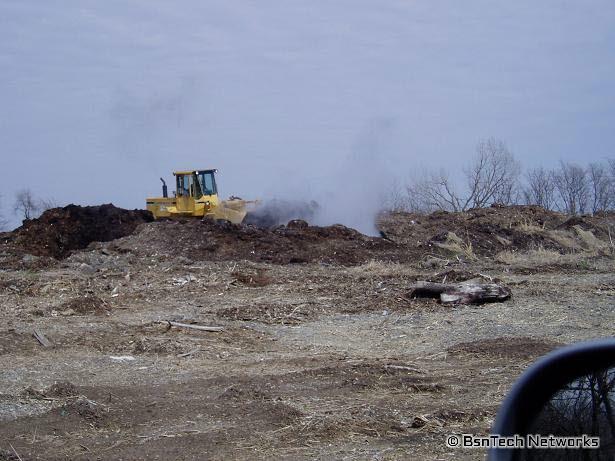
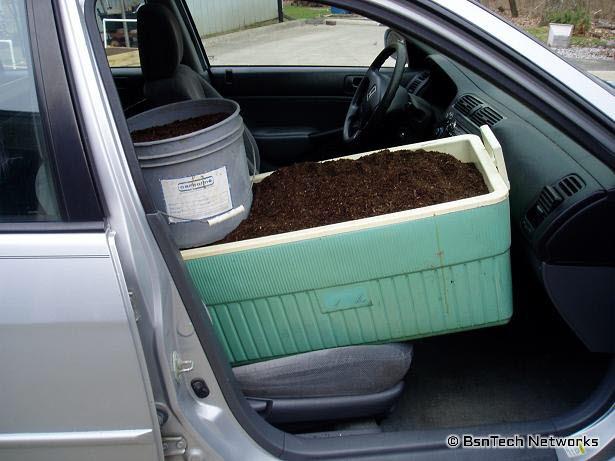
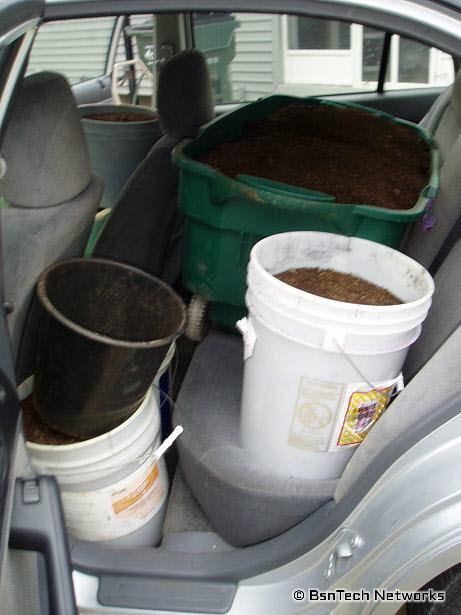
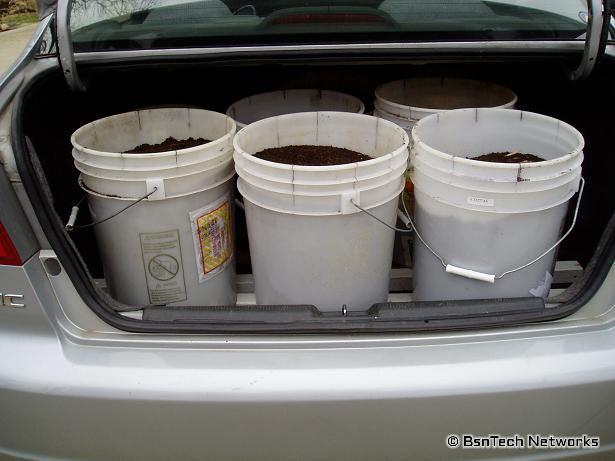
Now – the question is what to fill the containers with?  Luckily we have a county compost facility just about two miles down the road from us.  I called them yesterday and spoke with a person there.  They informed me that they have a special heap of compost for gardeners that is rich in many organics including some manure.  He forwarned me that it is pretty "rich stuff" and said that it needs to be mixed in with some dirt.  I asked the price and they said they give it out for FREE.  So, that sure beats buying the bags of compost for over $2 each or even topsoil for that matter.

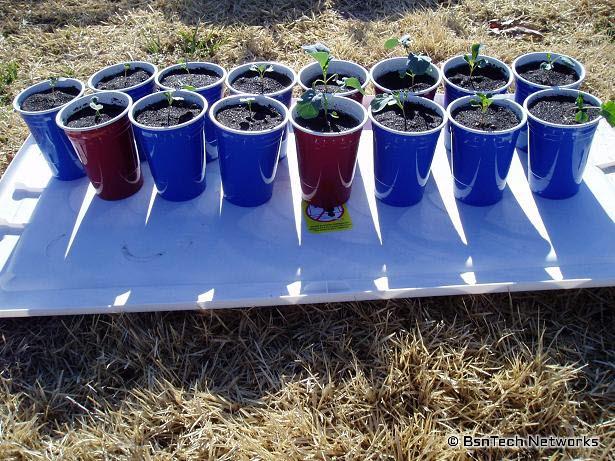
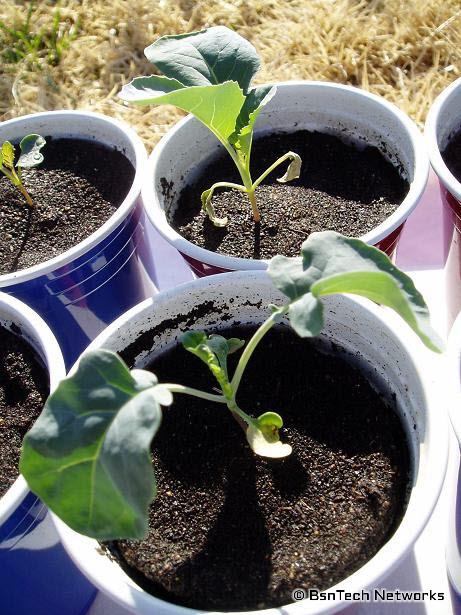
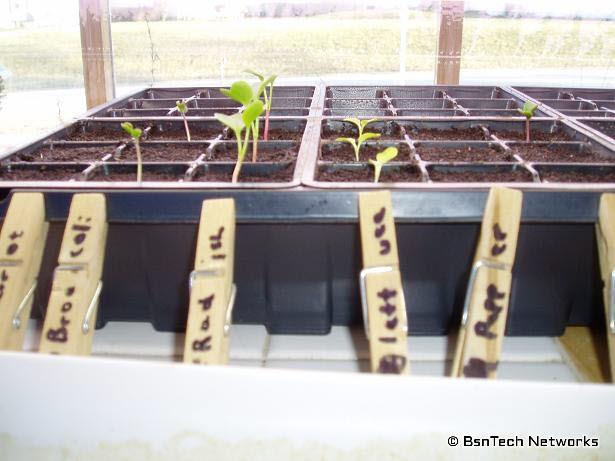
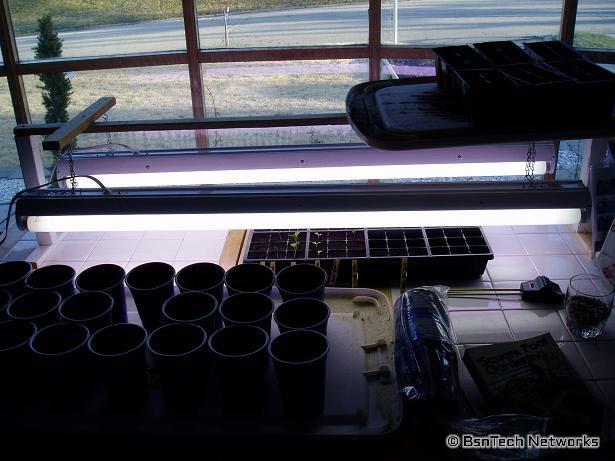
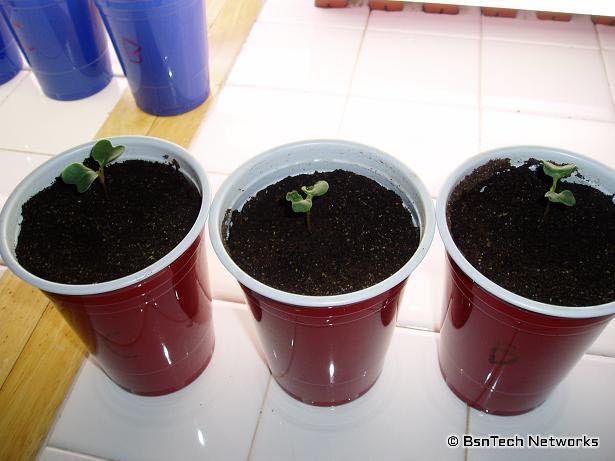
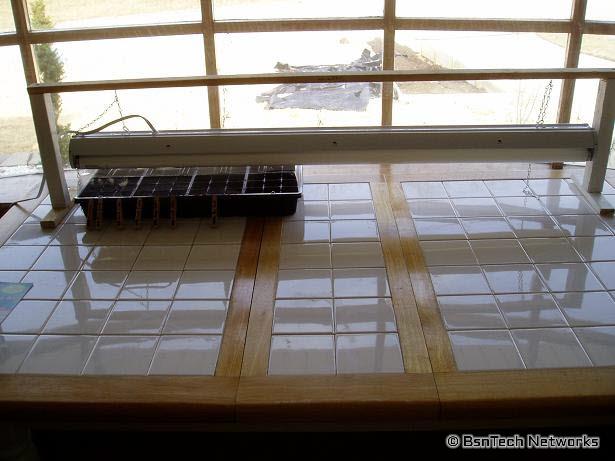
Anyways, back to the Square Foot Gardening book.  This book is pretty good and in the back, it shows all of the information for planting veggies.  It shows when and if you should start them as transplants, when to make additional sowings, when to expect harvest, and all kinds of other information about the plants – such as sun/shade, pH for soil, etc.  I have learned through looking at the book that cauliflower and broccoli need to be started indoors as transplants at least eight weeks in advance.  This has been my problem previously as I was go out and plant them directly in the garden around May 5th – which in the Central Illinois area is a good day that shows the forst chances are about 15% from that point forward.  By putting them in so late, they never could bloom and fully grow.  So, next week I will start the cauliflower and broccoli inside.

This year I have a pretty sizable plan for growing many more things.  At the in-laws house, they have plenty of acreage so we are going to make use of it this year.  We plan to put in about 300 or so stalks of corn and will also plant some rows of potatoes for the extra seeds I have left over (it will only take about a pound of potato seed for the potato box, which leaves me with four pounds left that I don't want to waste).  In addition, I have purchased nine grape vines that will be put up at their place as well – three vines of the Catawba, Concord, and Niagara grape varieties.  We are using this to make wine – and with three vines each, they should each produce about three gallons of wine for each variety.

At the house, there is quite a lot more that I will be planting compared to last year – but we have also basically doubled the size of usable garden space with the new containers.  In the 16 x 2 area, I will plant four potato seeds, 106 carrots, 68 onion sets, and about 32 radishes.  This container was designated as the container that would hold the plants that will take all year to produce or are small in size.

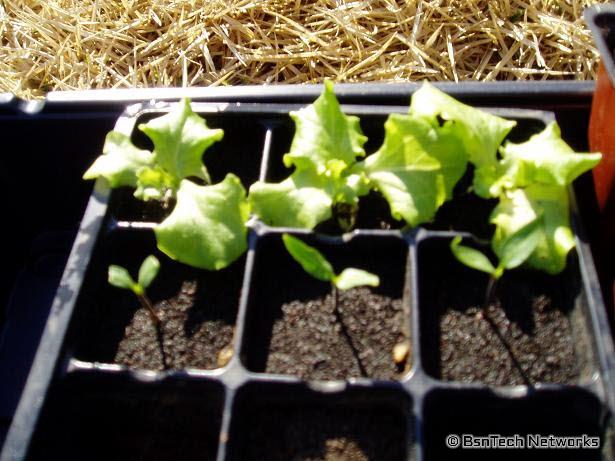
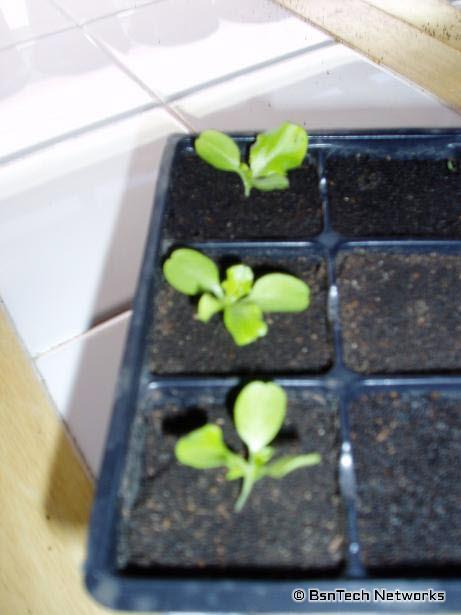
The larger 20 x 4 container will have 80 bush beans planted around the perimeter, 12 lettuce, 8 cauliflower, 8 broccoli, and 8 peppers.

With the square foot method of gardening in the containers, you can fit much more into a smaller space because you don't have to walk around on the soil to get to your plants.  Since the container is only four foot wide, I walk around the container and can harvest the produce without stepping foot into the container.

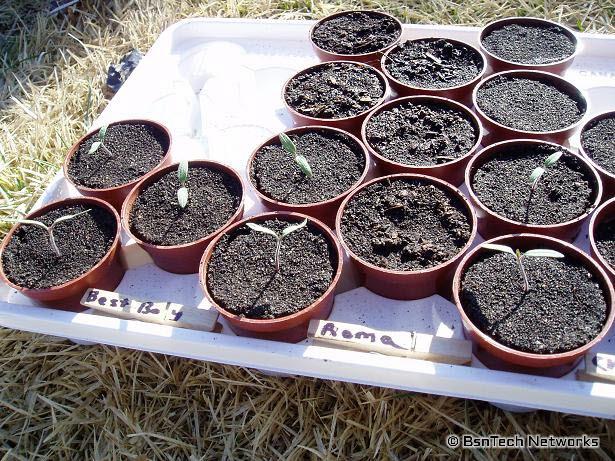
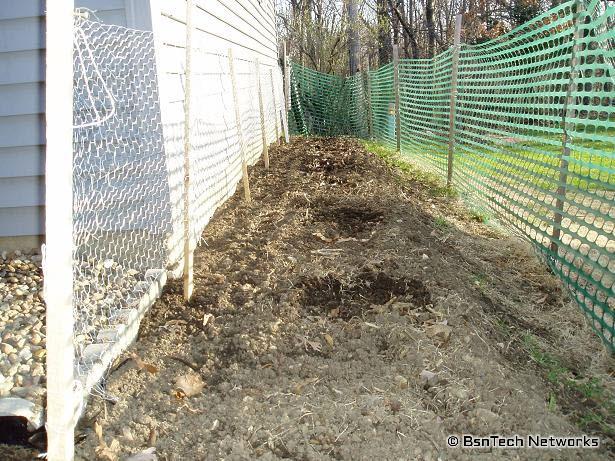
The garden space used last year will have sugar peas and tomatoes.  I know you are not supposed to plant tomatoes in the same spot for two years, but at this point I am still limited in space.  They will be put behind the garage in a 24 x 3 area.  Last year I planted two cherry tomatoes and three roma tomatoes.  This year I plan to do about the same – except I have some "better boy" tomatoes that I will plant in with them as well.  This way we will have the small cherry tomatoes, the oval-shaped romas that are very meaty, and then some larger ones for slicing onto hamburgers and salads.

Grape Arbor & Granny Smith Apple Tree

Since I last posted, I gave instructions on how to create a small grape arbor. Since then, I decided to completely change the arbor. The top of the arbor was four-foot by eight-foot. I expanded it to 8-foot by 12-foot instead so I could put in four different varieties of grapes so they would ripen all at different times.

For the new arbor, it requires four 12-foot 1×4 treated pieces of wood and 14 8-foot 2×2 treated pieces of wood. The 2×2’s were spread 10-inches apart from one another amongst the 12-foot area available. From both sides of the 12-foot boards, the first 2×2 on each side was put six-inches in – again to have a little bit of a decorative effect.

I re-used some of the old 2×2 pieces of wood and put horizontal pieces across the two sides of the arbor – that way I can also grow a grape cane from each vine on the pieces.

You may also see in the picture below that there are horizontal pieces all the way around the perimeter at the top. This is to hold the bird netting up above the arbor area so that when the vines reach the top, they will not tangle in with the bird netting. I just actually completed all the bird netting today. I purchased a 7-foot by 100-foot piece of bird netting at the local Menards store for $14.95. I saw others online for more than twice that for not even half of the size. I just hope it lasts a while because I put over 10 hours in with putting the bird netting in. Along the sides, I also had to “weave” some string through the places where the seams of the bird netting are. Otherwise, with the wind, it would create a gap and the birds could fly right in. You can see the small white pieces on the picture below too.

Lastly, I worked a few weeks ago at excavating the grass below the arbor and putting in pavers to complete the nice landscape look. I really hope the grapes pay off in the long run because there are several weekends of work in this between putting the arbor up, putting in the patio pavers, and putting up the bird netting.

Along with the grape vines, we also purchased a Granny Smith apple tree from an online orchard as well. I put the grapes and the Granny Smith apple tree in last weekend. All together, we now have a Concord Seedless grape vine, Flame Bunch Seedless grape vine, Niagara grape vine, and a Crimson Seedless grape vine in addition to the Granny Smith apple tree. These were all purchased online through Willis Orchards

The only other thing left that we may do is try some of these columnar apple trees. These columnar apple trees are kind of neat because they can grow 10 – 12 feet tall and you can really increase the space where these are put. Unfortunately, there is not enough space in the front yard now to put another semi-dwarf apple tree, but we are thinking about buying a North Pole columnar apple tree and a Golden Sentinal columnar apple tree to put on either side of the grape arbor. The columnar apple trees have been said to begin producing apples after two or three years and once they are fully mature, they will give about two dozen apples each.

Grape Trellis and Strawberry Pyramids Built

Over the past few months, I have been attempting to find a way to increase the 'crop' and different ideas for planting different veggies/fruits for the garden. I didn't want to do too much in the front yard, but this was the only place that was now available after using all the space in the backyard (which wasn't much to begin with).

So, I started to try to think of different ways that we could make use of the front yard to make it functional but also maintain a nice look and not a junkie look.

Recently I purchased a Granny Smith apple tree, a Niagara Grape Vine, a Concord Grape Vine, and a batch of 50 strawberry plants. All of these will be delivered in the end of March to beginning of April.

So how would we put all of this together? Well, putting up a grape trellis and making some strawberry pyramids!

The next question I had was – how to make a grape trellis. I went to the local Menards and started looking at them; and found many different styles. Unfortunately, they were all too small and had a price tag of $75 or more. I opted to make a grape trellis to give me exactly what I was looking for.

What I have made has a bit of 'style' to it, but it is also functional in the fact that it will support the two grape vines. The size of the trellis between the posts is 3' x 7', but the actual available space at the top is 5' x 8'. The top pieces extend out over the sides of the posts to make it look more fancy instead of just a generic look. I also cut all the pieces to have 45-degree angles pointing up.

Here are the materials I used. It cost me about $70 to make a trellis that was at least 3 times the size of the least expensive one at Menards – for cheaper.

  1. 4 – 4"x4"x8' treated posts
  2. 4 – 1"x4"x8' treated boards (go across the front and back and creates the diagnol pieces)
  3. 9 – 2"x2"x8' treated boards (pieces across the top)

The 4"x4"x8' posts were put about 1.5 feet down into the ground to give a total head clearance of 6 feet at the top point (this is because the 1"x4" pieces are dropped 6" below the top of the posts that connect the posts together). I then cut two of the 1"x4"x8' pieces down to 7 feet and used a saw to cut a 45-degree angle on both sides. The cross-braces (4 total) were made out of the 1"x4" pieces and were cut to 3 feet then a 45-degree angle cut out of each. Lastly, the 2"x2"x8' boards were cut to 5 feet and then 45-degree angles cut out of them as well.

It was just a matter of drilling the holes for the screws and then using premium deck screws (that won't rust) to put everything together.

The grape trellis is very sturdy and will be completely filled with leaves from the two grape vines once they all grow! From what I have read, the grapes will produce about 30-45 pounds of grapes on each plant after a few years after maturity. The vines I purchased are three years old already and will begin fruting the first year, but there is still a lot of growing they need to do so I don't expect that large of a yield until at least a year afterwards.

The next question I had was – how to make a strawberry pyramid. I chose to use strawberry pyramids for a number of reasons – (1) I don't have to dig the tiller out and till the ground, (2) raised planting schemes allow you to plant more in a smaller area (therefore I am able to plant 50 in the same space as I could have only planted about 25), and (3) having these beds will make the landscaping look nicer and appealing instead of having rows of strawberries in the front yard.

The strawberry pyramids I made are 4'x4' in size and they will each hold about 22 – 24 strawberry plants. Here are the materials I used for each:

  1. 3 – 1"x4"x10'
  2. 1 – 2"x2"x10'
  3. 1 – 2"x2"x8'

I then cut the proper items as follows:

  • Using 1 1"x4"x10' board, I cut two 4-foot pieces and two 10-inch pieces
  • Using 1 1"x4"x10' board, I cut another two 4-foot pieces and two 10-inch pieces
  • Using 1 1"x4"x10' board, I cut the remainting four 28-inch pieces
  • Using 1 2"x2"x10' board, I cut 4 12-inch pieces and 4 16-inch pieces
  • Using 1 2"x2"x8' board, I cut 4 22-inch pieces

What are all these pieces used for? Well, the outer square is made up of the 4-foot cut boards (4 of them) and they are held in place by the 22-inch stakes made out of 2"x2" boards. The reason these are larger is because I want to put bird netting over the whole thing, so these will support the bird netting. The middle square is made up of the 28-inch cut boards (4 of them) and they are held in place by the 12-inch stakes made out of the 2"x2" boards. Lastly, the inner square is made up of the 10-inch cut boards (4 of them) and the 16-inch stakes made ouf of the 2"x2" boards. The stakes were cut at double 45-degree angles (45-degrees from both sides) to make a point to make it easier for driving the stakes into the ground 3-4 inches.

For the outside square, measure up 4-inches from the bottom of the 4 – 22-inch stakes and make a line. This line is where the bottom of the 1"x4" board will be placed (that means you will have 4" of area below the 1×4 board for driving it into the ground). Do this for all four 22-inch stakes and screw the 4-foot boards on them to make a square.

For the middle square, screw the 4 – 28" boards to the very top of the 12-inch stake. Same with the inner square – screw the 4 – 10" boards to the very top of the 16-inch stakes.

Then, go place them where you want in the yard and put them in the ground! The outter square should have the 1"x4" boards flat with the ground so that there is no space between the ground and the boards. The middle square should have about the boards about 4" higher than the ground, and the inner square should have the boards be 8" higher than the ground – which causes the stepping or pyramid effect. Fill these with dirt and you will see the results like below!

More Gardening Completed

This past week has been quite interesting! Today we had the remnants of Hurricane Ike come through Illinois – although it was a tropical depression by the time it hit us. I was surprised to see some limbs off of a tree near our house. The winds didn't seem too bad, although there seemed to be gusts of 30 mph at times. Some roads were also flooded because we had a downpour for at least five hours this morning non-stop.

Anyways, back to the main topic. This week was generated the last of the sweet corn. The hybrid I use is called Sugar Dots. Sugar Dots has both white and yellow corn kernels and it matures fairly quickly – about 90 days to completion. About three months ago, I went through and harvested my first set. About a week before, I planted another 30 stalks in another area of the yard for later harvest – which was this past week. Overall, I was not too pleased with this later harvest although the weather for its growth period was cool – between 70 and 80 degrees for most of the days. The previous harvest yielded two ears of corn on several stalks, but this time there was only one that yielded two ears. The rest of the corn all yielded one (a few didn't yield any) and the ears ranged from about 3 inches in length to a good 7 inches in length. I think it comes down to the fact that during the maturing stage, the sun had moved and the house was shading the corn. The soil was not as fertilized as the other batch either.

In addition to the corn, I have been getting buckets of tomatoes. The tomatoes we have are both cherry tomatoes and roma tomatoes. I do have the say that these two are the highest-producing kinds of the tomato plants. My parents try for the larger tomatoes each year and are disappointed with the results. At one time, I also attempted to plant the 'beefsteak' tomatoes and got very few vine-ripened fruit. So far, I have only two roma tomato plants but yet I have received over 60+ vine-ripened fruit. Today I just pulled another 20 of them off the two! The sizes are smaller than the beefsteak variety, but I would prefer to get some kind of yield than none at all.

The cherry tomatoes are also growing everywhere like a weed. There are four cherry tomato plants and I usually get between 75 – 100 fully ripened cherry tomatoes off the four plants every other day. About 10 – 25% of them though seem to be cracked open – which I don't understand because the weather has been cool and there has been plenty of moisture over the past two weeks.

Today I tried my luck at freezing tomatoes. As other places online suggest, you want to barely make an "X" incision at the bottom of the tomatoes just enough to cut through the skin. Then, with boiling water, put about 2-3 tomatoes in the boiling water at one time for 30 – 45 seconds. After this, ensure to take them out promptly and put them in ice cold water for a little bit. What I would suggest is getting all of the tomatoes boiled up first and then begin taking the skins off – to save energy on the stove. The tomatoes can sit in the ice water for 15 – 20 minutes without problem. Afterwards, I then cut off the tops of the tomatoes and then sliced them and placed them in freezer bags. I put about a pound or two of tomatoes in each bag.

This year with the plethora of roma tomatoes, I wasn't sure what to do with them all before going bad. My wife took two large bags of them to her co-workers yesterday – probably 10-pounds worth – and that is when I decided it was time to start freezing them for later use in salsa, chili, and other recipes that need canned tomatoes.

We went and bought a 5-cubic foot freezer a few days ago and this has made storing all the extra produce easy! The fridge/freezer combo that most people have only store so much – and ours was already full from all the corn and other stuff! This will make the possibility of freezing produce in the future more accomodating.

We still have plenty of them on the vine that are to ripen up yet, so we will get plenty more. Too bad there isn't a way of preserving tomatoes so they maintain their rigidity for use on hamburgers, but oh well.

Next year I plan to put out about the same number of roma and cherry tomato plants – and will probably do the same thing with the corn – except I may try to plant the corn in both areas and after it is harvested, plant another batch. I will have to do more research first because corn definitely will take all the nutrients out of the soil. Next year I plan to till up a little section of the front yard and plant two rows of bush green beans as well. It might make the neighbor upset, but I would rather use the lawn for something productive instead of paying for gasoline to mow the yard.

Read more