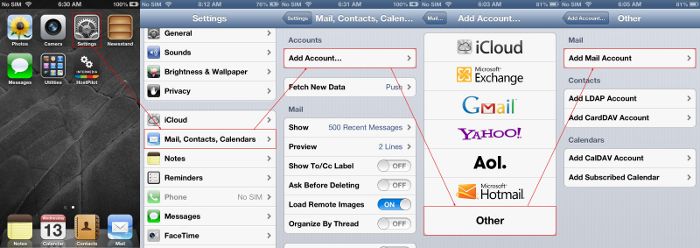
If you would like to use Microsoft Outlook to connect to your e-mail account, follow the instructions below.
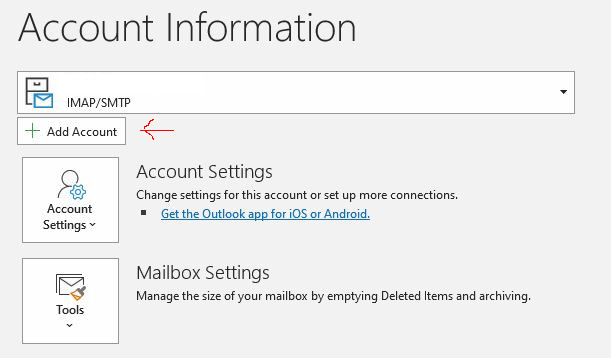
Step 1 – Open Microsoft Outlook. If you do not have an email account already setup in Outlook, skip to step #2.
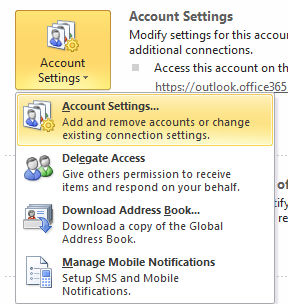
- Go to the File menu at the top left
- Click the “Add account” button underneath your existing email:
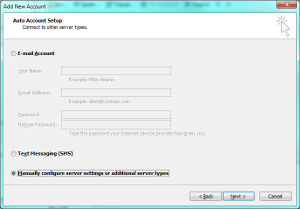
Step 2 – A screen like the box below will show up:
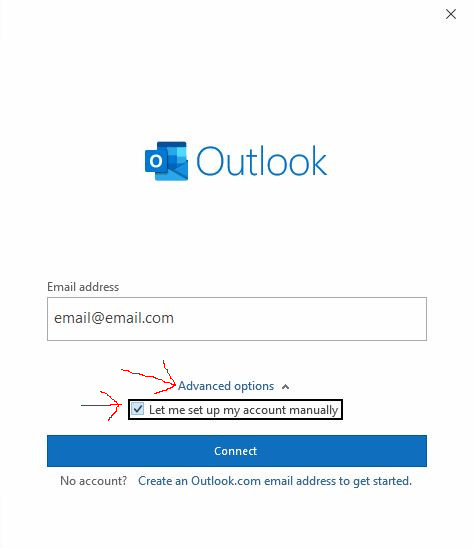
- Enter your email address in the first box
- Ensure you click “Advanced options” and then check the box for “Let me set up my account manually”
- Click Connect
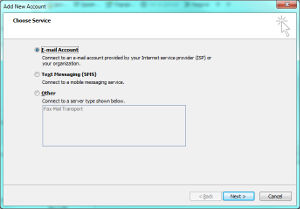
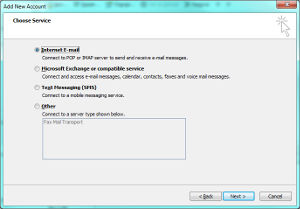
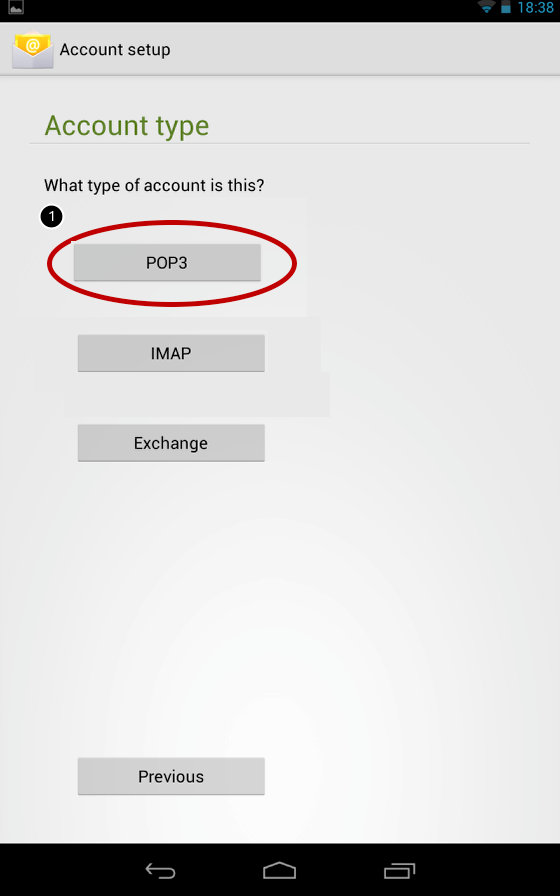
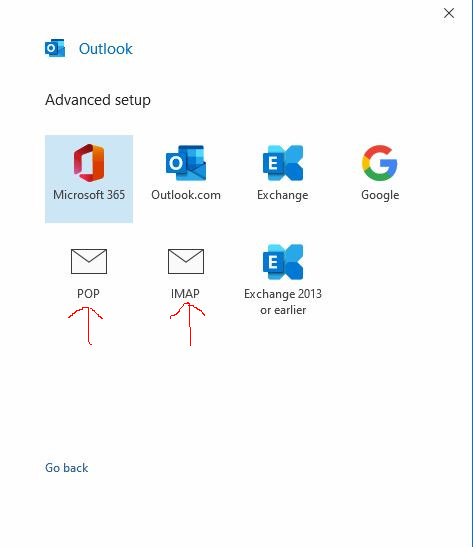
Step 3 – The next screen will prompt you for the account type. You may choose POP or IMAP. IMPORTANT: If you choose IMAP, all of your email will be stored on the server until you delete it. If you have a basic email account and not an upgraded account, the mailbox will fill up quickly and prevent new messages from coming in until you are under your mailbox limit.
Step 4 – The next screen simply asks for your email password. Enter your password and continue.
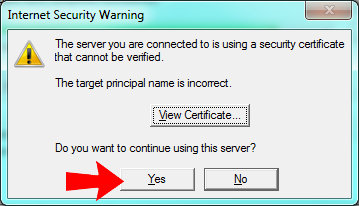
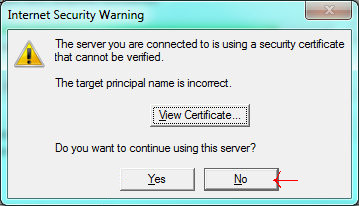
Step 5 – You may get a box similar to the following about a certificate error. Click on NO.
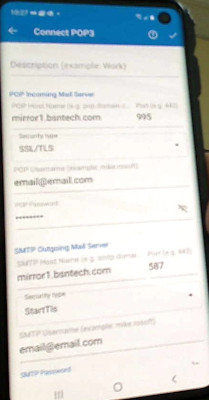
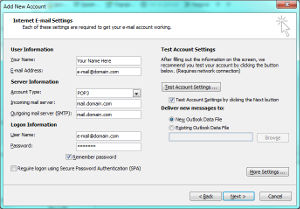
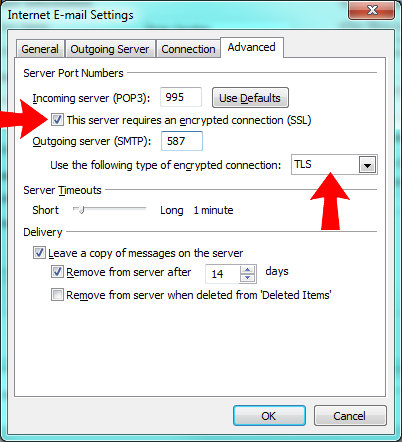
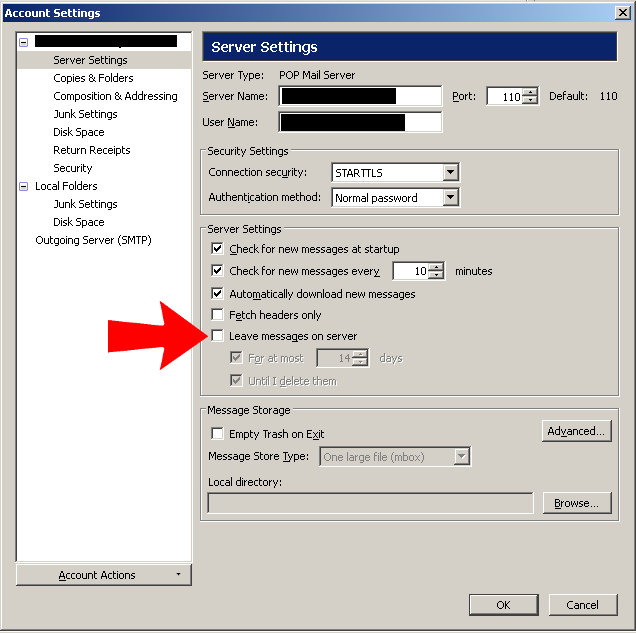
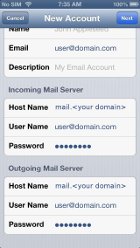
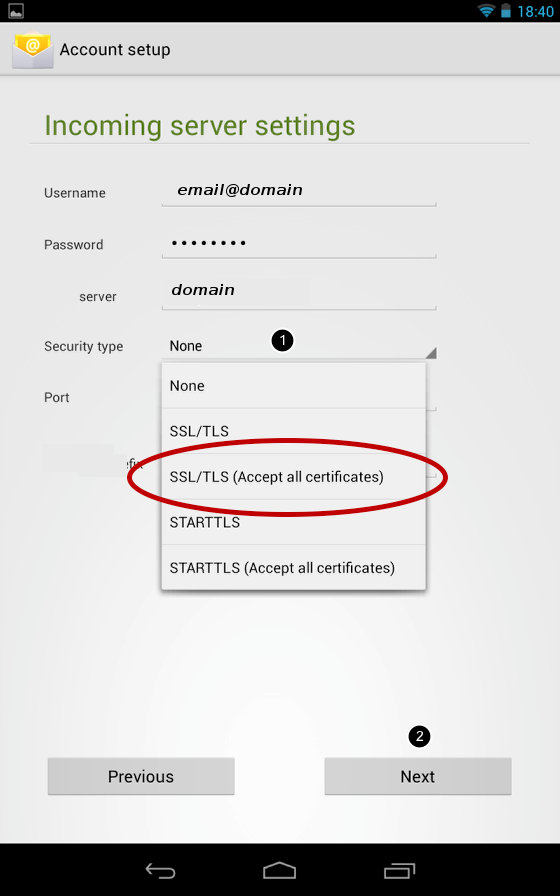
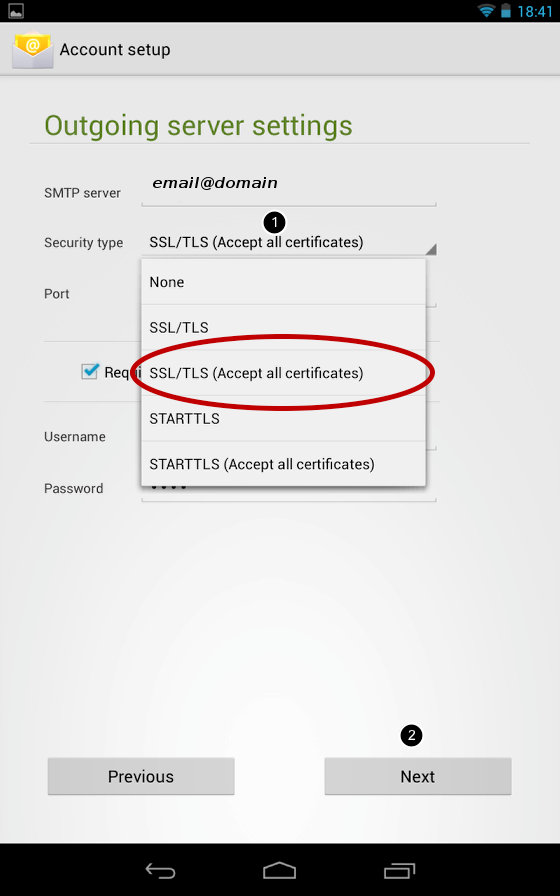
Step 6 – Ensure you update the information as shown below. The picture below shows an IMAP setting. If POP, the Incoming Mail port should be 995 instead!
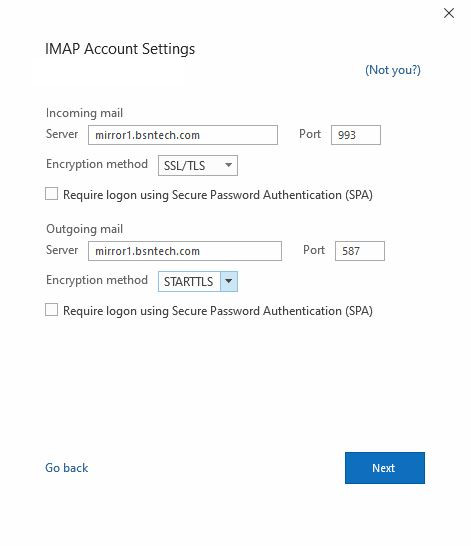
- IMAP Settings
- Incoming Mail Server – mirror1.bsntech.com
- Incoming Mail Server Port – 993
- Encryption method – SSL/TLS
- Outoing Mail Server – mirror1.bsntech.com
- Outgoing Mail Server Port – 587
- Encryption method – STARTTLS
- POP Settings
- Incoming Mail Server – mirror1.bsntech.com
- Incoming Mail Server Port – 995
- Encryption method – SSL/TLS
- Outoing Mail Server – mirror1.bsntech.com
- Outgoing Mail Server Port – 587
- Encryption method – STARTTLS
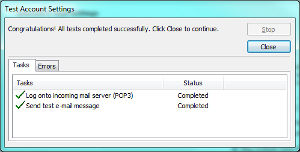
Step 7 – The account should now be verified and setup.