We finally got some rain!
We had a big storm front finally make it through our county yesterday and dumped about two inches of rain on us. The first wave came through around 1:45 PM and lasted about 45 minutes to an hour. I checked the rain barrels after this and they were completely full! I don’t know how much rain we got in that storm, but it was enough to fill nine 55 gallon drums full of water.
Unfortunately, the one barrel that I just added last week still has a leak in it! I had to use some silicon caulk sealant around the hole where the PVC T-adapter connects the barrel to the main line underneath – and then it cured for about five days before the storm yesterday. Still, somehow the water made it through and there is about a one drop per second leak coming out of it. That means something else to fix down the road.
Then the next storm came through right around 10 pm and lasted another hour or so. That one also dumped quite a bit of rain on us.
They are predicting rain everyday this week through Saturday – and we are getting some rain today (Tuesday) as well.
I failed to write my blog entry over the weekend – because it was a busy weekend! More work on the bathroom is progressing.
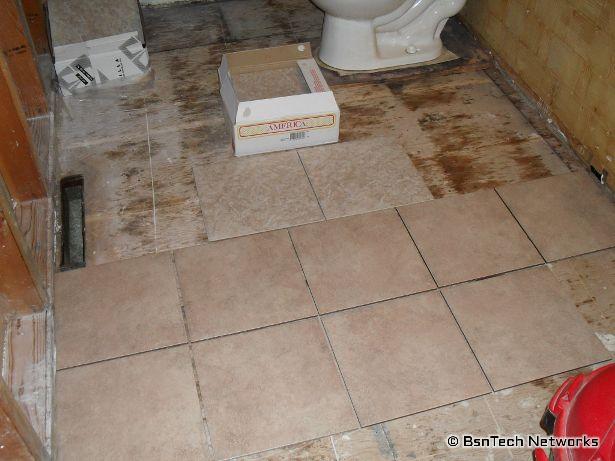
The first picture shows the tile we will be using on the floor and around the tub. The tile near the bottom of the picture is the tile that will be on the floor; the tile near the top of the picture will be put around the tub. Also notice the old flooring that is a bit rotted out (which we replaced this weekend).
My dad came up to help on Sunday and we got the old cast iron tub out. I was doing a lot of reading online on how to remove a cast iron tub. Well, everyone had the same idea – take a large sledge hammer and just it up! We put a blanket over the top in order to keep the porcelain from flying everywhere – because it is extremely sharp and would have went flying everywhere! My dad basically began in the back of the tub near the middle and in essence – cut the tub in half right down the middle so we could take it out in two pieces.
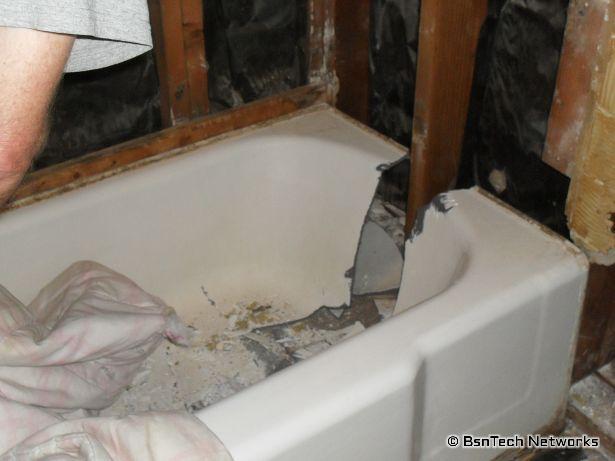
It took less than an hour to fully get the tub out. Cast iron is actually quite brittle – even though it seemed the tub was about 1/4 inch thick.
After that was done, it was time to remove the old 1/2-inch flooring. Before doing so, I had to run a couple of additional supports between the joists because one of the walls was not sitting directly on top of a joist. Luckily this wasn’t a load-bearing wall, but not very good to have zero support under the wall.
Now the floor is removed and you can see right through to the basement and the A/C unit right under the bathroom.
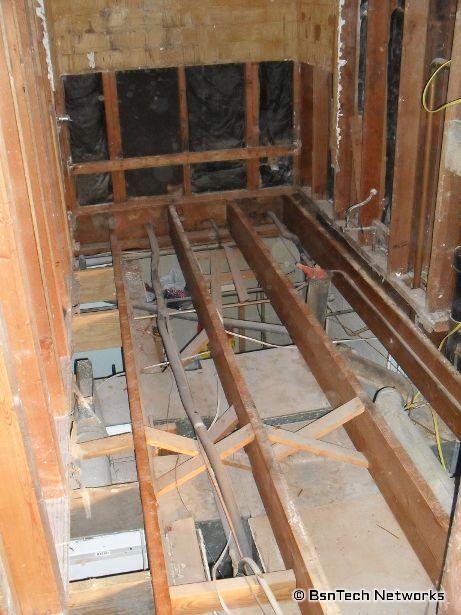
And lastly, we got the new OSB 3/4-inch flooring laid down. It has tongue and groove in it so the pieces interlock and help to strengthen it even more. Amazingly enough, this took a good four hours to put in with all of the cut outs and snugly getting the pieces in place.

Last night I then removed the rest of the drywall that was around the but. In the picture above, you can see at the very back wall at the bottom of the wall there is the studs and black insulation showing – then above that is the drywall. That was all taken out so the demo is almost fully done! Today I plan to put the new insulation in and maybe work on making some additional supports between the joists.
Let’s get back to gardening!
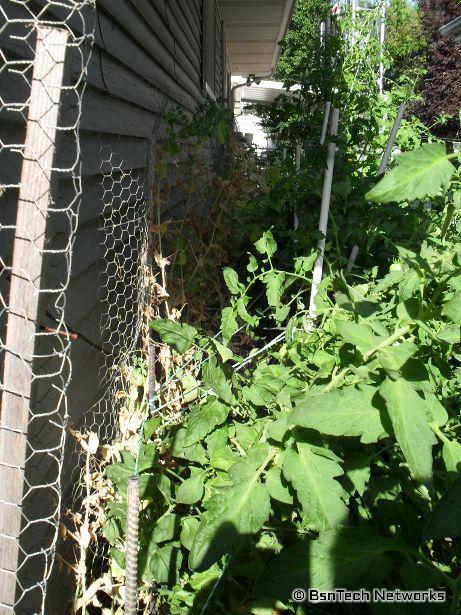
I believe in the last post I mentioned how two of the tomato plants fell flat on the ground. Well, all of the plants kept leaning more and more and I was afraid they would fall over. I made some posts out of 1/2-inch PVC pipe and filled it with concrete and put these in each tomato cage, but they simply cannot support anything and it was a waste. So I had to cut two 10-foot pieces of rebar I had into 5-foot pieces and drove them in the ground – and then tied all of the tomato cages to them. This should be quite enough support to keep them going for now.
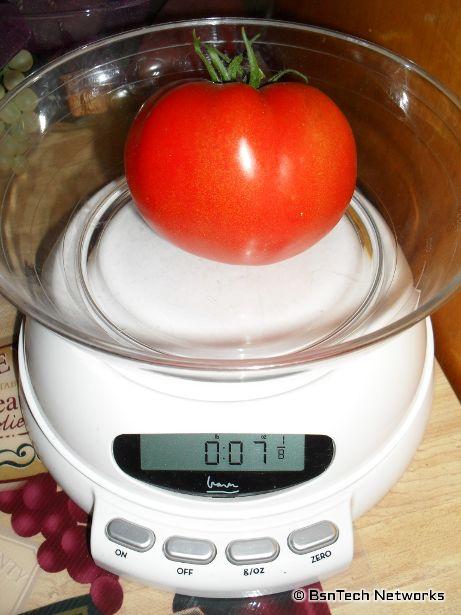
In addition, we had our first Best Boy tomato that was picked last week as well!
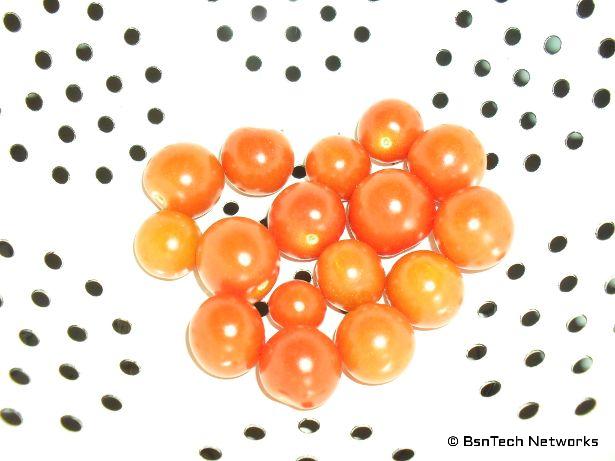
Then we had a couple of little cherry tomatoes that joined the party.
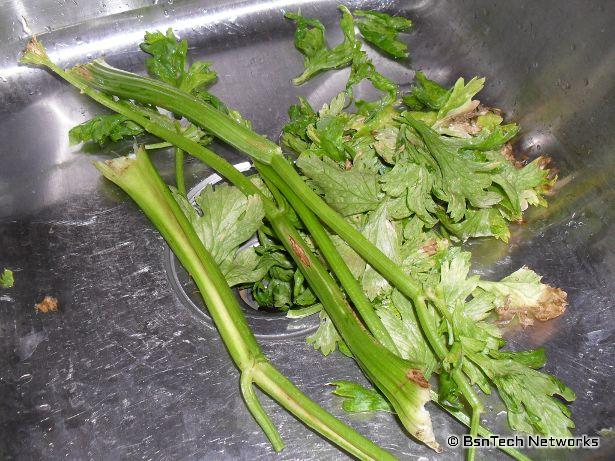
I also picked one of the Ventura Celery plants last week as well. Well, it wasn’t anything like I expected. There just wasn’t much of anything on the stalks and it only weighed in at about 2.5 ounces of usable celery. The celery was a bit fibrous, but I sort of like it that way – makes it more crunchy. But, it had this very sweet, sugary-like syrup flavor to it. I don’t know if the weather this year caused the issues with the celery (since it turned very hot incredibly quick). But I will try celery again next year and see what happens.
The four new trays for our dehydrator showed up two weeks ago. I immediately put them to use and filled all eight trays with basil that was drying on the table for a few days. It took about 3 – 4 days to fully dry all eight trays and there was quite a bit of basil that we got out of it!

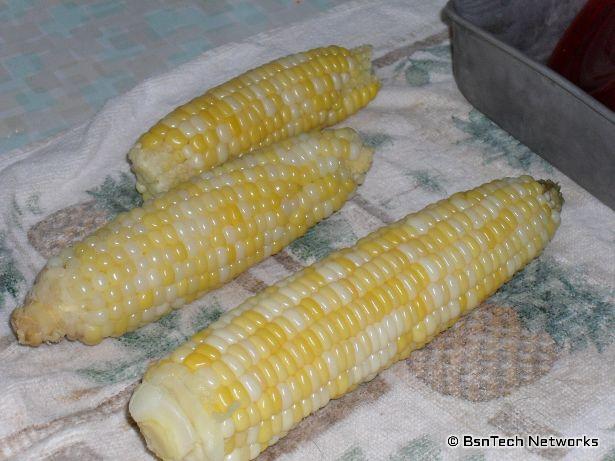
On Saturday, I picked our first few ears of corn. These are Sugar Dots corn and it is a bi-color variety with both yellow and white kernels. One of the ears was very good size but the other two left more to be desired. The Sugar Dots corn was quite stunted and didn’t seem to grow well. In addition, only about half of the corn managed to have some silks – but that doesn’t mean we’ll get much of an ear from them.
After picking the corn, I removed all of the Sugar Dots corn stalks that were in the garden bed that didn’t have any silk on them. No reason to continue feeding them and taking good nutrients out of the soil without any results. I then back-planted about 50 Greencrop green beans in this area; they were spaced six inches apart with about 18 inches between the rows. Our bean harvest this year isn’t very good thus far. We had over 50 pounds of green beans from the Bush Blue Lake variety last year – but this year we might have two or three pounds from about 40 Greencrop plants. However, the playing field isn’t “level” because these beans are being shaded by the potatoes in the back garden all day long. We’ll see how these new green beans with full sun produce.
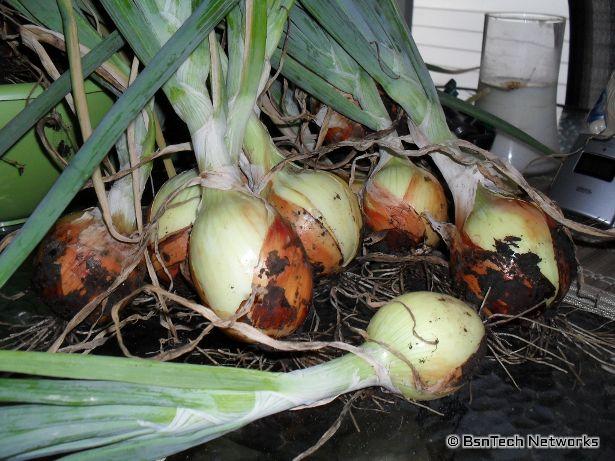
And for the last couple of pictures – onions!
I noticed that several Copra onions had the “leaves” that were bent over near the top of the onion bulb. I asked on GardenWeb if this meant they were ready – because the leaves were still green. I was told to pull them!
I pulled them – and although there were maybe a dozen that were rotten already (roots were completely off and the bottom was rotted out – because they continued to get water when they were done), there was over 20 pounds of onions so far! I still have yet to pick the onions in the back garden that are in the foundation blocks – but I will do that in the next couple of days.

Some of the onions have pretty large bulbs – like the size you buy at the grocery store. Others didn’t produce quite as well – but they are by far much bigger than the onion sets that I planted last year.
Well, that is all for this update. I would have liked to take all of the general pictures of the garden beds but just haven’t been able to do that lately with the work in the bathroom.