Been a week since I’ve last posted a garden update.
Here is a lot of photos from the garden – then followed up by my first time drying herbs (basil) with the Nesco FD-80 dehydrator.
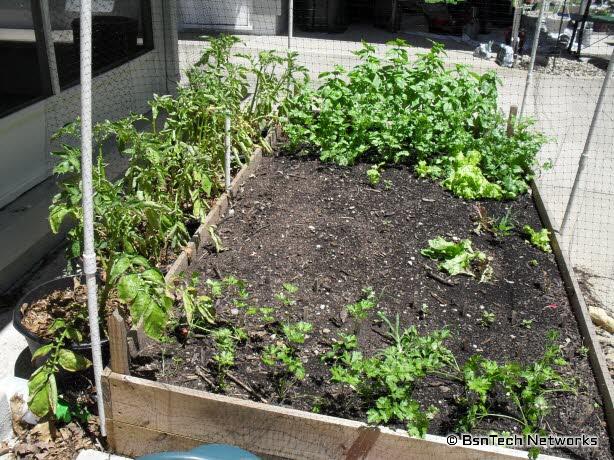
Starting off with the herb/lettuce garden. I’m not too happy with Mother Nature this year. It has turned off incredibly warm and therefore the cool-weather crops have suffered dramatically. We’ve had less than two pounds of lettuce this year and less than a pound of peas. Last year we had 12 pounds of each. The hot weather has stayed in the upper 80s to lower 90s this week. Summer this year is exceptionally hot!
The basil is doing well along with the cilantro. I’m surprised the cilantro hasn’t bolted yet. However, none of the oregano came up and the parsley is still very leggy and not doing well. I even seeded at least five to eight seeds of oregano in each area – times 16 areas! That is a lot of seed. Oregano seed was so tiny; I’m amazed that something could even grow from that small of seed!
The potatoes in buckets are to the left in the picture below – and they aren’t looking nearly as good as those planted in the ground. But, this is an experiment to see how well they do.
The basil is in the very back of the photo, cilantro in front of the basil, lettuce in front of the cilantro, and then the parsley at the very bottom of the photo.
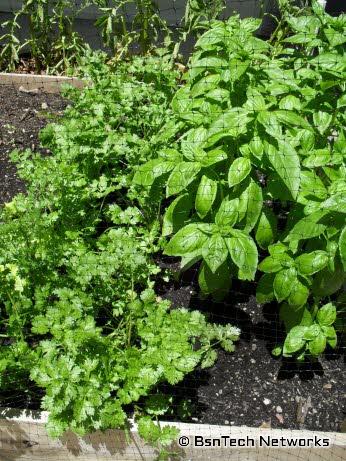
Here is a closer look of the cilantro and basil. I just plucked a good helping of basil from each of the 15 plants that came up and put the dehydrator to use today!
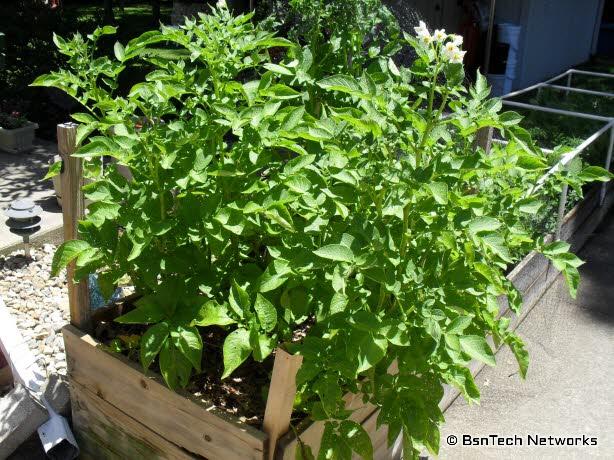
Here is the old potato bin. Now it just has potatoes in it and I didn’t build the bin up like I did last year. What a difference. All six potatoes are thriving and doing well. I did build up the “bin” by an extra six inches and then filled it in with leaves – so this is like hilling up the potatoes. The potatoes grow above the seed potato that you plant – so it is important to hill up or provide enough growing room for all of the potatoes. If the potatoes get sunlight, they turn green and are poisonous at those spots.
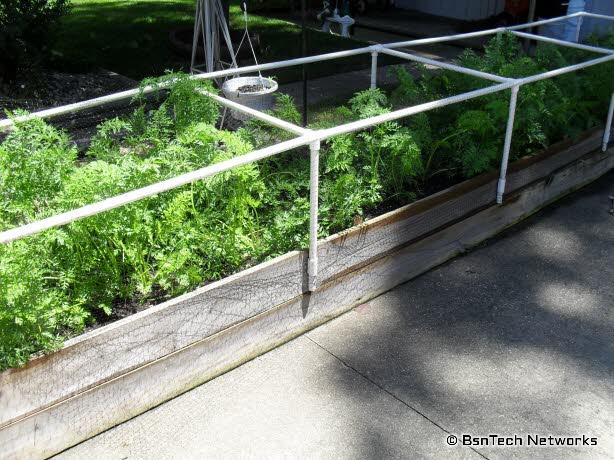
Behind the potatoes are the carrots. The carrots didn’t recover as well as I hoped they would. Last year we had almost 17 pounds of carrots and I think we’ll be lucky to get 10 pounds this year. I re-seeded all of the areas where the carrots died due to a disease (probably damping off disease). Dozens of them came up – but the original carrots that survived damping off have easily fought the newer carrots for sunlight and most new carrot seedlings have been killed off from this.
Last year this entire 2 x 13 area was completely filled with greenery with zero dead spots.
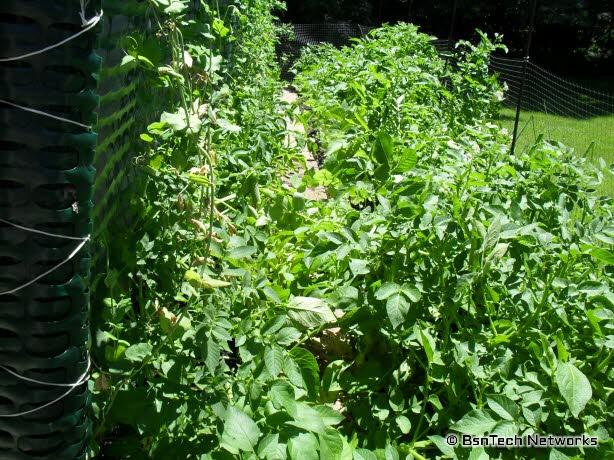
Going to the side garden. There has got to be something in the soil over here! These are the largest tomato plants that I’ve ever had! The tomatoes were planted two feet apart from each other with a potato planted between each tomato plant (trying to use all the area possible). The tomatoes have all completely grown together and the potatoes are vying for sunlight!
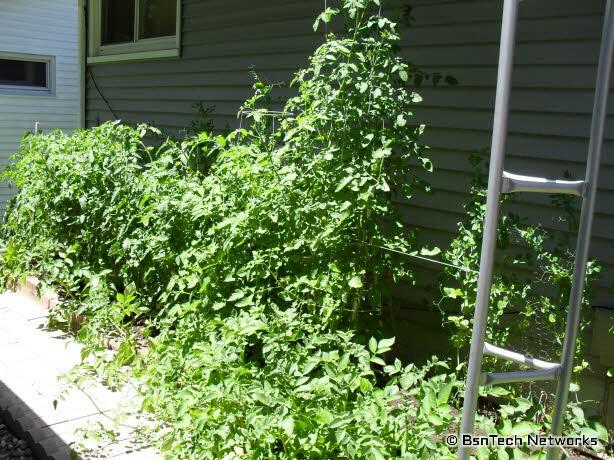
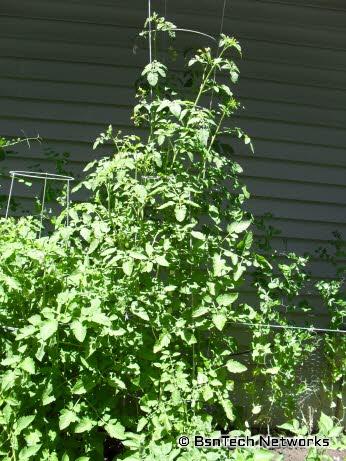
Look at that huge tomato plant in the above picture! It is over six feet tall now! That is the red cherry tomato plant. Here is a closer look.
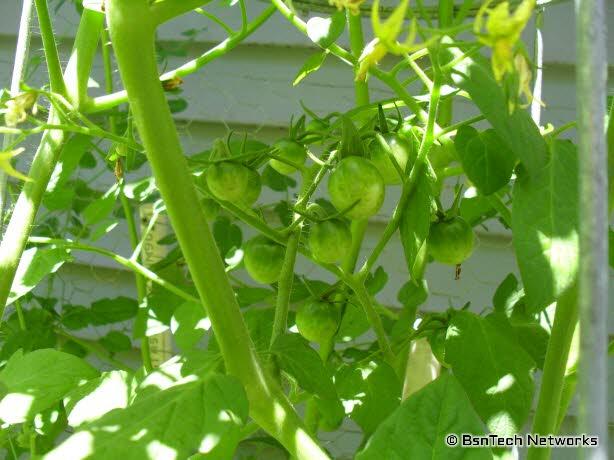
Here are some of the red cherry tomatoes on the vine:
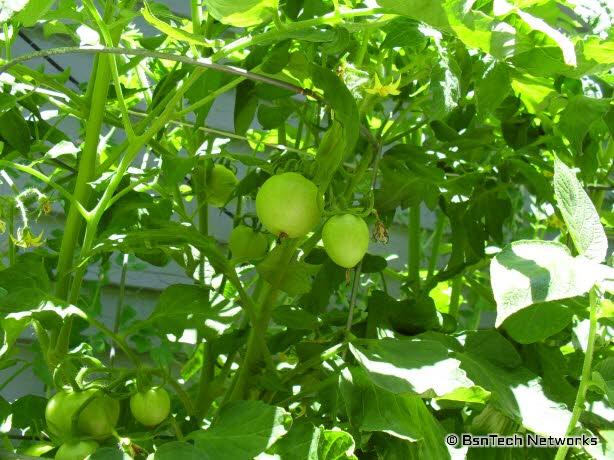
And some Best Boy tomatoes on the vine:
Now to the back garden.
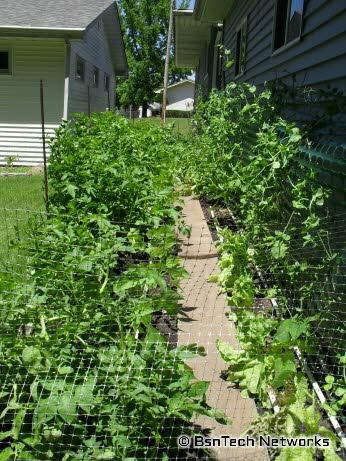
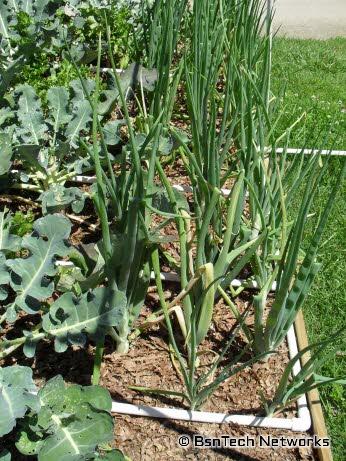
The potatoes have the reign back here. The potatoes were planted a foot apart down the right side of the walkway (which you can’t hardly see now). 27 total on that side. They were then also planted on the left side – but only about 14 on this side to leave room for lettuce in the back. There are green beans under the potatoes on the right sides of the board – but you simply cannot see them because of the potatoes covering everything up.
A view from the other side so you can see some of the lettuce (on the left) and some green beans (on the right).
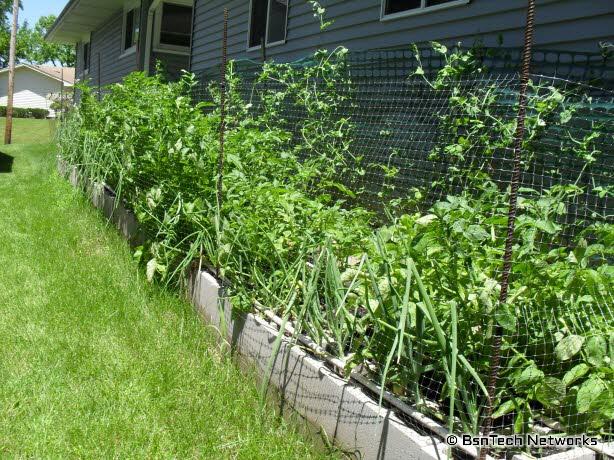
And a side picture of the garden – where you can see the onions that were planted in the foundation blocks trying to fight for some sunlight against the potatoes!
Going to the fruit area now – here is the Flame Bunch grapevine. This sucker is huge and has made it all the way to the end of the trellis (where the concord grape vine is – but isn’t doing nearly as well).
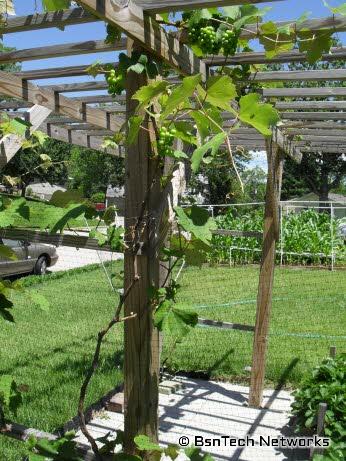
Did you catch the top of the photo? There are quite a lot of bunches of grapes that are coming along well. Here is a closer view.

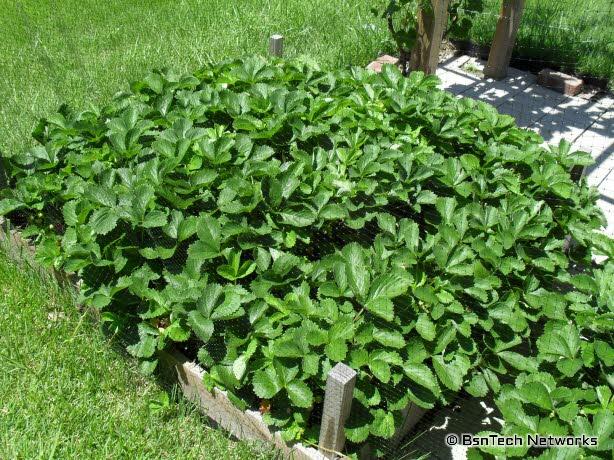
The strawberry pyramids by the grape arbor are still full of greenery. I cut off well over 50 runners from the two strawberry pyramids and took them to my parents house. So they have quite a bit of strawberries planted in their garden now. While you can’t see them in the picture, these Tri-Star strawberries are STILL producing! We will have another picking of strawberries in a couple of days. While the Tri-Star strawberries aren’t nearly as large as those huge berries you buy at the store, this variety does continue to produce fairly evenly throughout the year. The large strawberries at the stores typically produce once in the year and that is all.
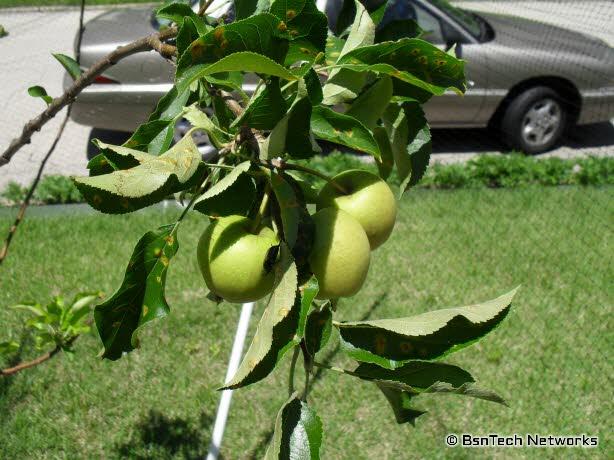
Lastly for the fruit – the Granny Smith apple tree. I’m going to have to provide some support for the limbs with apples on them. This one is drooping quite a bit because the weight of the apples. I’ve contemplated cutting the apples off (maybe seven on the tree in total), but may just get some support to tie the limbs together so we can have some apples. The Japanese beetles are out already and one of them is on a leaf of the apple tree below.
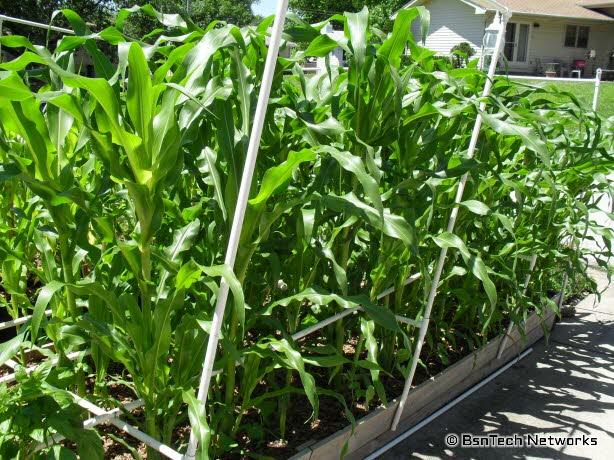
Now for the garden in the front. The neighbor asked me today when I was going to get the combine out to harvest the corn! The Silver Queen corn is at least five feet tall now – but the Sugar Dots corn is still lacking by at least a foot – if not more. I am wondering now if the Sugar Dots corn I bought online was tainted. Last year the Sugar Dots corn was very short as well and the cob was quite small. I ordered the seed from a website I’d never heard of before – so that is my fault. It is possible that they somehow bred a short corn variety in which is causing it. The Sugar Dots corn is in the front of the picture below; the Silver Queen behind it.

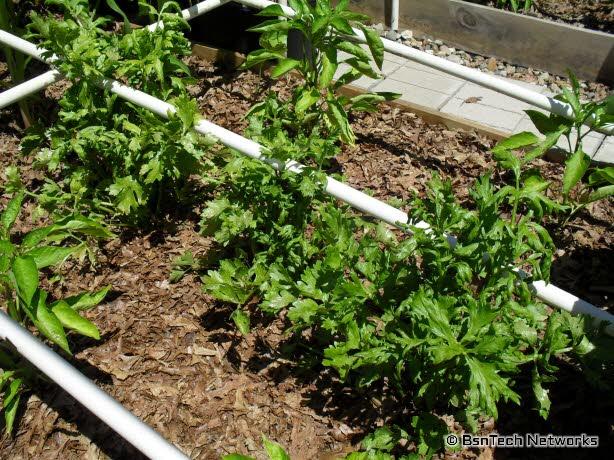
Also in the front garden is the Ventura celery. It is still coming right along – but it doesn’t seem to be growing anymore. I bet it is because of the very hot temperatures we’ve had. I’m not exactly sure when I need to cut out the celery and start to use it (going to try and dehydrate some of this as well). I know if I start seeing flowers or buds, it is time to cut. Just hope that won’t be too late.
And one of the California Wonder pepper plants. This has a few small peppers already started. The pepper plants have been coming along way lately – but about four of the eight are doing well – the other four are still quite small.

I’m going to see if I can save some radish seed this year. Here is a photo of a very tall radish stalk with flowers on it.
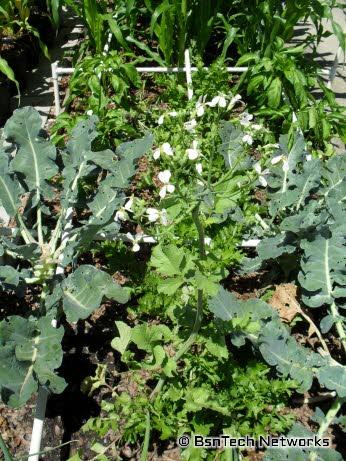
You can see the old broccoli plants in the picture above. I was hoping to maybe get some broccoli seed to try my luck at them – but I’m thinking I need to just cut most of these out – and maybe leave only one with some flowers on it. They are just eating up the nutrients in the garden and it is much too hot for them to make any side shoots. Plus, we have more than enough broccoli for the year with 12 pounds!
Here are the Copra onions in the front. The onion “leaves” aren’t really growing anymore – but I have noticed that the bulbs are getting a little larger. Still a long ways to go though.
And lastly, a side picture of the Silver Queen corn. The Silver Queen corn has many side shoots on them that almost look like a full corn stalk in itself! I’d say that close to every Silver Queen corn stalk has at least one side stalk – and some have two!
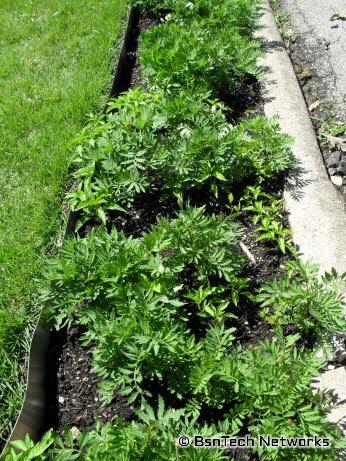
Lastly before going into the dehydrating, the curb appeal project with the flower bed is growing very well. Many marigolds have the flower heads on them and a few have opened up already. The marigold plants are very large – and it has competed most of the ornamental pepper plants out of the sunlight!
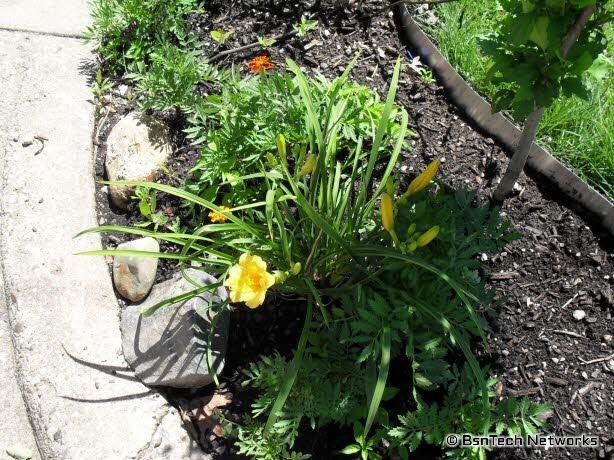
Here shows a marigold flower open (reddish and orange color flower) along with another flower that is still open.
That is all for the garden update!
Dehydrating Herbs
This is the first year that we are dehydrating herbs. We got a good deal on a Nesco FD-80 American Harvest dehydrator. The nice thing about this dehydrator over others is that it is square-shaped and not circular! Because it is square-shaped, it gives a lot more room for putting your items you’d like to dehydrate! We purchased this at Amazon several months ago for $45 with free shipping. At this moment, they are currently selling for $58 with free shipping.
The Nesco FD-80 dehydrator came with four trays with the one we received. I picked a lot of basil leaves today to try my luck at dehydrating basil. The basil plants are quite large so it was time to thin them out a little bit. I just took some leaves here and there from the plants – but mostly the largest leaves. The smaller leaves will continue to grow and get larger, but the larger leaves are at their prime and are ready to be used.
My first bit of luck was picking just enough basil to fit on all four trays. I could maybe fit a few leaves extra on the trays if I really scrunched them together, but overall I picked just the perfect amount!
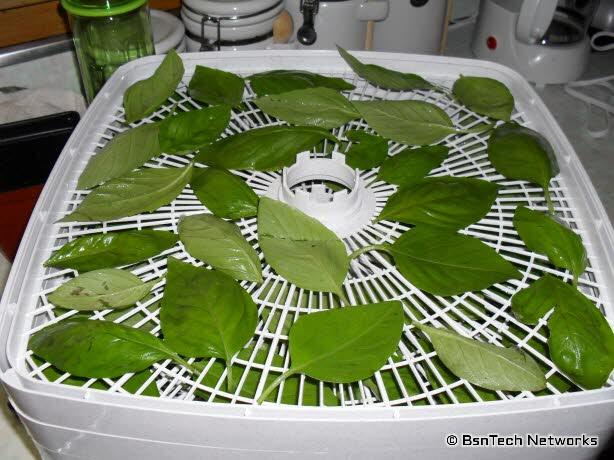
I washed all of the basil leaves first to get any dirt off of them and then placed them on the trays. They all are spaced well and do not overlap each other. You don’t want to overlap as much as possible – otherwise those areas won’t dehydrate as well and will require more time.
The Nesco FD-80 dehydrator has a good heater and temperature control right on the top of the unit.
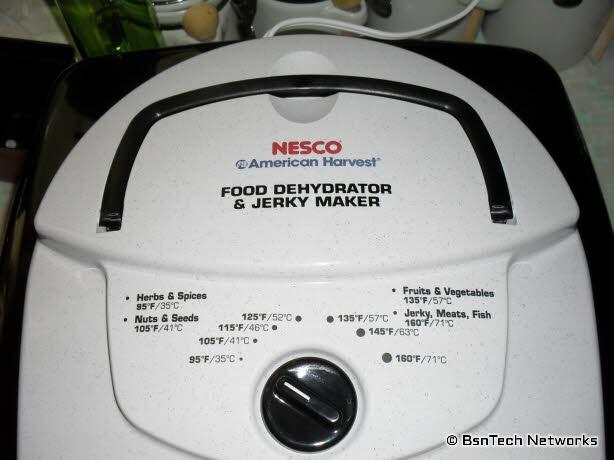
Very nice! Right on the top it says to dry herbs and spices at the lowest setting – 95 degrees. Perfect and easy without having to consult the manual.
The question is – how long should you dry them? Well, this is very experimental. You just need to check on them every now and then (about once an hour). Once they are done, they should crumble easily – which means they are fully dehydrated. If they don’t crumble easily, wait another hour and check again.
How long did it take this batch of basil? Well, the book that came with the dehydrator said it should take between 20 to 24 hours. Nope. Not even close. It took about 48 to 50 hours. I then started taking the basil off of the top tray and crumbling them.
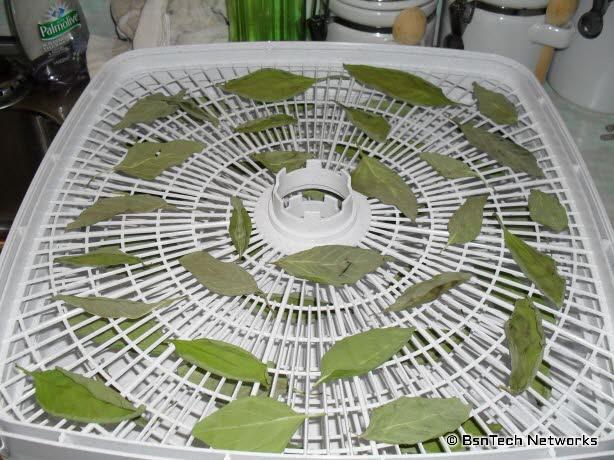
Wow! Much smaller than the were when they went on the rack eh? Yep. When I got a couple of trays down, I noticed there were some larger leaves that were not fully done. So even 48 – 50 hours wasn’t enough! How much basil came out of a full four-tray dehydrator?
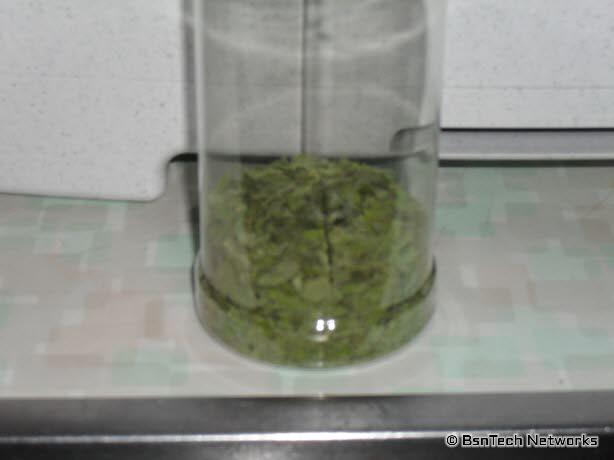
Not a lot. Disappointing to say the least. It managed to only fill a standard herb container up by about 1/5 or less. So, after all that electric used on the dehydator, I found that it wasn’t worth the drying of basil in a dehydrator. I’ll probably just put the leaves in a mesh bag or something for a week and see how they do next time.