Because I had a 55 gallon drum that I picked up from someone locally that won't work for my rain barrel project, I figured I would put it to use by making a compost bin.
I have seen these kind of compost bins sell for over $100 on TV ads and even online. Here you can make one for less than $20 if you can find a 55 gallon drum!
Let's get down to what you will need for this project:
- 55 Gallon Drum (Free)
- A pair of small hinges with screws ($1.68)
- A latch kit (barrel bolt) ($1.67)
- ONE sawhorse kit ($4.99)
- 1" steel pipe (I had some already – so free for me)
- 1" drill bit (I also had this already – so free for me)
- Jigsaw
- Drill
Total cost for the project for me was a measly $8.97 after tax.
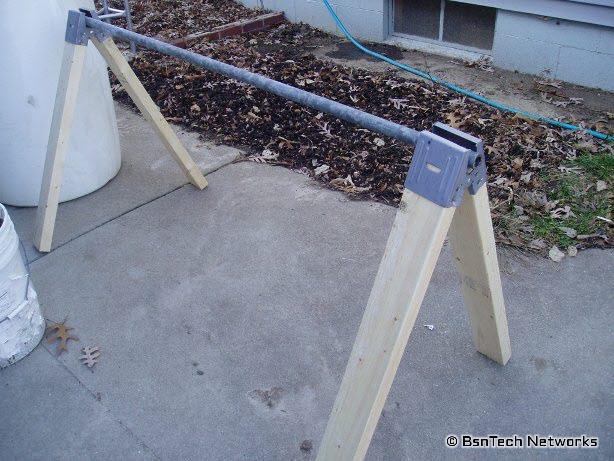
OK, so let's see some pictures of what is involved. Below is the saw horse kit and the steel pipe propped up to give you an idea what it will look like. As you can see, the saw horse kit I bought has two legs and it also had another wooden piece that goes across the top, but I didn't need it in this case.
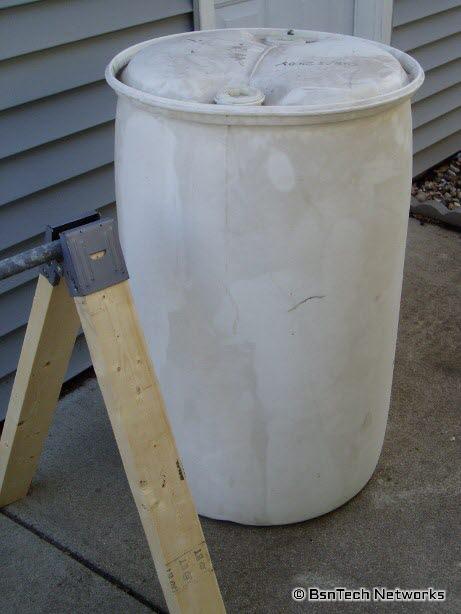
Here is the 55-gallon drum that will be used:
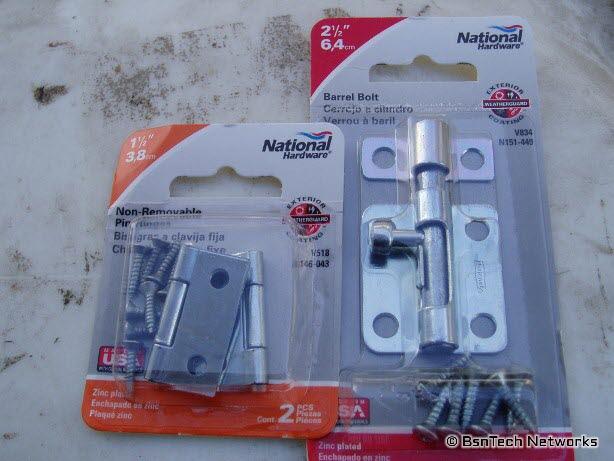
Here are the hinges and the latch that I bought:
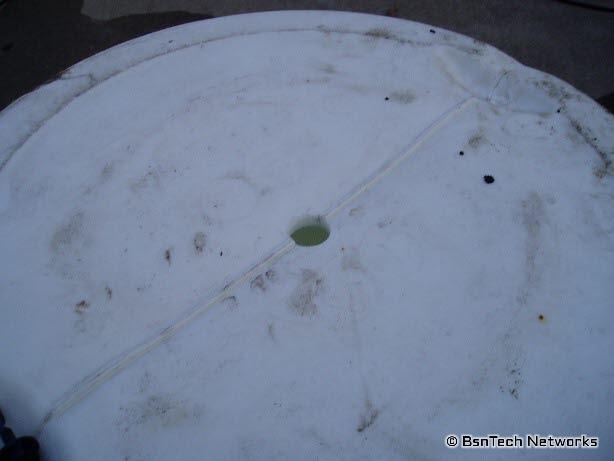
Now, let's get started. The first thing you need to do is to take your 1" drill bit and cut out a 1" hole on both the top and bottom of the 55-gallon drum – right in the middle!
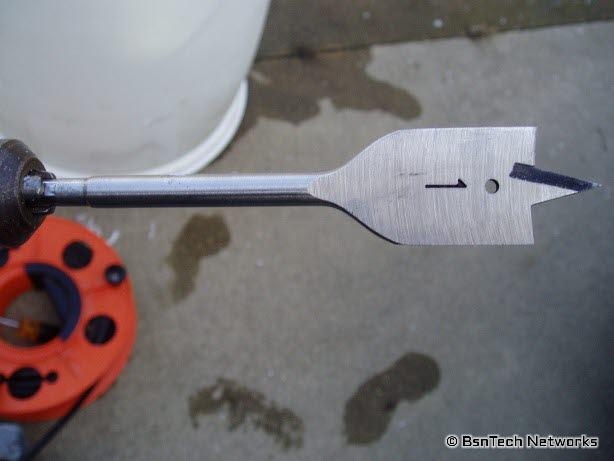
After you have the holes made, take your 1" steel pipe and put it into the hole. It will be a very tight fit – so in order to allow it to rotate better, you should put the steel pipe into one hole and wiggle the pipe back and forth and in a circular motion to make the hole just a wee bit bigger (or just get maybe a 1 1/8" drill bit instead!). Now turn the barrel over and do the same thing in that hole.
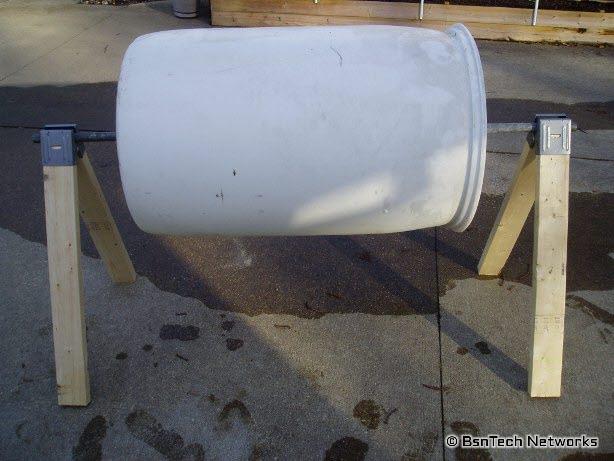
After doing that, the pipe should freely move into the hole without much problem. Now comes the fun part! You need to put the steel pipe through the 55-gallon drum and put it through both holes! I had to have the wife help me because it wasn't something I could get just right! Now get out your two saw horses and put one on either side of the drum and put the pipe onto them:
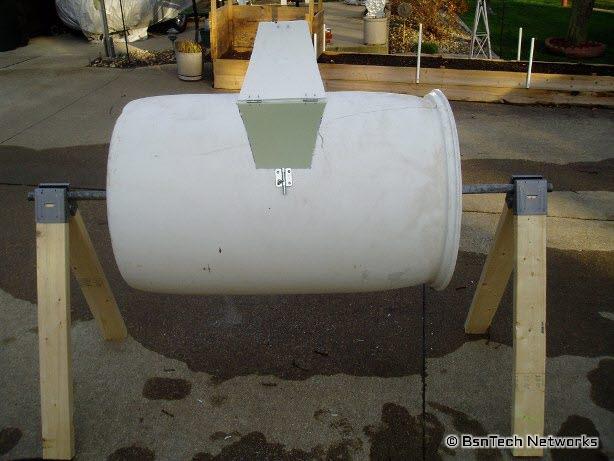
Wow, it is already starting to look like a compost tumbler! The next step is to figure out how big of a hole you want to make in your bin. I made mine about 10" long at the top and about 7" at the bottom. If you'd like, you can make it just a big square, a triangle hole, or a trapezoid-like hole. I chose to use a trapezoid-like hole since I had two hinges and only one latch. Now, you need to make two four pilot holes (or three if a triangle-opening shape) on all the corners. The hole needs to be big enough to allow your jigsaw blade down into the hole. After this, take a sharpie marker and mark the area where you want to cut. Oringally, I was going to make a triangle opening – but I didn't think this was big enough. So you can see here I have some extra lines:

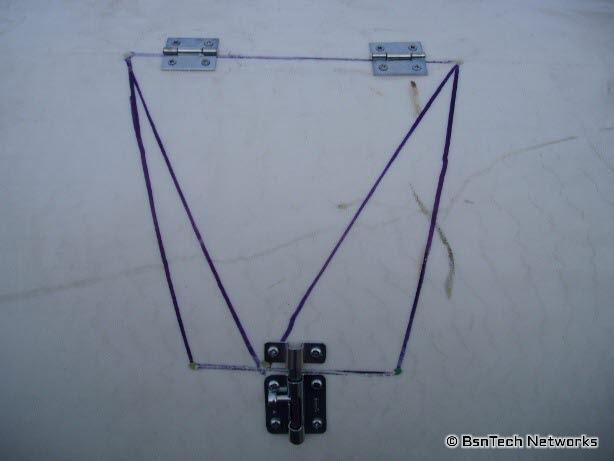
Now take your jigsaw and cut across the line where you are going to place your hinges. I placed mine at the top. I HIGHLY recommend that you only cut this one line and then add your hinges. If you cut the entire hole first, it may be more difficult to add your hinges on – and the plastic piece may fall through the bin as well!
After you get your hinges screwed on and attached, cut the line opposite of the one you just cut (the bottom line in the picture above). Then add your latch that will allow you to open/close the lid.
After you have the latch added, now cut the two remaining lines (the ones on the left and right). Below is a close-up picture of what mine looks like after adding the hinges, latch, and cutting all the lines.
You are all done! you now have a working compost tumbler. Now just give it a spin and see how easily it moves!
I then added in some of my neighbors grass and leaves that he mulched up today while mowing his law (nice today for almost December – in the lower 60's in Central Illinois).
Enjoy your new tumbler! You can add organic food scraps (not meat!), leaves, grass clippings, and any other organic matter to your composter. Every few weeks just give it a little bit of a spin! These compost tumblers work much better than just having a big compost pile because there isn't any shoveling and heavy labor required.