Wow, it has been over two weeks since my last post! Why has it been so long?
Well, there isn’t much at all going on around the garden lately. The only things left standing in the way of veggies are the peppers, cucumbers, and tomatoes. Basil is still being harvested slowly but it doesn’t appear to be growing anymore. So, no point on reporting on things that haven’t changed right?
Decided to post today – just because it has been a while – and because over the weekend, we tried our hand at making REAL grape wine. The wine we’ve made previously is real I suppose – but this time it was actually us getting the grapes, crushing them, and straining them to get the juice.
The wife’s sister dropped by on Friday. She has two grape vines at her house and they are huge! They are about eight or nine years old. She brought two bags of grapes – probably about 17 to 18 pounds of grapes in each bag! Unfortunately, she picked one of the bags about a week ago and then put them in the freezer. So by the time they got to our house for “processing”, they looked rotten and stunk pretty bad. Would have been nice to have those though.
The other bag was good because they were picked just that day. It took me probably 30 minutes to go through all of the grapes and pull them off the woody pieces that hold the clusters of grapes together. I also had to pull off a lot of bad grapes that bugs or birds got to.
Unfortunately I didn’t take any pictures of these. I also had some grapes out on our two vines as well – so I went to pick those and throw into the mix. I only had about a pound of grapes from my two vines – but the vines were just planted last year!
One thing I am not happy about is the type of grape vines that we have. I’m not fully sure what kind they are, but both of them are the same. Originally I had ordered four different grape vines from a place online called Willis Orchards. The vines were a Flame Bunch Seedless grape vine, a Concord Seedless grape vine, a Crimson Seedless grape vine, and a Niagara grape vine – which had seeds.
When they were planted, only the Flame Bunch and the Concord Seedless seemed to make it through the winter; the Crimson and Niagara did not do anything when Spring broke.
Now – after the grapes ripened up on the Flame Bunch and Concord Seedless vines, I discovered they were NOT Flame Bunch or Concord Seedless grape vines! The grapes were not green like Niagara – but they definitely did not have any kind of red or purple pigments to them. The color more closely resembled a “Blanc du Bois” grape vine look. Needless to say, I’m not happy. I can’t just rip the grape vines out of the ground now and return them – and I wouldn’t want to because it would set me two more years back on getting new vines.
I originally had called Willis Orchards before they shipped the vines to me and wanted to cancel the order – because I found a cheaper place to order them from. Well, they proceeded to tell me to not order from them because this company was known for sending the wrong grape vines – and you’d get something that you didn’t order in the first place. Well, low and behold – I think they were talking about their own company! So I paid Willis Orchards $40 for four three-year-old grape vines; two of them died and the other two were not even the right kind. No more ordering from them!
Anyways, let’s get to some pictures. After getting the grapes broke free, I put them through the food processor. Wow that made a mess. I then took that big mess and put it in the six-gallon “Ale Pail”, added some yeast, and let it sit overnight.
After letting it sit overnight, I needed to figure out how to separate the skins/seeds from the actual juice. I ran up to the local True Value and got a package of five-gallon paint strainers. They are nylon bags (there were two in the package for $3.50) with holes all over so the liquid could escape – and it has a nice elastic band around the top of the nylon bag.
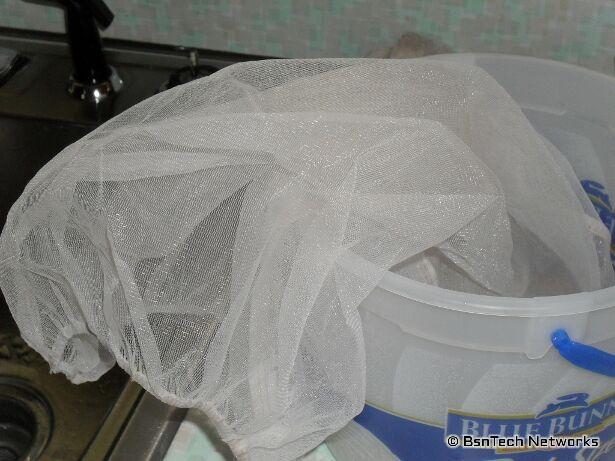
So I put this bag around the “Blue Bunny” ice cream container you can see there – and then poured all of the skins, seeds, and grape juice into the bag.
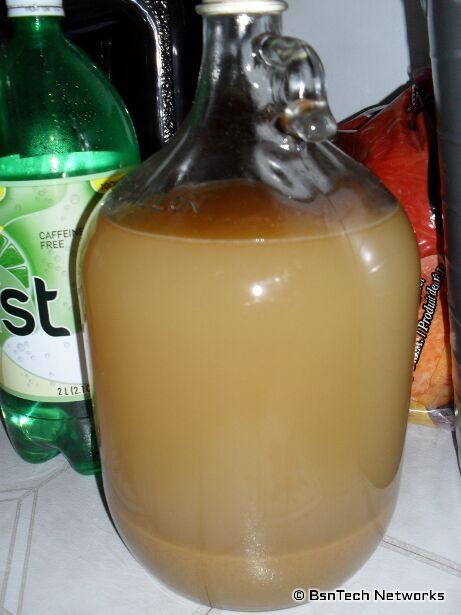
After almost an hour of trying to compress the bag and get the juice separated, I finally was able to put it in one of our gallon wine jugs. Unfortunately from all of that work, we managed to get less than one gallon of juice.
I’ve seen many home-made wine presses online where people use hydraulic bottle jacks between two pieces of wood to squeeze apples, grapes, and other fruits – and I think that I’ll build one of these next year. It is a nice wine press that works well – without the cost of paying $250+ for a real wine press that the pros use.
So anyways, here is the wine juice in the container. You can see that it isn’t a full gallon of wine – and there still is a lot of particles and debris down at the bottom.
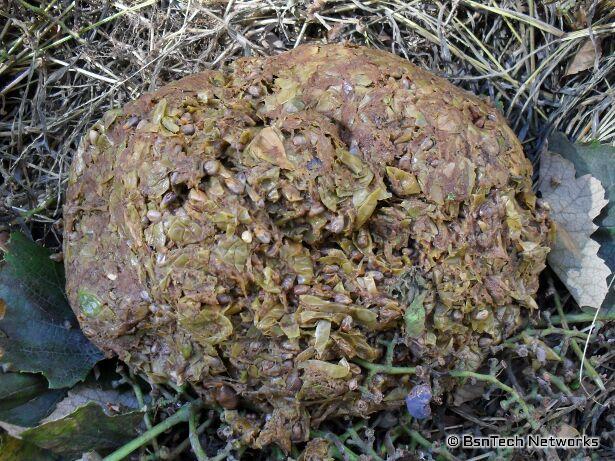
Here is the big blob of skins and seeds from the grapes that were taken out of the nylon bag. I bet if I had one of those wine presses, I could have filled the gallon container – and probably even made a bit more.
After a few hours, the yeast really started doing some work. Some of that extra stuff that got through the nylon bag started to collect around the top. I had to give the bottle a good twirl to get all of this off the side of the bottle.
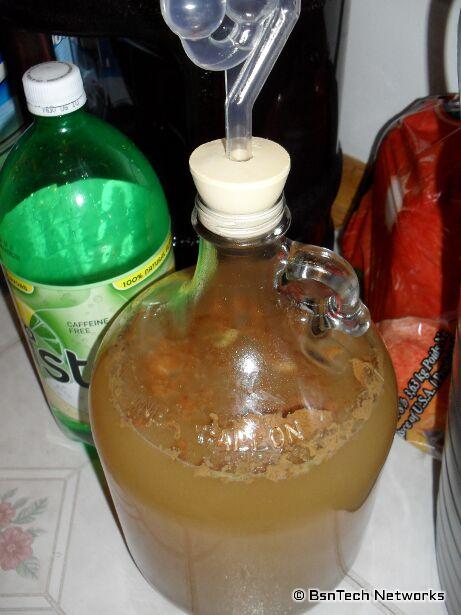
This is the first time doing it – so we’ll see how it turns out. I know next time that I will not run the grapes through the food processor – and I know that a fruit press is definitely needed. I did add 1/2 teaspoon of bentonite, one campden tablet, and 1/2 teaspoon of pectic enzyme to the mix.
Meanwhile, here are some photos from the garden.
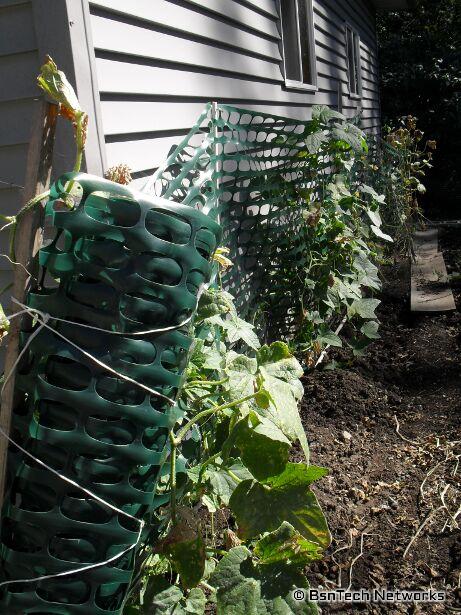
The back of the garden has about five of the six cucumber plants left. They are still providing cucumbers at a good rate (picked three today). The Burpee Pickler vines do not look nearly as good as the Straight Eight cucumber vines at this point. But I have found out that the Straight Eight cucumbers have a tendency to get bitter after a period of time – but I haven’t noticed the Burpee Pickler cucumbers doing this.
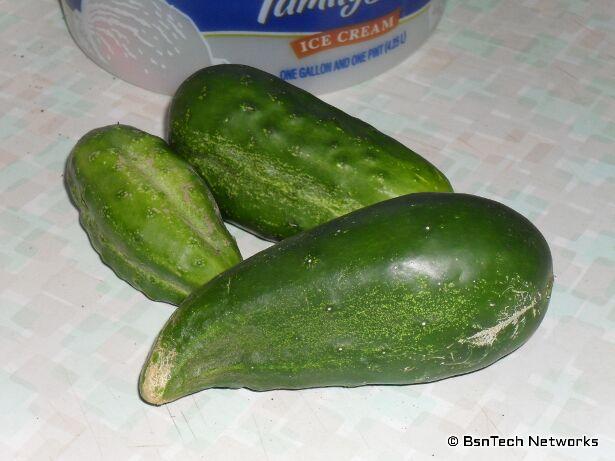
Here are the cucumbers that were picked today.
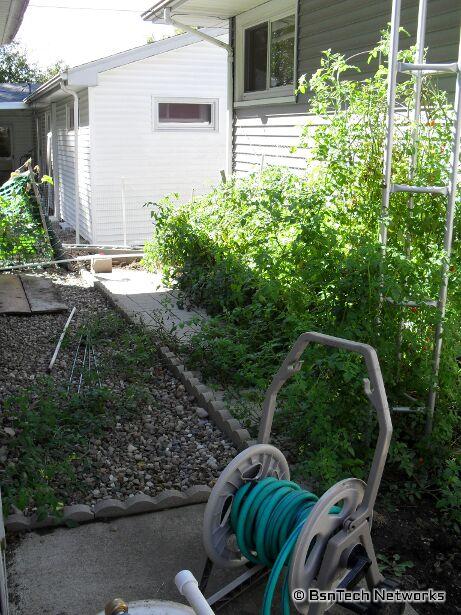
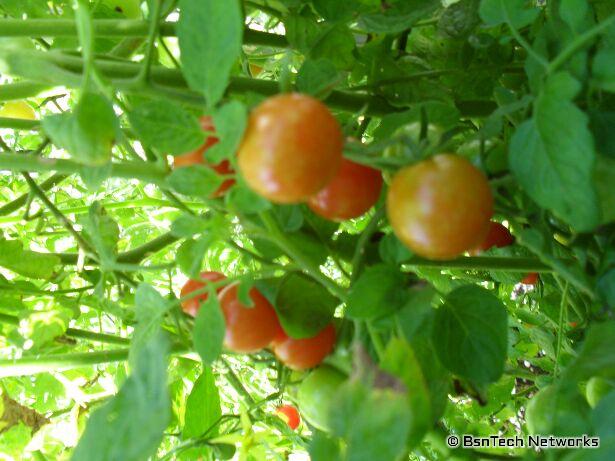
The tomatoes are still doing well. Something is getting to the tomatoes though that is causing little black spots in them and then the spots get large and eventually rot the entire tomato. Or – something is burrowing in them and rotting them out quickly. I’ve seen a lot of small white flies surrounding this area. So, we have to pick the tomatoes when they are just beginning to turn red and let them sit indoors. That allows us to beat out whatever is causing the issues.
You can also see in the picture that the cherry tomato plant (the one in the front) is HUGE and it has even put branches out into the landscaping as well.
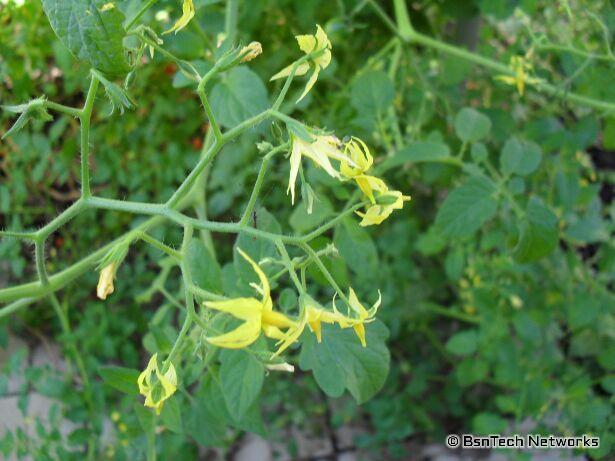
Here are a few pictures of the cherry tomatoes; one of the small tomatoes and another of the flowers that just keep coming!
Not much left in the patio garden. The bins that I was growing some corn and potatoes in were turned over and emptied into this area this week. In this area, I attempted to grow some Greencrop green beans. They did well – but then they just all abruptly died at the same time. The area also is growing the basil (which you see here) and it still is going very well.
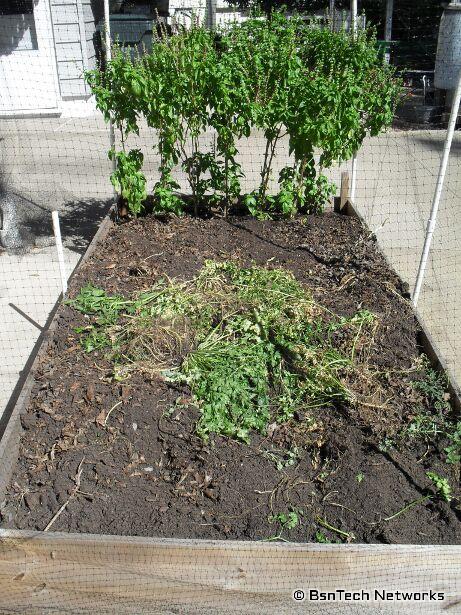
What is all that stuff thrown on top? Those were the parsley plants that I pulled up yesterday. Parsley smells like celery – but it is used as an herb where you cut off the parsley leaves. I thought they tasted like soap. I’m not too sure why I planted these actually – but they did last through this deathly-hot weather this year and grew well.
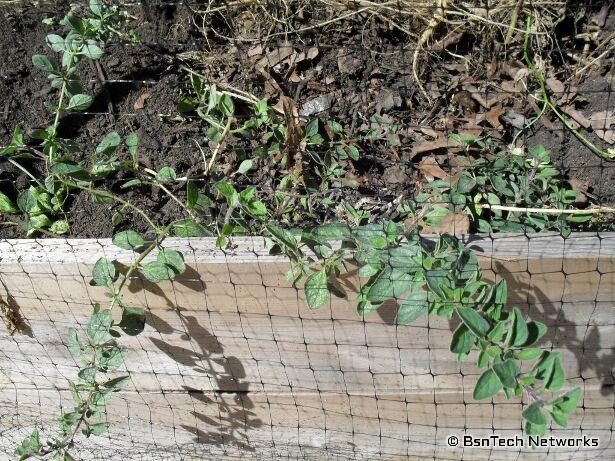
On the other hand, some oregano was planted right next to the parsley and it just didn’t grow well. I looked at a lot of pictures online of oregano and saw how bushy it got – but the kind I planted didn’t get bushy at all and was a let-down! There isn’t enough to even dry and use.
I may see if I can find a different variety of oregano – if one exists. I bought these at the last minute at the local garden store in the typical Burpee packet. When it comes to herbs, basil is our number one followed by oregano. We also use a lot of garlic salt as well. That is something I should try growing in the future – garlic.
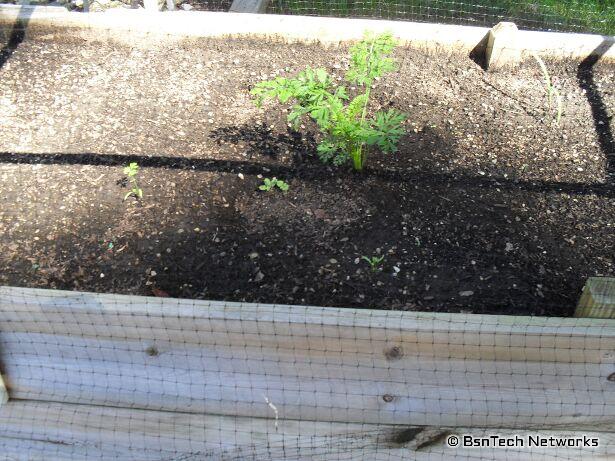
Over in the old carrot bed, a few carrots have decided to grow! One just sprouted sometime in the past couple of weeks and the other one is now about a month old. I have just let them be – but when it comes time to cleaning the beds out for next year, they will be pulled (if they don’t rot first).
To the front garden now. The eight pepper plants are still here along with a radish plant still putting on some seed. The rest of the bed is unoccupied. Well, it is occupied by some dead green bean plants that never made it, but I’m not counting those.
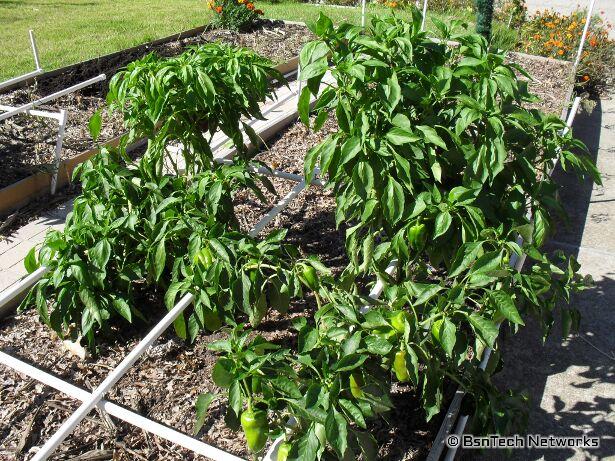
After adding some epsom salt around each of the pepper plants and giving them a feeding of compost tea about twice a week, it seems like they are doing very well! You can see all of the green peppers that are on the plants and there are quite a few blooms as well.
A few peppers were picked today. There was a branch that was broken on one of the plants so I picked the peppers on it. They were mostly all small, but I’ll take em!
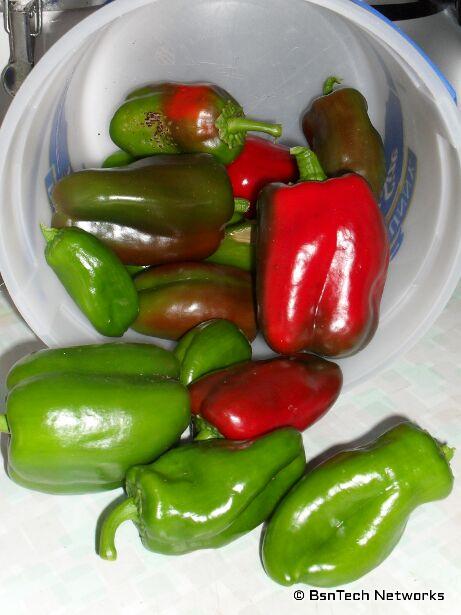
Something has also been rotting the peppers out as well. in the picture above, you can see some black spots on one of the peppers. There is another pepper in this bunch that has some flesh-colored areas that feel like a rotten area. Just as with the tomatoes, the peppers also need to be picked before they get ripe. Otherwise, something causes spots on them and poof – they rot.
This one radish plant just won’t quit! I pulled about 3/4 of the plant over a month ago and harvested all of the brown seed pods. Thinking of that – I still need to crack those open and get the seeds out! But this radish plant is putting on more flowers – and more seed pods!
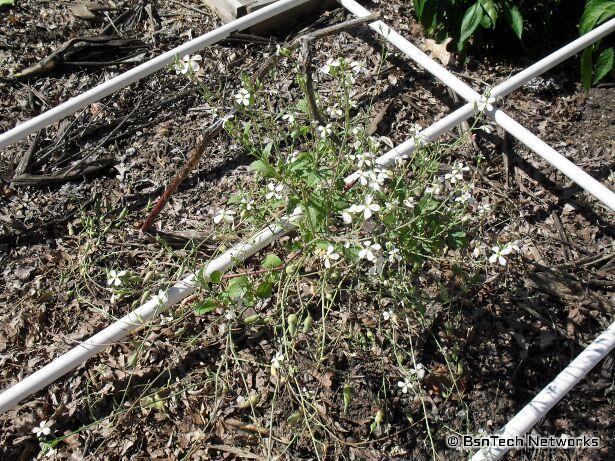
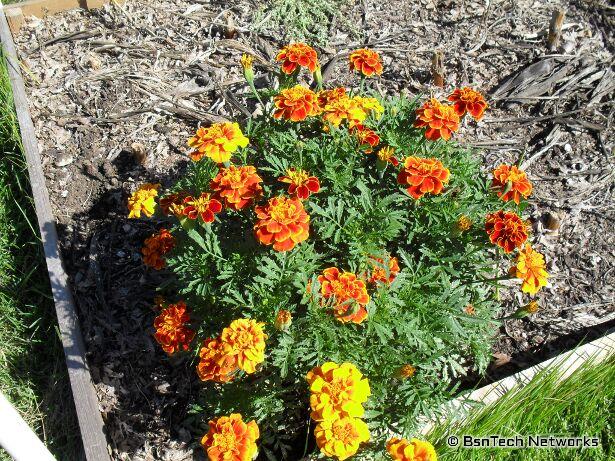
Over on the far end of the front garden, a huge marigold plant has really came a long way. Somehow a seed got into the gardening area back when there was corn in the area. The marigold plant looked pretty bad and appeared it was going to die. Well, now this ONE plant is huge and has flowers all over it!
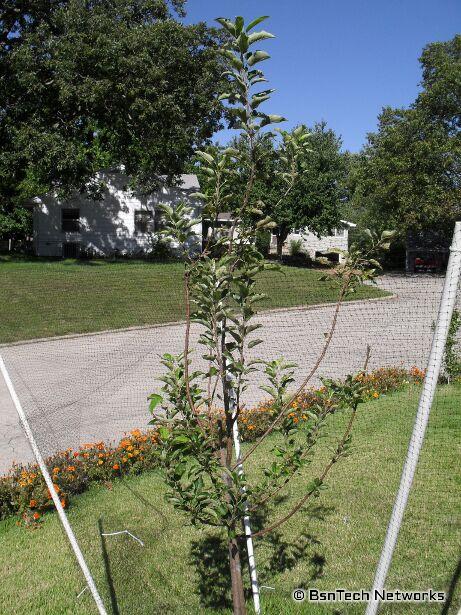
Onto the Granny Smith Apple tree. The tree seems to be turning around now that it is protected from the deer. It has put up one long branch so the tree is getting taller now. It still isn’t strong enough to hold apples, though.
Unfortunately the other two apple trees that were planted met their demise about a week ago. These were called “columnar apple trees”. One of them was a North Pole and another was a Golden Sentinel. The North Pole was to put on red apples – an the Golden Sentinel was to put on yellow apples. It would have been neat to see this vertical tree – that has no branches – put on apples in such a small space. But the deer just kept eating every single leaf that would come out on these “twigs” that were coming out of the ground.
They were just a pain to mow around and I wasn’t satisfied with them – so they were pulled out.
How about the strawberries! The tri-star strawberries did not like the heat this year at all. At one point, both of the strawberry pyramids were completely dead-looking; no greenery in sight. Much of that was my fault. I was side-tracked and busy with other projects around the house (and I didn’t want to get out in the heat) so I just didn’t keep them watered. There were times where we didn’t get a decent rain for three or four weeks at a time – so they just died.
Amazingly enough, most of them have come back now. The one on the top never came back though – so I’ll have to pull a runner (or a baby strawberry plant that is made from a stem from another established strawberry plant) and put it in this area. The strawberry beds also need to be refilled with some more compost since they have sunk again. This takes a long time to do because the compost/soil has to be slowly added around each plant – and then each plant pulled up just enough to sit on top of the new compost/soil. This is done so the roots aren’t disturbed as much.
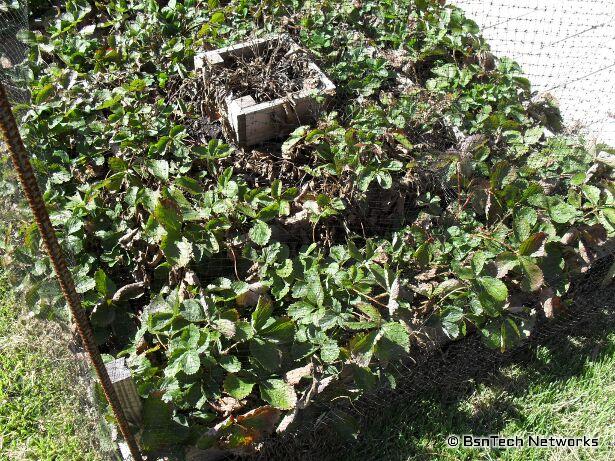
There is still a lot of dead leaves in here – but I’m hoping they will just compost down into the soil on their own. Meanwhile, we still have three quart jars of strawberry jam in the fridge. We just finished one (took about three weeks) and it is very good! Nothing like your own strawberry jam!
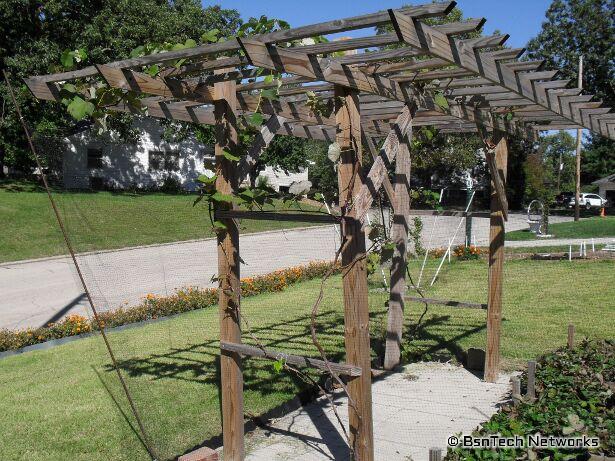
And for the last picture of the post – the grape vines and arbor. The vine closest in the picture is the one that was supposed to be the Flame Bunch vine – but like I said earlier, the grapes never turned red like they should have and were more like a “Blanc du Bois” grape color. This vine overtook a huge area on the arbor and was inter-twining with the deer netting around the arbor. So when I went to pick the grapes on Friday, the vine got a good pruning and now it is more in-line and ready for growth next year. In all reality, I should not have pruned the vine until March of next year – because that is the time to prune grape vines in this area.