I posted my review of the Nesco / American Harvest FD-80 Dehydrator on Amazon the other day:
We use the dehydrator for one purpose mostly – and that is dehydrating fresh basil leaves. The dehydrator came with four trays.
When I filled the four trays with basil leaves and set it on the recommended setting of 95 degrees (lowest setting), it would take the basil between four and five days to full dehydrate. Yes, four or five days!
Later we decided to go ahead and purchase four more trays to max the unit out – so we could pick more basil (about five ounces worth at a time) and fill the eight trays. Now it takes between seven and eight days to full dehydrate the basil!
This seems like an extreme amount of time for dehydrating basil. Even in the book that came with the unit, it indicated basil should be dry within 24 hours. Definitely not the case.
We then tried a few trays of strawberries from the garden. The book said (if I recall correctly) that it should take 11 – 12 hours to dehydrate the strawberries. Nope. It took about two days.
The dehydrator is very reliable and the fact that it has square trays was the sole reason I purchased the unit – for the fact that you can fit more on it. I plan to do some experimenting with the dehydrator here soon with the last batches of basil before the frost hits. I believe that the slow drying times is because of the 95-degree recommended setting for herbs – but I plan to try to do my next batch of basil at the highest temperate setting and see how long it takes then – and if there is any difference in the quality of the basil once done. You can read about this on bsntech.com when completed.
Let’s start with some information about this dehydrator.
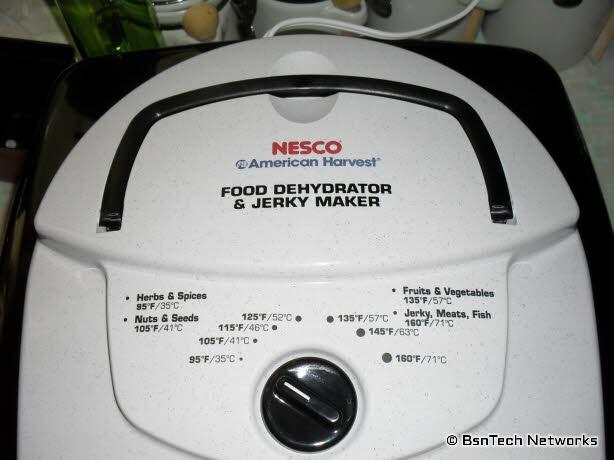
Above is a top photo of the dehydrator. The Nesco / American Harvest FD-80 dehydrator has the blower and heater on the top. Other models may have the blower/heater in the back, one of the sides, or the bottom. I opted to purchase this version with it on the top – because in case of any water leakage, you don’t want it leaking down into your blower/heater if it is at the bottom.
You can see the temperature setting on there as well with some of the recommended temperatures for various items. This comes in handy because you don’t need to resort to the manual every time to look things up; it is right on the top and easy to read.
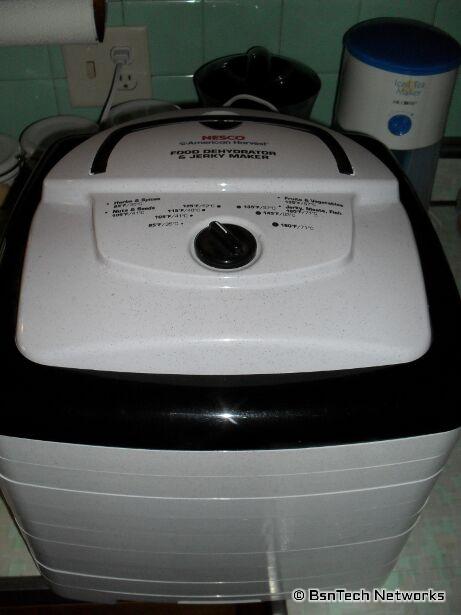
Another big reason I purchased this dehydrator was because of the square-shaped layout. Why? Well, how much surface area does a circle have compared to a square of the same size? Less. So that means you get more bang for your buck with the square model and you have more usable square feet available.
Noise – Well, there is some noise to it – but that is a given. It isn’t terribly loud but we can hear it throughout the house. Our kitchen is centrally located in the house between the other rooms (about 1,100 square feet) – so we can hear it running if there isn’t any other noise. The noise isn’t bad at all and is quite tolerable. It is about the same noise level as running a ceiling fan on high.
Construction and durability – The entire thing is made of plastic. it has that nice “cookies-n-cream” look to it with a white plastic with little black dots embedded in it. The outside perimeter of the trays are built well – but I do question the actual area of the trays where you lay the items to be dehydrated. I’m always afraid that if I push too hard, that it will snap some of the plastic. Speaking of the trays – some folks have complained about items falling through the slots in the trays which allow for the air to penetrate through the trays. While I have had this happen a few times where basil falls through, it is tolerable and not bad.
Expandability – The American Harvest FD-80 came equipped with four drying trays. They all just stack on top of one another. It is expandable up to eight trays (which I later purchased to max the unit out). In the picture above, all eight trays are shown.
Now, let’s get on to my experiment with the temperature settings and various drying times.
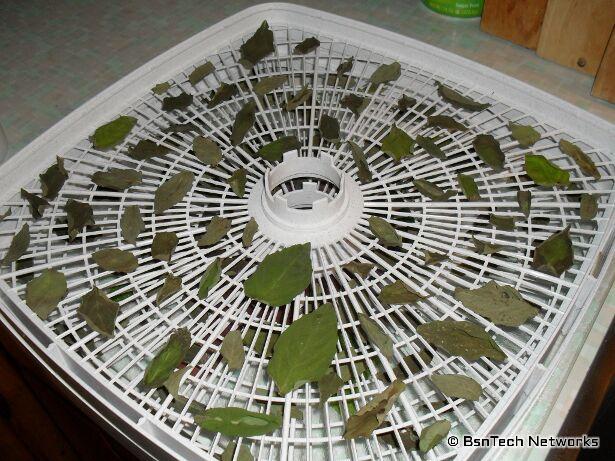
The very first batch of basil that I dried – I washed the leaves. This can be seen in the below picture with the sheen coming off of the leaves. I did not do this on all other batches after this. Washing the leaves added the additional moisture to them and it took a bit longer to dehydrate them.
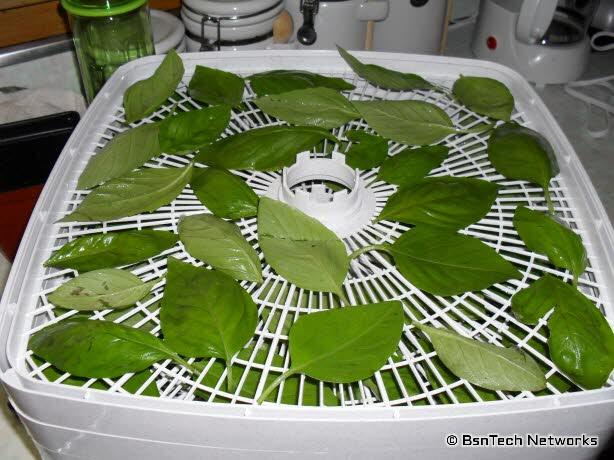
Looking back at these leaves, I am astounded to see just how big those leaves were! In the batches since, the leaves have been smaller. There is a lot of space between the leaves – as you can see above – but with all batches after this, they were snugged in very close together. Of course, the more you load your dehydrator and the less space between the items, the longer it will take to dehydrate.
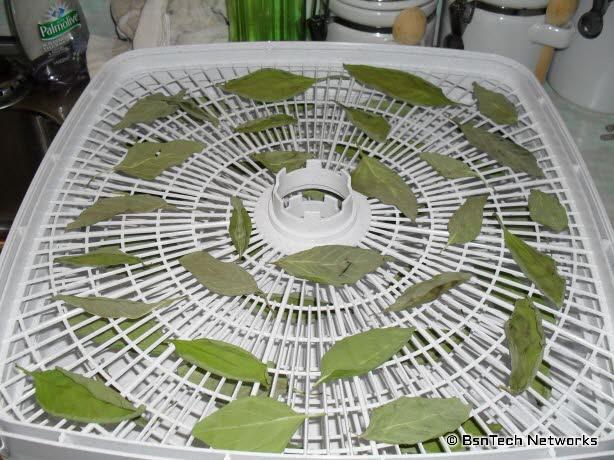
One day later, this is what the batch above looked like. The basil has shrunk quite a bit because of the moisture escaping the leaves, but the basil still was not fully dehydrated – which is obvious when you look at the bottom left-hand corner leaf that still is very green.
Our dehydrator is not used nearly as much as what other folks use theirs for. Ours has only been used to dehydrate basil and some cilantro. However, just as my review of the Nesco FD-80 dehydrator that I wrote on Amazon, ours takes a LONG time to dehydrate herbs. The booklet that came with the dehydrator says it should only take 24 hours to dehydrate basil and herbs. Not so.
I e-mailed Nesco Customer Service and got a nice response back from Joy. Joy indicated that our unit is potentially defective and for me to call into Customer Service to setup an RA (Return Authorization) number. I would be required to pay shipping to them – but they pay to ship it back. This is all provided that my unit is still under it’s year warranty – which it is.
Now the question is – is it really defective? I posed a question to Joy and asked her if the booklet that indicates basil should dry in 24 hours is based upon the highest temperature setting on the Nesco FD-80 dehydrator – which is 160 degrees. The lowest setting – which they recommend for use on herbs (as seen in the picture above where it says “Herbs & Spices”) – is 95 degrees.
As in my review of the American Harvest FD-80 dehydrator states above, it would take three to four days to fully dehydrate basil at 95 degrees with the included four trays. Bump the trays up to the maximum of eight (like we did after the first batch of basil) and it takes seven to eight days.
I have some basil dehydrating at this time. I put it in there and fired the dehydrator up at about 2:30 pm on Sunday. This time, I decided to experiment – and I have the temperature setting at 115 degrees instead of 95 degrees. It is now Tuesday. About 41.5 hours later, some of the basil on the top tray already appears to be dehydrated!
So the question is – again which I asked Nesco Customer Service – does the temperature make a difference? To me this was a common sense question. If you have room temperature air blowing on you, how long is it going to take you to sweat? Now, how long would it take 160-degree heat blowing on you to make you sweat? I hear your thoughts – exactly.
While I haven’t fully proven this yet, it does appear odd that 41.5 hours later (still well over the 24 hours the book says it takes to dehydrate basil), some is already dehydrated. Last night when I checked, the leaves were withered up but they were still “limp” and had moisture. This morning when I picked up a few pieces, they were indeed fully dry and maintained their shape when they were picked up.
Stay tuned with this experiment. I’ll also compare the basil that I’ve dehydrated at 95 degrees to this that I’ve dehydrated at 115 degrees and see if I can tell any difference. The next experiment I’ll try is to run the dehydrator at the highest setting of 160 degrees and see how much closer I get to dehydrating basil in the amount of time the book says that came with the Nesco FD-80 dehydrator.
Thursday, October 14th @ 4:30 PM
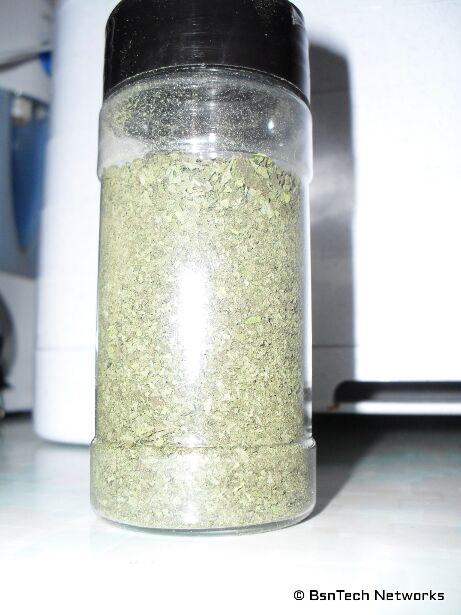
Well, the basil is fully dehydrated! This batch started on Sunday at approximately 2:30 pm. It is now Thursday at 4:30 pm and I’ve removed and crushed all of the basil.
Here are a few more pictures to start off. These were taken on Tuesday – after about 50 hours of dehydrating time. The first picture is the top-most tray in the dehydrator:
And now the bottom:
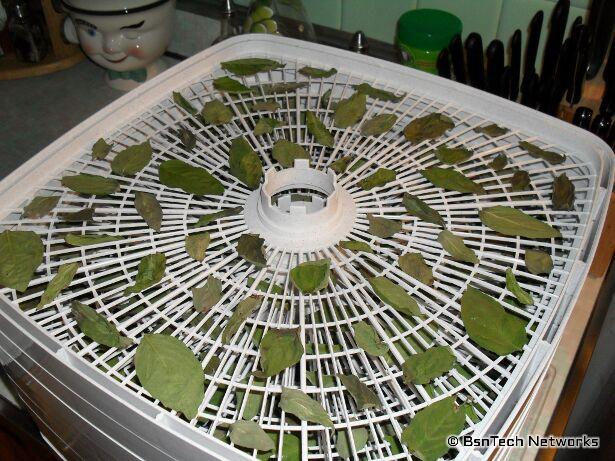
Can you tell much of a difference between the very top tray and the very bottom tray? To me, it almost seems that the top tray is drying faster than the bottom tray. You can see that the curling and browning of the basil on the top-most tray seems to be more present than the bottom tray. After taking these pictures, I did rotate the trays. So the bottom tray became the top, the second-from-the-bottom tray became the second-from-the-top, and so on.
Now moving to the results.
At a temperature setting of 115 degrees to dehydrate basil, all eight trays completed in HALF the time it takes if the temperature setting is at 95 degrees – which is the recommended setting from Nesco/American Harvest. Hard to believe that just 20 degrees differences cuts the time in half!
So, it took a total of 98 hours to dehydrate the basil at 115 degrees.
Now, what about quality? Is there much of a difference between dehydrating basil at 95 degrees or 115 degrees? For the most part – I couldn’t tell. Taste was the same and the aroma was the same. However, I did find that crushing the basil that was dehydrated at 115 degrees was easier – and it crushed into much smaller pieces.
Continue to stay tuned to this post. I will update it with the next batch. The next batch of basil will be dehydrated at the highest setting – 160 degrees.
Saturday, October 23rd
The next batch of basil has been started at about 11:30 AM. The temperature is set at 160 degrees; the highest setting. We’ll see how long it takes to dry this batch at the highest setting.
—
As an update, I changed the temperature from 160 degrees down to 135 degrees (20 degrees higher than the last trial – which was 115 degrees) after about two hours. Why? Well, the basil was getting cooked and started smelling – as my wife said – like candied yams! Very sweet smell but it was cooking the basil. This batch probably is ruined. So, I DO NOT recommend drying basil at 160 degrees.
—
After another two hours, I changed the temperature up to 145 degrees. It does appear that some of the basil is almost fully dried already. Amazing considering it has only been about four hours so far! So again like my previous hypothesis, the temperature definitely makes a difference in the time required to dry anything. I may have one more batch of basil that I can take from the garden – as long as the frost holds out. I will then try an additional test at 135 degrees. Because I cooked the basil in this period, the taste tests will be way off I fear to make this trial worth considering for dehydrating herbs.
Sunday, October 24th
Dehydrating is already done! Approximately 22.5 hours on this round! That is four times faster than when the dehydrator was set at 115 degrees and eight times faster than drying at 95 degrees. However, I still need to redo one more batch since the setting was put on 160 degrees for a few hours and potentially changed the flavor of the basil.
Thursday, October 28th
The last of the basil has been taken from the garden due to a hard freeze that occurred. After closely packing 6.25 ounces of basil on eight drying racks, I set the temperature at 125 degrees at 10 pm. The basil was – for the most part – dehydrated by October 30th at about 4:30 pm. That means it took 42.5 hours to dehydrate at 125 degrees. Compare that to 98 hours at 115 degrees. So by increasing the temperature by 10 degrees, it dropped the time by more than half – by 55.5 hours.
However, the basil could have been dried longer and I bet to get 100% drying of the leaves, it would have taken another day. The trays would have also needed to be moved around. The very bottom tray – only about half of the basil was fully dry – which made it pretty hard to crumble up with the undried leaves. The second to bottom tray and third-from-the-bottom trays (sixth and seventh from the top) were mostly dry but a few leaves didn’t get completed either.
So taking this into consideration, it does show that you need to move the trays to get even drying. If I were to have moved the trays, I’m sure it would have at least taken another 12 hours to fully dry those leaves. Therefore, by upping the temperature from 115 degrees to 125 degrees, it didn’t cut the time fully in half, but still did produce quicker results. The basil was not cooked and had nice green coloration to it at this temperature.