OK – so I will start off with the gardening activities first – and then go into the update on the bathroom project.
There wasn’t much at all that happened this week in the garden. Last week (probably Wednesday), I went out to pick a few cucumbers behind the garage. In doing so, I also turned the water on for the tomatoes since they needed a good watering. It was another scorcher this week – with everyday at around 95 degrees or higher.
I took the cucumbers inside to weigh them – and before doing so, I told myself that I’d better remember to go turn the water off. Well, I forgot. I drained the rain barrels out on the tomatoes! It was probably 300+ gallons of water that was given to the tomato plants. What is worse is it was right next to the foundation of the house. Luckily there wasn’t any kind of water that got into the basement.
Friday night we had some storms blow through the area so it dumped about two inches of rain on us. So the barrels are full again! Came just in time really.
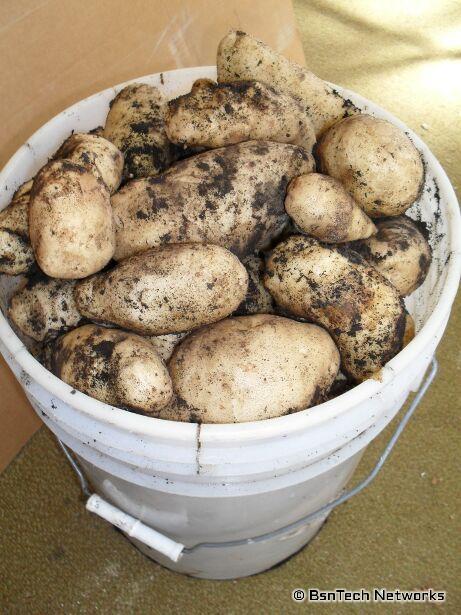
Saturday morning I got myself out of bed around 7:30 and went outside. I needed to start digging up to the potatoes. I was also worried with all that rain if it would start to rot the potatoes in the ground – because the leaves/vines on the potatoes had been dead for a few weeks now.
I picked one of the rows behind the garage – the longest row of about 25 potato plants. The other row has about 12 plants that I’ll have to come back later and dig up (can’t right now since the cucumbers are in that row).
I was absolutely amazed! I got a full five-gallon bucket full of large, nice-sized Kennebec potatoes. It was just over 31 pounds of potatoes after they were all picked. This exceeded my estimates of one pound per plant. This made up for some of the other potatoes that didn’t produce anything – or those that rotted in the ground.
Later in the day I also picked about four red California Wonder peppers from the front garden. It seems that after adding epsom salt, they seem to be more lush and are growing better.
Sunday night I went out to pick a large cucumber – a Straight Eight cucumber that weighed just under a pound.
The gardening season is quickly coming to an end. The green beans this year were pitiful and we only got about a tenth of what we did last year. I am wondering if it is this new Greencrop variety that I planted; next year I think I will go back to the Blue Lake varieties that yielded very well last year. Some of the cucumber plants are beginning to yellow. The only plants left in the garden that are still growing are the cucumbers, basil, and peppers. Parsley is still growing but I am not counting it; it mostly was a waste to plant since we don’t have much use for it.
Moving onto the bathroom update. What a huge difference a week makes!
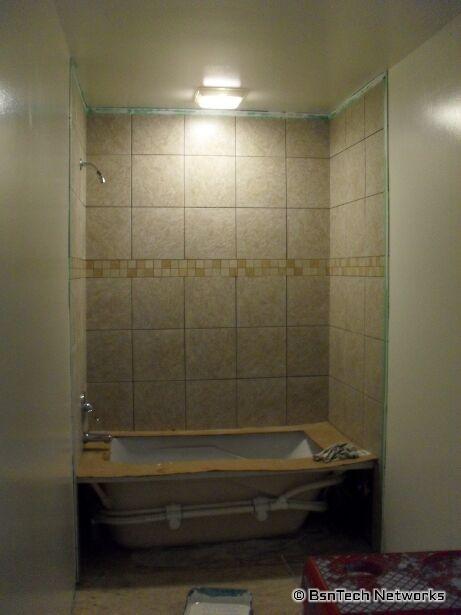
Over the past week, we have been working to put the tile around the bathtub. Well, after some calculations, it was discovered that there would only be three inches of space left around the top of the tile after the last full piece of tile was put in place. Instead of having a 12-inch tile cut down to just a 3-inch wide piece all the way around the top, we opted to get some accent tiles and put at the half-way point around the tub. Our trusty Menards store didn’t have much of anything good in the way of accent tile that matched what we needed. So we went to Lowe’s and they had a few that we liked. The tiles we bought were 2×2 inch tiles that were in a mat of a square foot. So this allowed me to make two cuts in the mesh backing that held the tiles together to make three strips of 4 inch by 12 inch tiles.
The accent tiles turned out exceptionally well. It did cost us an extra $26 just for this 4 inch strip around the tub, but I think it was a $26 well spent.
We were up late Wednesday and Thursday night until after 11 pm putting all the tile in and completed it that Thursday night.
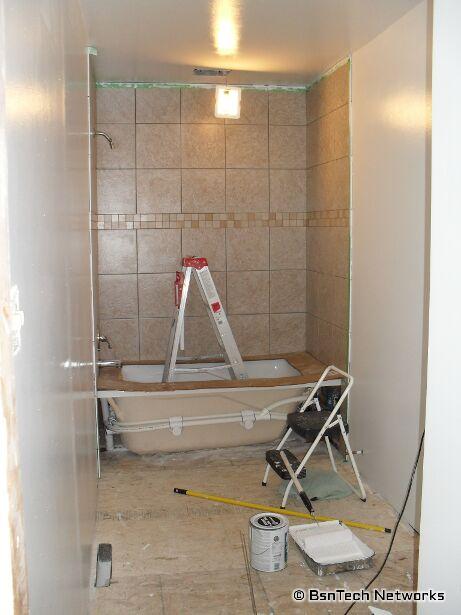
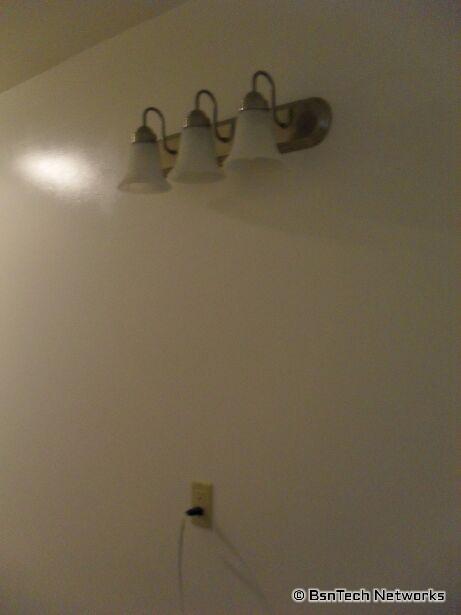
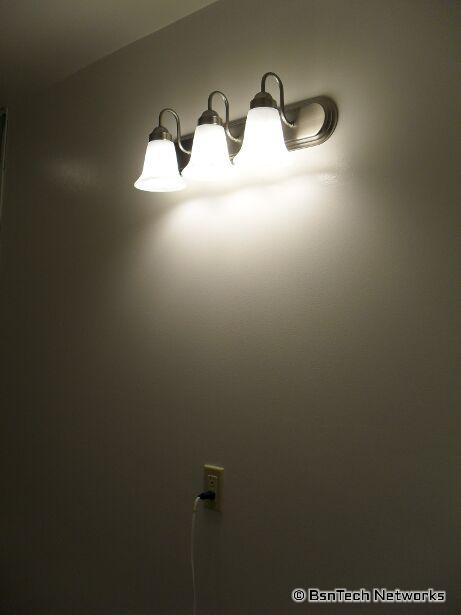
Friday it was time to get the walls all primed up! Our intentions were to have the walls primed and painted on Friday, but that didn’t quite happen. One coat of primer was put on the walls – and the walls just absorbed the paint in! It took exactly one gallon of primer to do the walls and ceiling – but there was a lot of green still showing through. We used some Zinser primer that had mold and mildew block in it – wanted to get stuff that would last a long time. So Friday evening I had to get another gallon of primer – and we put two more coats of primer on the wall. The first coat took a gallon since it absorbed into the wall but each additional coat took less; about 2/3 of a gallon for the second coat and only 1/3 of a gallon for the third coat. Now the walls were fully white and all of the green from the drywall was gone.
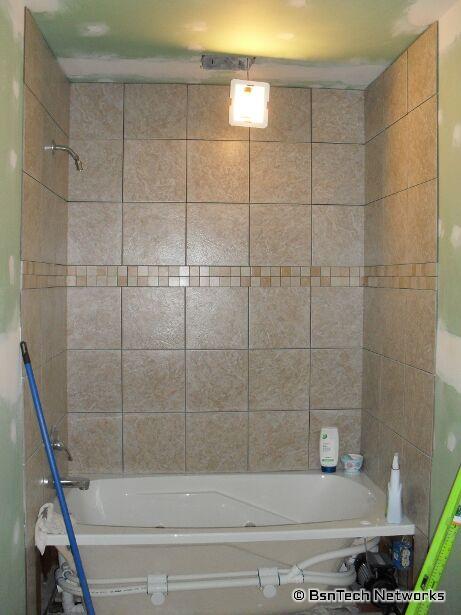
Saturday we put on the paint. We used a color called Country White. It is just a little darker than white. Again, I opted to get a good paint to ensure we wouldn’t have any painting problems. The first coat took about a half gallon. I waited a couple of hours and put the second coat on. It probably didn’t need a second coat but I had quite a lot of paint left – so I figured it was better to use it than let it go bad.
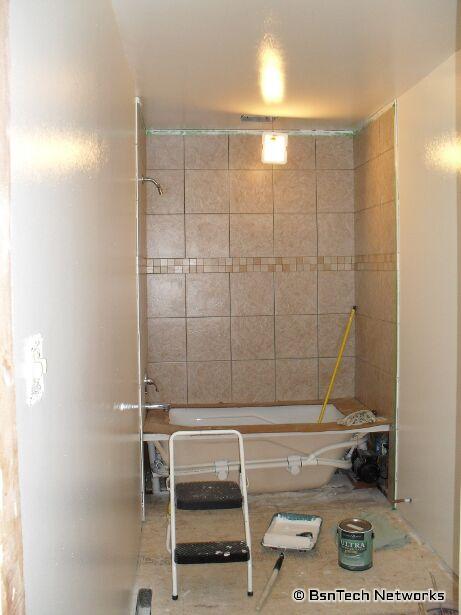
The paint has a nice shine to it since it is semi-gloss. It doesn’t look too different in the picture below compared to the picture above where the primer was added.
After the walls were painted, it was time to get the new light fixture hung up that will go over the mirror and vanity. I also got the light over the tub put back together so it wasn’t hanging down and put the face plates on the electrical outlet and switches.
Wow – so that is the tile around the tub, the painting, and lighting done in a week!
What’s next? Well, stuff we just did yesterday (Sunday). We got much farther than I expected. Dad first started doing the grouting around the tub tile while I was cutting the concrete backer board for the floor and screwing it in. Tiles were then laid down to see how we needed to cut them.
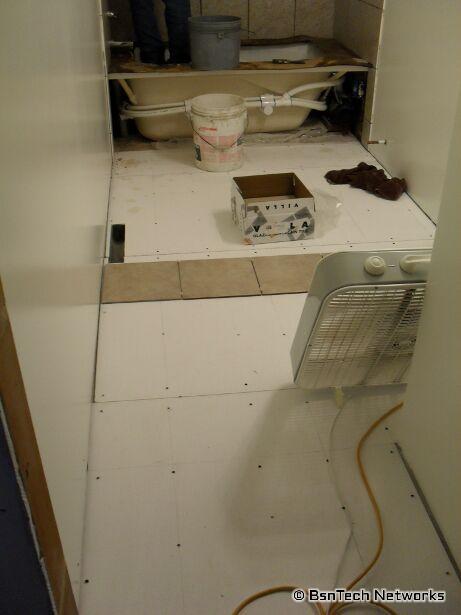
The tiles were absolutely perfect. The tiles were 11.5 inches square and the bathroom width was one inch less than five feet – because of the half-inch drywall on either wall. When we laid the tile down for a quick check, exactly five tiles wide is what we needed with the 3/16-inch spacers between the tiles. We got a lucky break.
It was then time to lay the tile. We first started out by putting all the full tiles in place – then we cut the ones around the air vent, the wall corner, and around the toilet. It was about 8 pm by the time it was done.
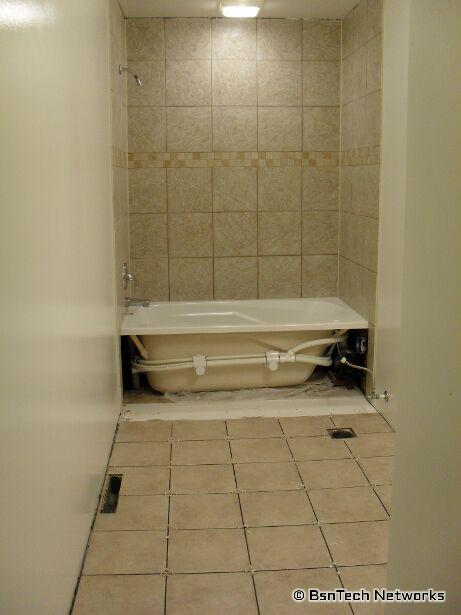
And there it is – the tile on the floor, the tile on the wall, the grout done on the wall, the plumbing all done.
What is left to do? Well, I still need to make the support for the side of the tub so it hides all of the ugly stuff. After the wall is put in, I will have one more row of tile to lay on the floor. Then the flooring can have the grout done. After that, it will be moving in the vanity, cabinet, and toilet. The door will then go up and the towel racks – and the bathroom will be complete!