Wow, here it is the first of December and the garden is dead. However, I am still finding out that I'm blogging just as much as I did during the gardening season! I blame it on all of the extra projects that is keeping me busy. Between the project that I'm currently working on on the side of the garage and the making of the wine, there are a few things to write about.
This weekend I opted to get the 55 gallon drums out of the garage and get them tested. One of the drums had a hole that was larger than 2" in the top – so my PVC fittings would not work with this drum. Therefore, that one was used for the compost tumbler.
The other two were put to use. I got all of the 2" PVC fittings fitted into the 2" hole on each of the two drums. I then purchased eight foundation blocks at the local home improvement store so they could be raised 16" in the air – 8" was needed as a minimum since the PVC pipe runs under the barrels.
The setup went fairly quickly and I got them setup next to a downspout by the back patio. Although it is cold and now is into the freezing weather, they didn't get anything from the downspouts.
I got the top hole cut out of the main barrel that will take a downspout and then drilled a small 1/8" hole in the other blue barrel so that as the water comes in the white barrel, the air pressure will be released from the blue barrel as the water equalizes out amongst the two.
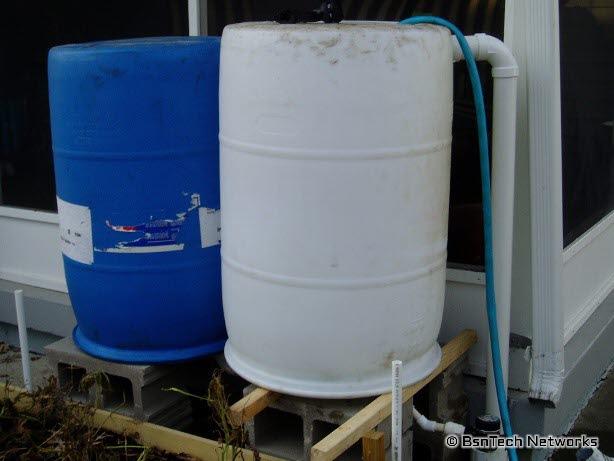
In the picture above, you can see the PVC pipe up near the top and then it goes straight down – this is the runoff pipe that drains out when the barrels are full. In addition, underneath you can see a small 1/2" PVC pipe connected to a black-looking thing – which is a water timer. The water timer won't work for the rain barrels (unfortunately) because there just isn't enough pressure to get out of the timer. it is just a very slow trickle of water.
You can see that both barrels are propped up on four blocks each – and the white barrel has some additional 2×2 boards underneath. This was done to so that the other barrel will be almost completely full before water begins to run out of the runoff pipe – so it was elevated an additional 2" for that purpose.
I then just had a standard garden hose going in to the top of the white rain barrel – this was done to test the barrels by filling them up.
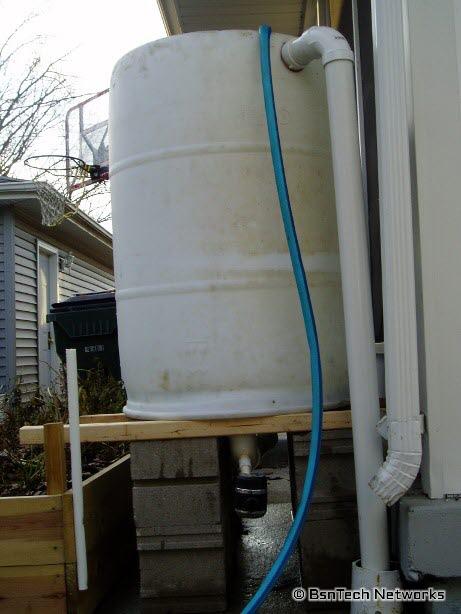
Here is a side-view of the rain barrel setup. Again, you can see the black-looking thing between the blocks (again, the water timer). Although it is hard to see, the 1/2" pipe is going into a 2" PVC elbow that is under the barrel. I had to actually drill a 1/2" hole into the 90-degree elbow, then use a male-threaded 1/2" PVC connector to screw into the hole. I then had to use a lot of PVC cement to ensure that it was very water-tight (hey, they don't make a 2" to 1/2" PVC converter so I had to make one myself!). That 90-degree elbow then connects to a 2" PVC pipe that goes straight back to connect to the other rain barrel – very hard to see but you can sorta see the outline of the pipe underneath.
Well, notice how wet it is under the barrels? Yep, I had quite a few leaks to work out. There are two 2" bung holes on each barrel. One of them on each is used to connect the PVC pipes between the barrels. But, the other one just has a cap over them. Unfortunately, they were not tight enough and were leaking, so I had to drain the barrels, take the system apart, and then really tighten the caps down quite well. I turned the barrels back over, put everything back together, and poof, no more leaks around those two holes!
Oh no – still more leaks! Now there were leaks where the two 90-degree elbows connect the pipe to each barrel. Afterall, that 2" pipe has all the force of 110 gallons of water on them. So, I took the system apart again and used some PVC cement on one of the 90-degree elbow connectors. Unfortunately, I can't use cement on both – otherwise I won't be able to get the barrels apart.
So, there still is the leak in the one 90-degree elbow connector to the horizontal 2" PVC pipe that connects the two barrels together. Once I get a more permanent setup going, I'll be able to cement all of the pipes together – which will take care of all of the leaks.
Right now the barrel system was just setup with two barrels – but I will have a four-barrel system to hold 220 gallons of water when the rain barrel system is all setup and completed. But, I only have two barrels available at this time. The guy I'm getting the barrels from says he will get me three more – two in order to make the four rain-barrel system and one more for another compost tumbler.
Even with the two-barrel system, here is the pressure that it pushes through my 1/2" PVC irrigation system. Again, I have 1/16" holes every six inches along this 20-foot section of irrigation.
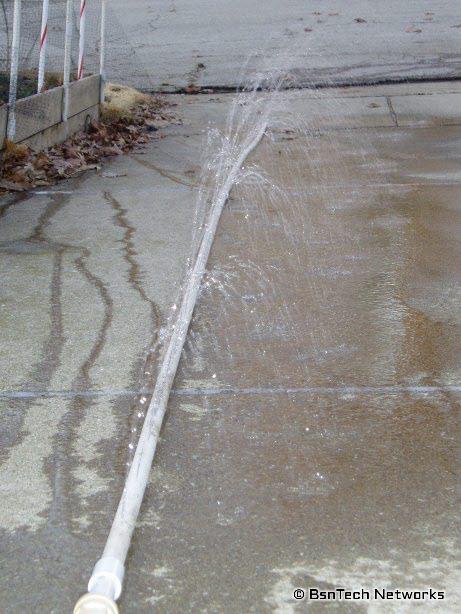
The barrels are about 4 feeet above the lowest point of this irrigation pipe (lowest point is at the end of the driveway – or the top of the photo). The barrels are then about 1.5 feet above the pipe at the top of the photo (since the driveway slopes downward). This is why the water is shooting out higher towards the end of the driveway then the top.
Overall, I think the rain barrel idea was a pretty big success – although there is one leak that needs taken care of. Again, that will be fixed when the permanent solution is created.
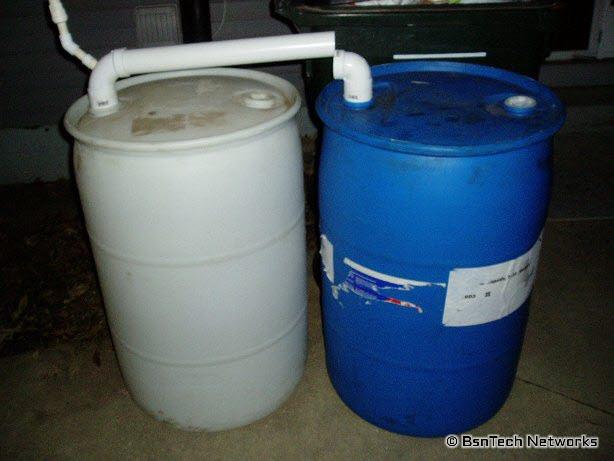
Lastly, a picture taken after the barrels were taken down and the water removed. You can see here the 2" PVC pipe connected. This is what runs under the barrels – but they are flipped upside down so the pipe isn't harmed.