If you would like to have your e-mail on your Android-based device, you’ve come to the right place. Below are the instructions for setting up the e-mail account.
Step 1 – Go into your phone and open the Mail app.
Step 2 – If you already have an e-mail account setup on your phone, tap the Menu icon and then choose Accounts (it may also say “More” if Accounts isn’t listed). Then tap the Menu icon again and choose Add Account.
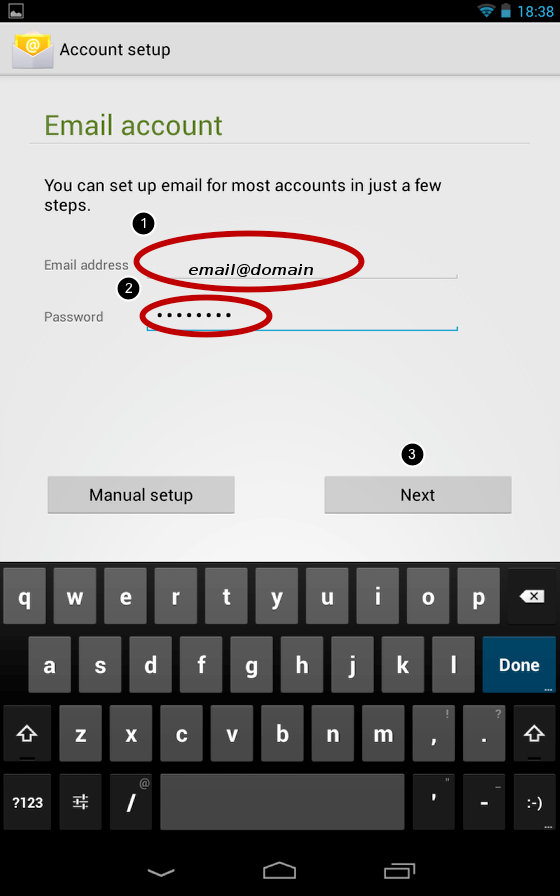
Step 3 – The next step varies based on the version of Android you are running. It may immediately ask what kind of account. If it does, choose “Personal (IMAP/POP). Otherwise, you will get the screen below where you are prompted for an e-mail address and password. Enter your entire e-mail address along with the password that was assigned. Then hit “Manual Setup” (if that option is available). If not, tap on Next.
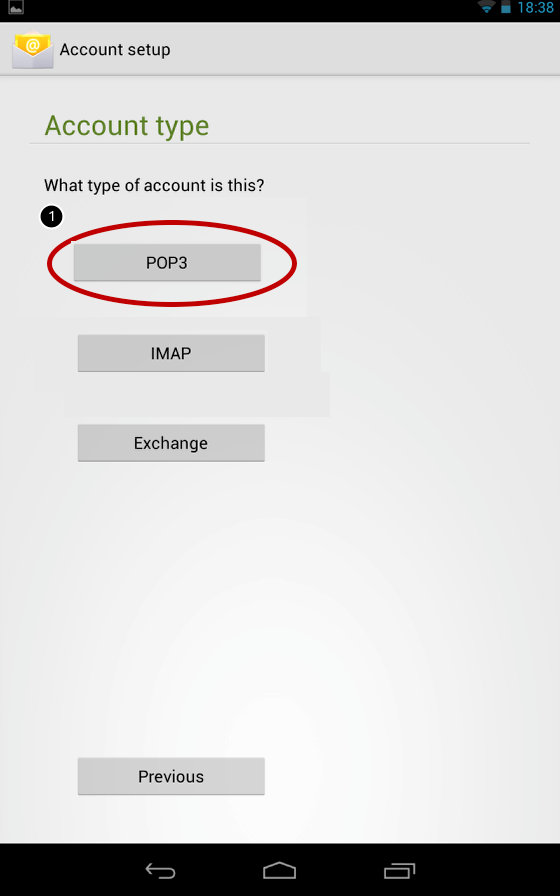
Step 4 – You should then be asked what type of account this is for. Choose either IMAP or “POP” (or it might say “POP3”) and then hit Next.
IMPORTANT: If you choose IMAP, all of your email will be stored on the server until you delete it. If you have a basic email account and not an upgraded account, the mailbox will fill up quickly and prevent new messages from coming in until you are under your mailbox limit.
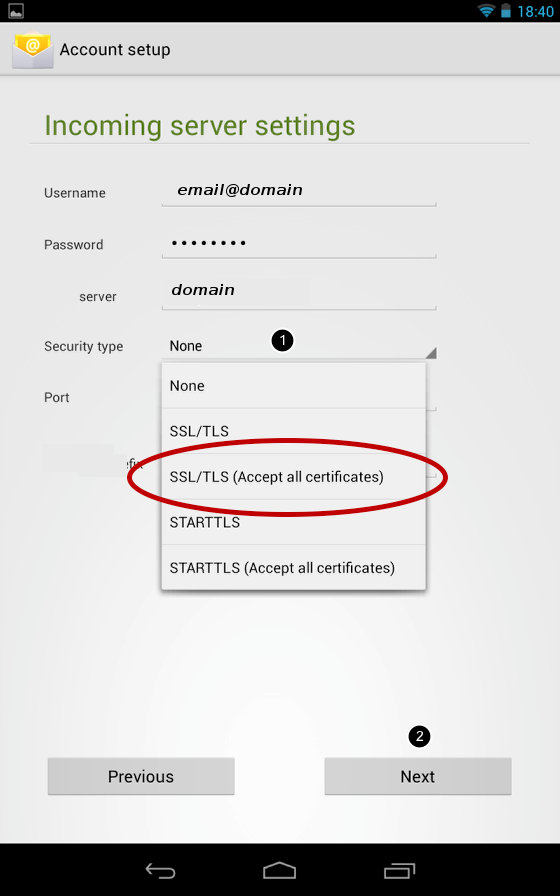
Step 5 – Enter your username. This is your full e-mail address. Then enter your password. Here are the other settings you need:
Incoming Mail Server: mirror1.bsntech.com
If you chose POP in the prior step, the Incoming Port: 995
If you chose IMAP in the prior step, the Incoming Port: 993
Security type: SSL/TLS (Accept All Certificates)
Delete E-mail From Server: (your choice. If you don’t have any other means for checking your e-mail, then ensure you set this to Always).
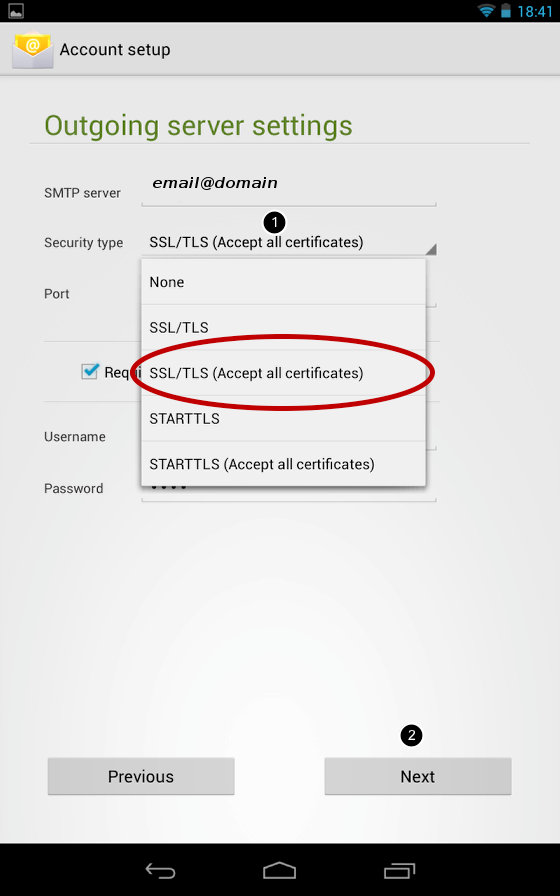
Step 6 – You are then asked for Outgoing mail servers:
SMTP Server: mirror1.bsntech.com
Port: 587
Security Type: STARTTLS (Accept all certificates)
Require Sign-in should be CHECKED
Username: Your full e-mail address
Password: The password for your e-mail account
Step 7 – Update your e-mail checking frequency to how often you’d like to check for new e-mails. 15 Minutes is the default.
Step 8 – Choose whether or not you want to send e-mail by the account by default and select that option if desired.
Step 9 – Choose whether or not you want to get a notification on your device when new messages arrive. Then hit Next.

Step 10 – Finally, give a name to your e-mail account and the “Display Name” that you want to display when you e-mail someone from the account.
You are all done!