Wow – there certainly was a lot going on these past two days.
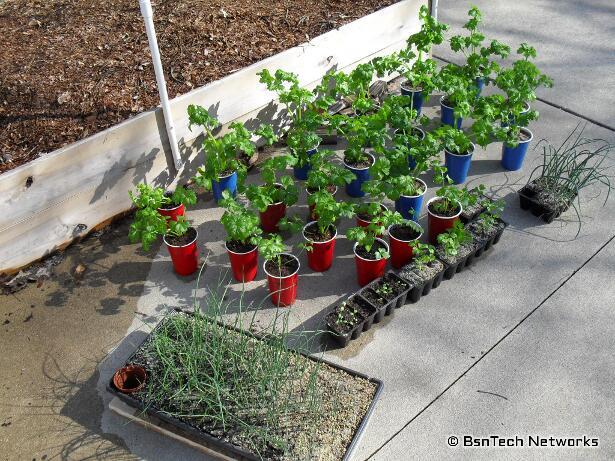
For starters – I took out all of the plants yesterday to get put in the sun. It wasn’t very windy and it was about 50 degrees outside. Perfect for getting the fluorescent lights turned off and to allow the plants to get some real sunlight for a change.
I only took out the onions, celery, and lettuce. The broccoli, cauliflower, and tomatoes are still way too small to put outside. Unfortunately, I also found out it was too soon to put the lettuce outside as well because they got a bit of “wind burn” as they call it.
Closer view of the onions:
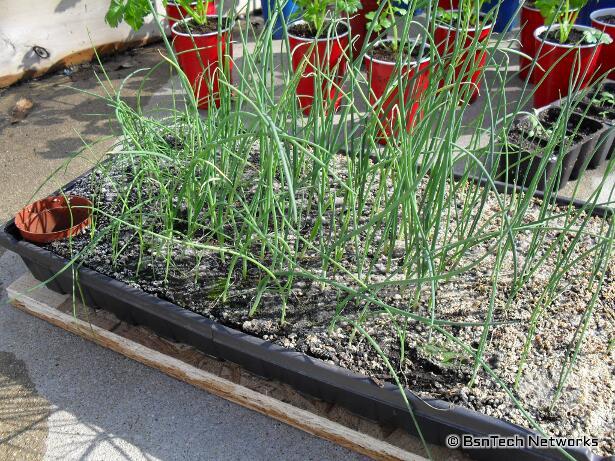
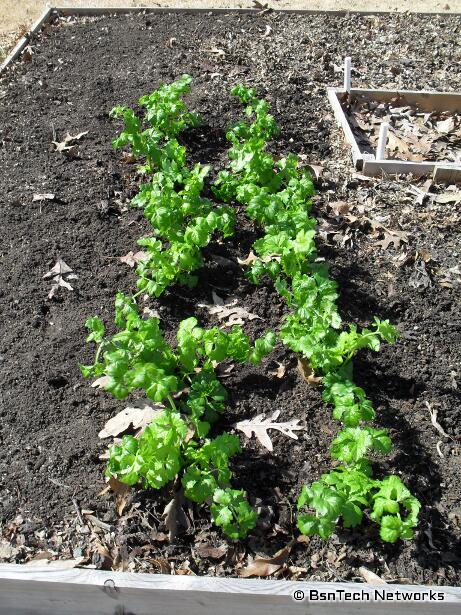
This batch of onions were started back in December. They are still growing strong! And.. I actually planted these out to the front garden today (Saturday). More on that in a bit.
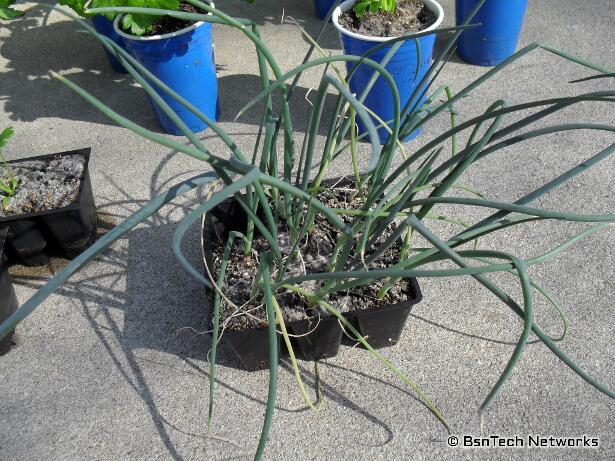
And a closer view of the Ventura celery that was started back in December. They are doing very well – and these were also transplanted to the front garden today (more on that later as well).
And lastly – the little lettuce getting some sun.
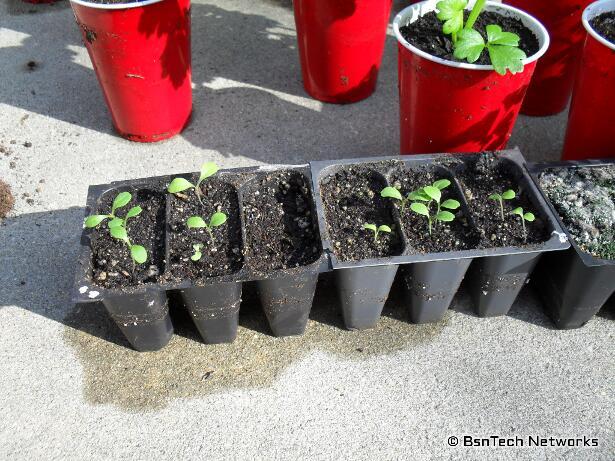
This year I am trying two new varieties of lettuce. They are on the left side of the picture. The lettuce in the first cell (three of them) is Parris Island Cos Romaine Lettuce. The next cell is New Red Fire Leaf Lettuce. The next cell was left blank (since I only have five varieties, not six). Next to that, there is one tiny Simpson Elite lettuce. This seed is now in it’s third year and still sprouting – although only one of four came up. Next to that is Buttercrunch and lastly on the very right is Red Salad Bowl.
Amazingly enough, all four Buttercrunch came up (year-old seed). Three Parris Island, three New Red Fire Leaf Lettuce, one Simpson Elite, and two Red Salad Bowl.
Alright – moving on to Saturday’s activities.
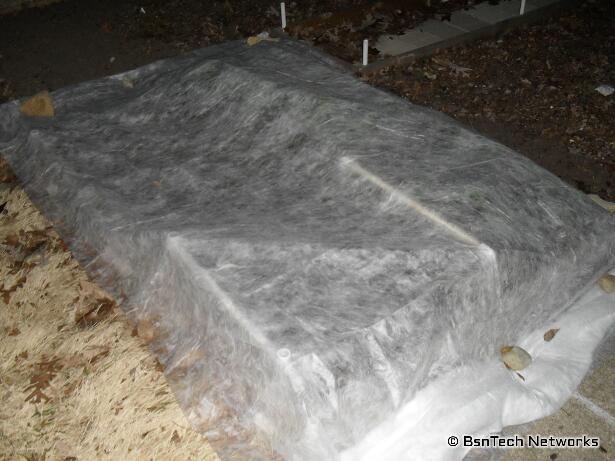
I called all over our town to the gardening centers. I needed a floating row cover! None of the big-box shops had it, some of the garden centers haven’t opened for the season, and alas – one place had some! Maske’s Organic Gardening – just a jog up the road from us – had some! I went over there and picked up a 25-foot by 5-foot floating row cover for only $10. I gave him $11 after tax and had him keep the change. Amazing – only one place in this city had these in stock.

Why did I need this? Well, I certainly have enough clear plastic that I could have used – but the problem with clear plastic is (1) it will not allow moisture through and (2) it will heat up the covered area exceptionally fast. That is where a floating row cover comes into play. This is a very thin, lightly-spun fabric that you place over your plants. It is so light that you don’t even need to provide support for it; the plants will hold it up just fine. Floating row covers will let moisture in (but also help to keep it in as well) and allows for about 90% sunlight penetration while protecting plants from freezing temperatures. According to the information on the back of the front cover, it said that the cover should be removed it temperatures above 85 degrees occur. Well, certainly by that point, I won’t need to have the cover!
The instructions also said that one layer of this floating row cover would protect plants down to about 28 degrees – so about four degrees colder than freezing. It indicated that if you layer it twice, it would then protect to about 24 degrees. Amazing how it can do that! But, the idea behind it is to trap the soil temperature into the area.
So, after picking this up, I went out and planted the Ventura celery into the front garden. They are planted ten inches apart with 12 inches between the rows. These plants were already root-bound in their 16-ounce cups – but they have been growing for just under three months!
Later on in the day, I then decided to plant the Copra onions that were started back in December as well. Out of the 18 that came up and grew, 14 of them survived and were therefore planted in the garden. They were all spaced six inches apart with six inches between the rows. I didn’t take a picture of this unfortunately.
But, at night – I then went out and put the floating row cover over the plants. For the onions – I didn’t trust that they could hold up the cover – so I sunk some PVC pipe into the soil to help provide support. I then made a double-layer over the area (supposed to only get to 29 degrees tonight, but I don’t trust the weathermen).
I used some rocks around the perimeter to hold it in place – and done! By doing so, I basically have just extended my growing season by a good month – if not more! Now, just as long as the temperatures don’t fall below 24 degrees for the year.
Now – let’s talk about the next project – the compost tea project.
I’ve already been brewing compost tea and started last season. I have a large 55-gallon drum (the white one in the picture below) that is filled with food scraps, grass clippings, and leaves. I then put water into this barrel. At the bottom, there is a spigot. Last year, I had to sit there for a very long time to get enough compost tea out for my needs (since all the dead plant material makes it trickle very slowly).
The end of last year – I got an even better idea. So, I went to get another two 55-gallon drums. These are “reserve” tanks. So I got some treated 2×4’s today and got those put in place – then put the three barrels on top of them – then ran some PVC pipe between all of them.
The idea is this – when all 12 of the rain barrels fill up, I have a large 2″ ball valve that separates nine barrels from three – just above the compost tea stuff. I’ll close the valve – then open a smaller 1/2-inch ball valve that will then trickle water from those three barrels – into the white 55 gallon barrel just below.
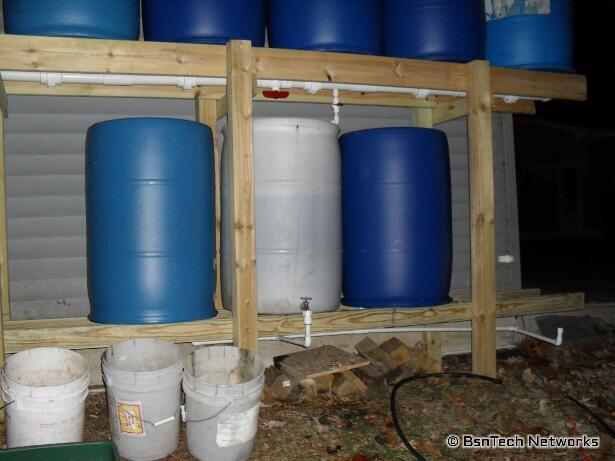
You can see the large read ball valve just above the white barrel. That is the 2-inch valve Then between the white barrel and blue, you see a vertical PVC pipe – which has the 1/2-inch ball valve. Once it is turned, the water goes into the white barrel just below.
Follow me so far? Hopefully so! As the water from the three rain barrels above trickle the water into the white barrel, the spigot on the white barrel (at the bottom) is open. As the water makes it through all the plant material, it will go through the spigot – and begin filling the two blue barrels on either side. You’ll notice on the very right-hand side there is some PVC pipe sticking out near the bottom of the picture. This will connect to another trash can that I used last year (currently in the house as I’m using it for my seedlings). It will also be attached to the compost tea system. That way when the three rain barrels above are fully empty, there is more than enough capacity between the three barrels below – and the trash container that will be hooked up.
Now – I have a 1/5-horsepower pump that I’ll place in the trash container. I’ll then pump all of the tea out of the barrels and back up into the three rain barrels just above (of course – the 1/2-inch ball valve will be closed first). What is the point of this? Well, by doing this, I’ll automatically have a 1-part compost tea to 3-parts water in the rain barrel system! Since it is hooked to my PVC irrigation system that goes out to the garden, it will be instant fertilizer that is built into the system.
Alright – I know I’ve typed everyone’s eyes off here – but I’m quite excited about this project. Finally I will not have to sit and wait to fill up a watering jug to manually provide compost tea to plants. I just turn on the irrigation system – and it is all done automatically!
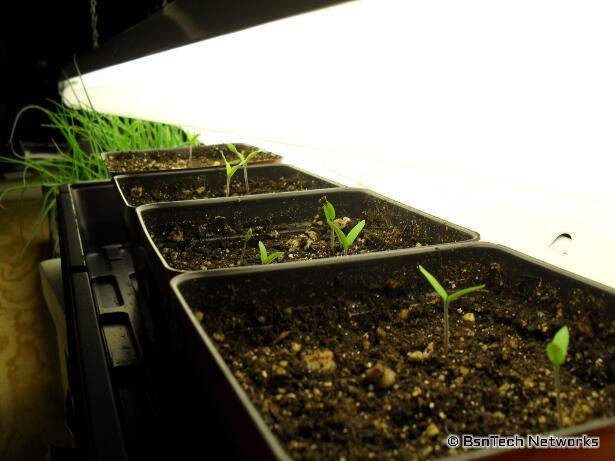
OK – done with those projects. Back inside, I took a few pictures of the cauliflower and tomatoes growing under the lights. Because the cauliflower and broccoli look exactly the same at this stage, there isn’t any point in showing pictures of both.
Snow Crown Cauliflower (or Green Goliath / Premium Crop Broccoli – they look the same at this stage):
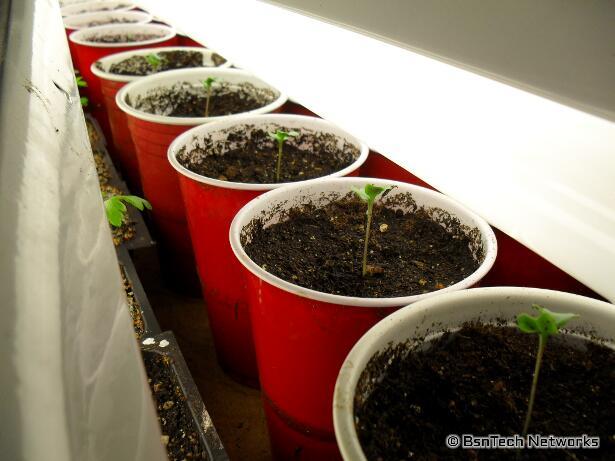
Tomatoes (again, they all look the same as well – but those that want to know – Red Cherry Tomatoes are in the first two containers in the front followed by two Roma Tomatoes and in the very back – a Best Boy tomato)
Unfortunately, I planted five Best Boy tomatoes and two have come up within eight days. Not what I expected. Certainly hope that I don’t need to plant more – because I allotted room in the garden for three Best Boy Tomatoes.
Same goes with the peppers as well – absolutely none of the four Anaheim Hot Peppers have sprouted – and none of the 16 California Wonder Peppers have sprouted. They are sitting in the heated green house and I would have expected them to germinate by now. I just tested the California Wonder seed in December and about 80% germinated.