These instructions will help you configure Mozilla Thunderbird with your e-mail account provided through BsnTech Networks – a free e-mail program.
Mozilla Thunderbird can be downloaded from http://www.mozilla.org/en-US/thunderbird/
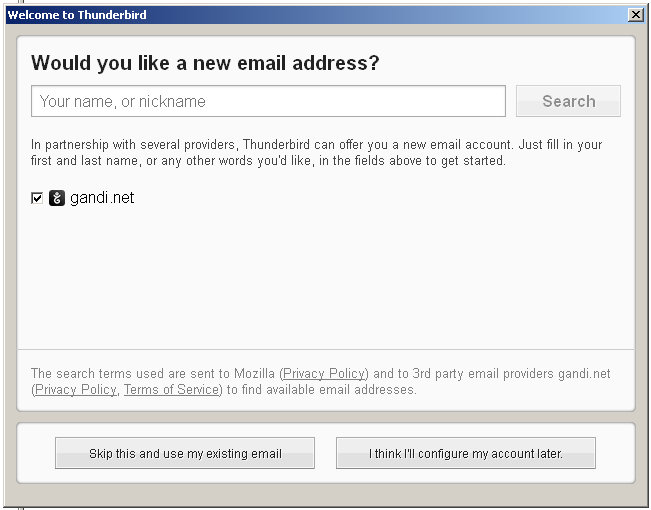
#1 – After installing Thunderbird, it will prompt you to setup a new account. Click the “Skip this and use my existing email”:
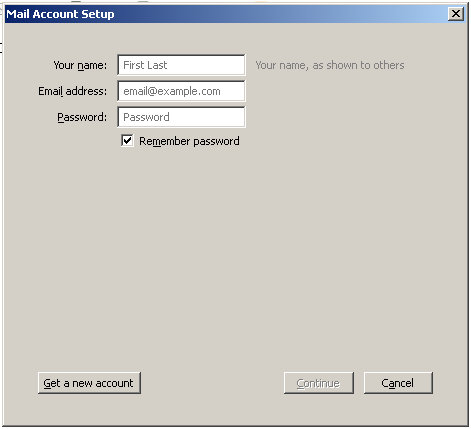
#2 – It will prompt for name, e-mail address, and password. Enter the information in. Then hit continue and then Manual config immediately afterwards.
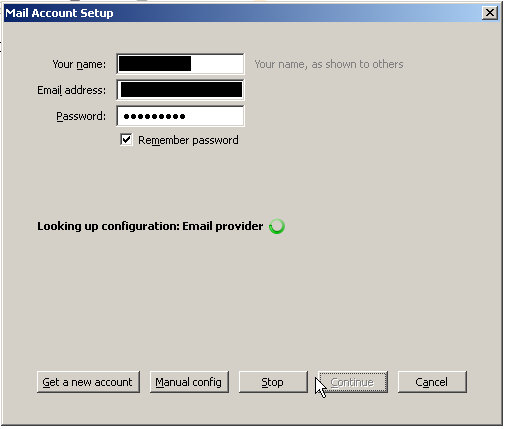
#3 – When you see Manual config (as shown below), ensure you click on it right away:
#4 – Enter the settings to manually configure Thunderbird. Many of these settings may pre-populate but double-check.
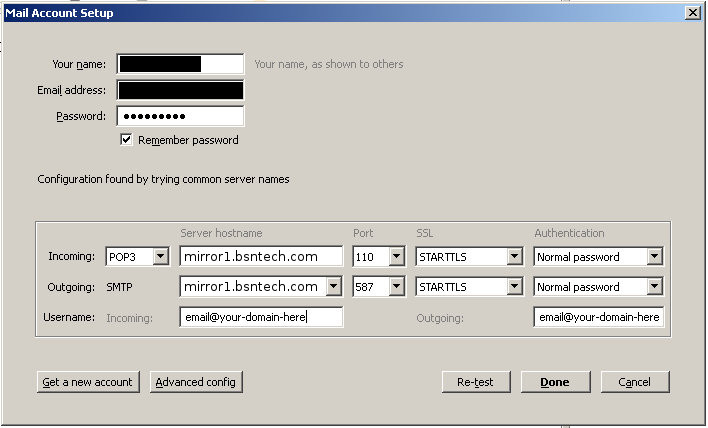
Incoming should be set to POP3 or IMAP.
IMPORTANT: If you choose IMAP, all of your email will be stored on the server until you delete it. If you have a basic email account and not an upgraded account, the mailbox will fill up quickly and prevent new messages from coming in until you are under your mailbox limit.
Server hostname is — mirror1.bsntech.com
POP port is 110 (if you chose POP3)
IMAP port is 143 (if you chose IMAP)
SSL is STARTTLS
Authentication is Normal Password
Outgoing is set to SMTP (cannot be changed). Server name is your domain name (where it says “your-domain-here”). Port is 587, SSL is STARTTLS, and Authentication is Normal Password
Username is your full e-mail address. This is important, it must be your full e-mail address.
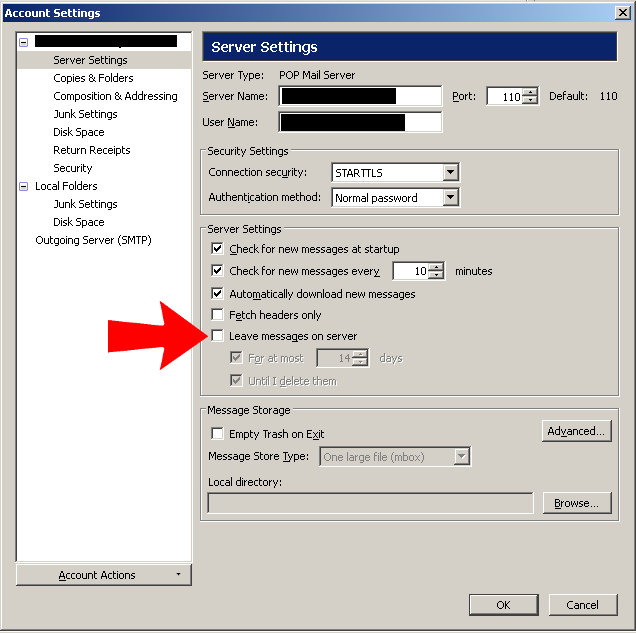
#5 – If you Chose POP mode, press the Advanced config button. It is recommended that you UNCHECK the “Leave messages on server” setting below. Otherwise, your mail account may fill up quickly and prevent you from receiving new e-mails: